
What is Developer Mode and How does it Work?
The Developer Mode, also known as Developer Options, is a feature available across all Android phones, regardless of the brand. You can find it within the 'settings' menu. However, this feature is not directly visible and requires a specific method to access it.
The Developer Mode is intended to aid developers in their work. Therefore, this feature is not readily visible in the phone's system settings until it is activated.
Developer Mode offers a variety of useful features, as it contains additional options not found in the default system settings. Before discussing how to enable and utilize Developer Mode, let's define what it is.
What is Developer Mode?

Developer Mode, also known as Developer Options, is one of the most important features on Android smartphones. It is mainly utilized by developers during the application development process.
This mode is used by developers to test and modify their applications, ensuring optimal performance across all Android devices.
Developer Mode's abundance of features makes it an intriguing feature. Nevertheless, caution must be exercised when using it, as certain features may have sensitive phone properties.
Misusing these features can result in malfunctions on your phone. In such cases, resetting your smartphone may be required. To prevent careless use, the Developer Mode feature is therefore hidden within the standard settings system.
How to Activate Developer Mode on Android Phone
Now that you have some knowledge of Developer Mode or Developer Options, you may be interested in its features. Activating this feature on your phone is thankfully simple. To clarify, please follow the steps outlined below:
- Launch the "Settings" application.
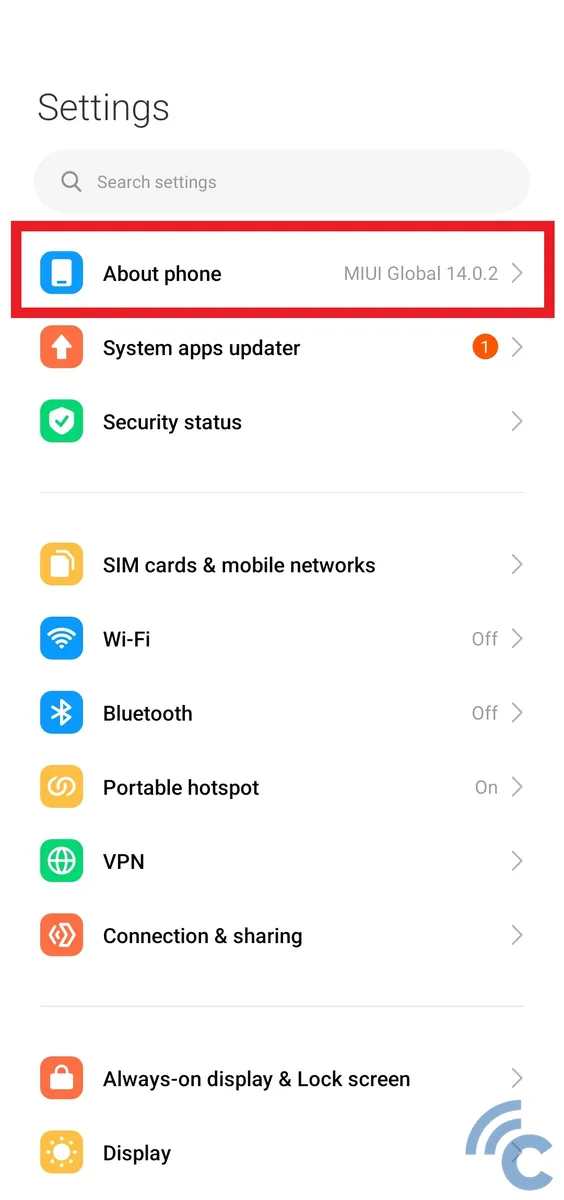
- Select the "About phone" menu located at the top.

- Here, please select the "Detailed info and specs" menu.

- Find the "MIUI version" menu option and press it approximately seven times continuously.
- Wait until "You are now a developer" or "No need, you are already a developer" appear, indicating that the Developer Options feature on your phone is already active.
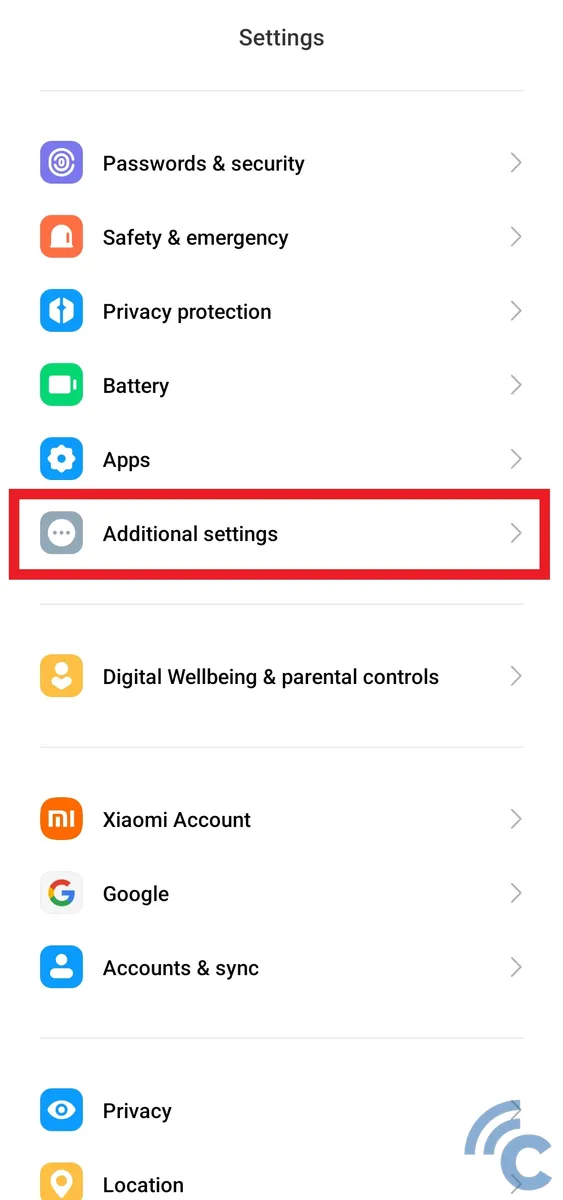
- Once active, please return to the "Settings" home page.
- Scroll down and select the "Additional settings" menu.
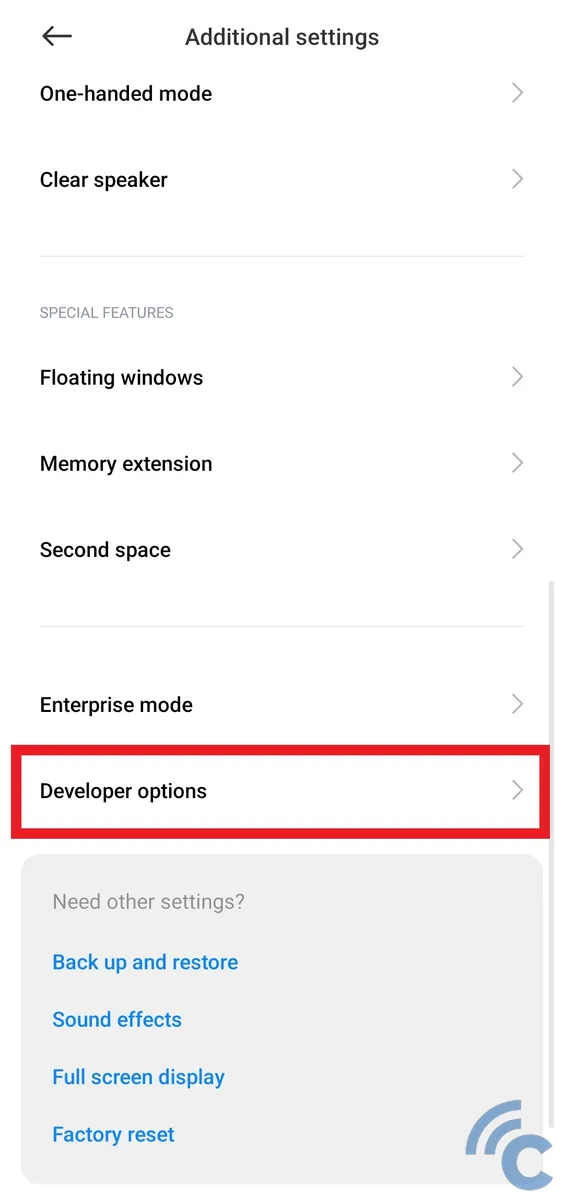
- To access Developer Mode, select "Developer Options" from the menu.
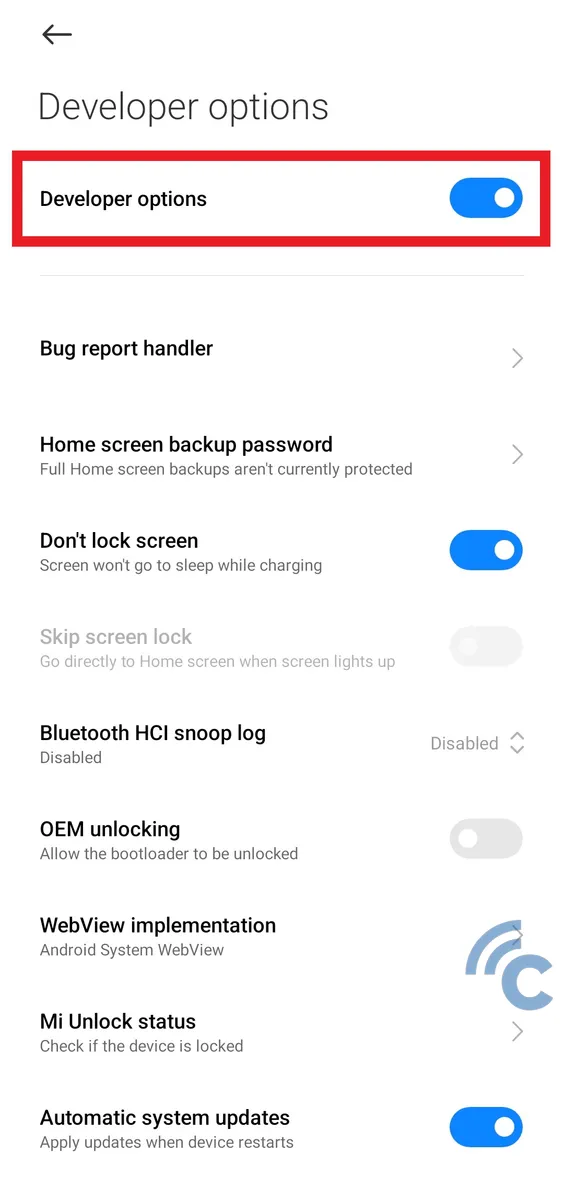
- After that, slide the toggle next to "Developer options" to activate it.
- Within Developer Mode, you will discover various fascinating features at your disposal, such as Bug reports, USB debugging, Graphic Driver Preferences, Bluetooth Audio Codec, and more.
Understanding the Functions and How Developer Mode Works
Developer Mode offers a variety of intriguing features, but misuse can be dangerous. Therefore, it is important to understand how the functions and features of Developer Mode work.
It is suggested to avoid making changes in Developer Mode if you are uncertain or inexperienced. Alternatively, you can take notes or save the default settings, which allows you to restore them easily if any errors occur.
Well, here are some functions or how the features in Developer Options work on Xiaomi phones. There are several sections that are divided into several columns with their respective titles. In order to avoid damage to your device, we will only explain some menus or features that are safe to use. To be clearer, please see this article until the end.
1. Developer Option Menu
After successfully activating this feature, there are several menu options that you can use. For example, the first section is just below the words "Developer options". Here are some menus or features that are safe to use.
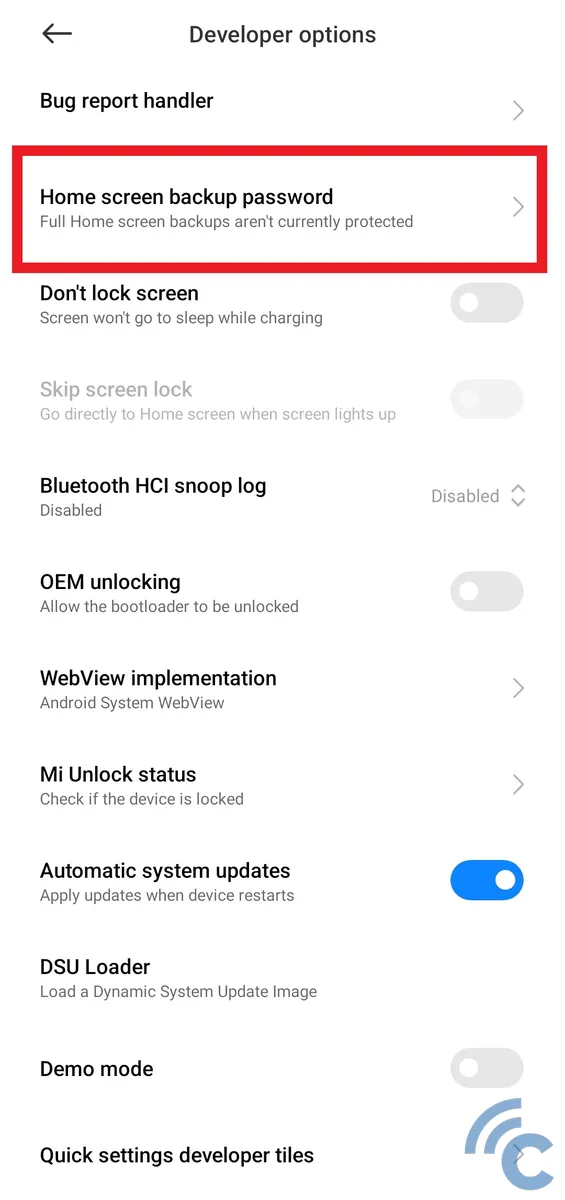
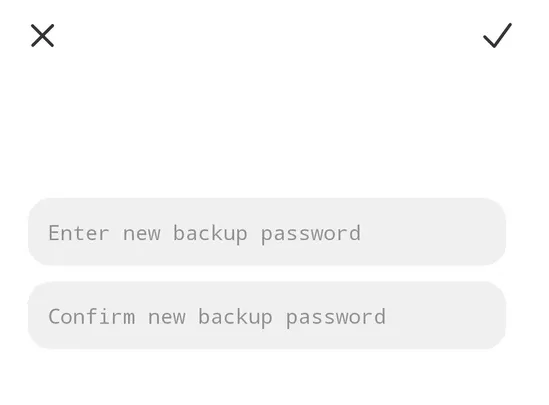
The first feature you can utilize is "Home Screen Backup Password". As suggested by its name, this feature enables you to create a backup, or a duplicate copy, of your mobile phone password.
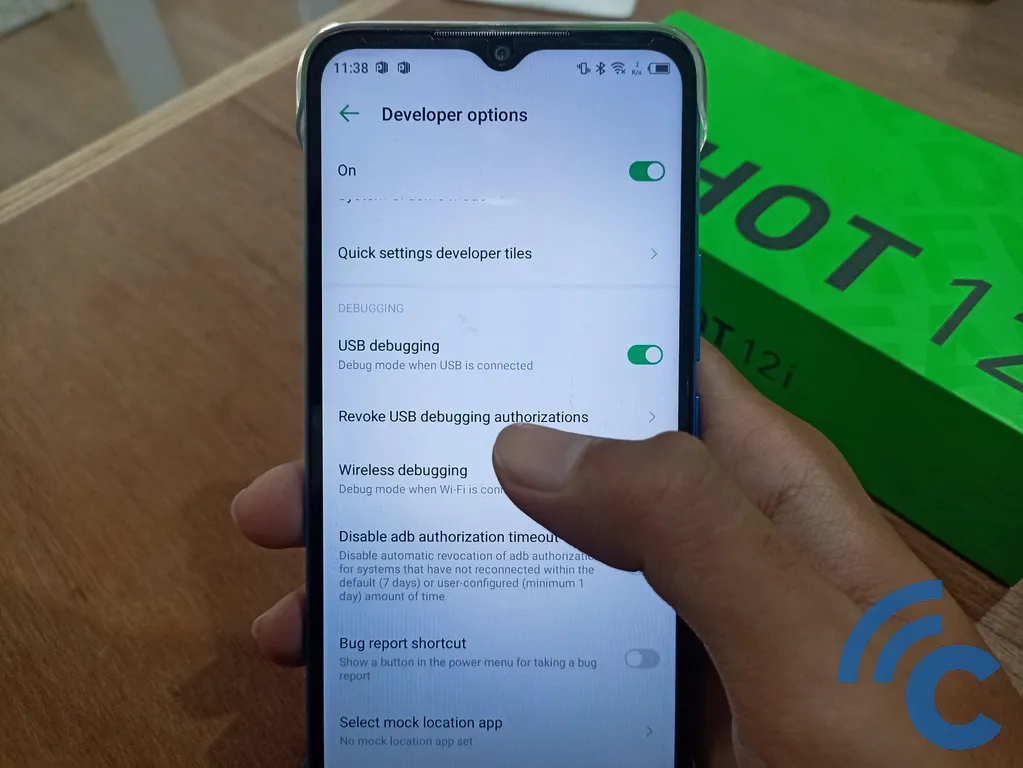
2. USB Debugging
USB debugging is a commonly used feature within Developer Mode. In simple terms, it enables you to connect your phone to a PC. With this feature enabled, you can perform tasks such as unlocking the bootloader (UBL).
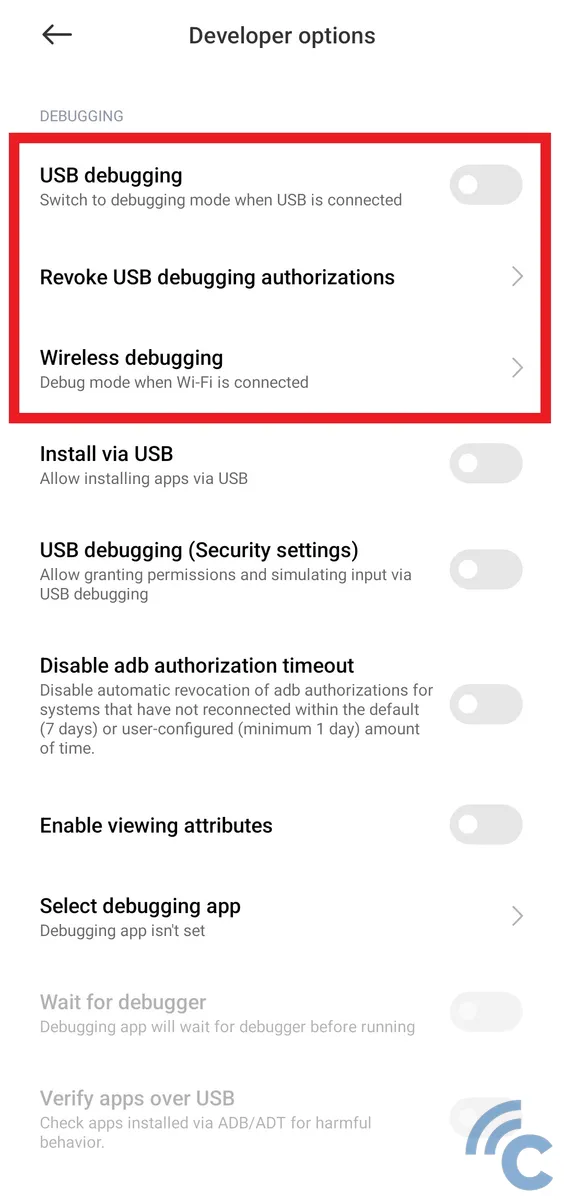
In addition, USB debugging is frequently used to transfer data between a mobile device and a computer. It enables you to copy files and even install applications without receiving notifications, granting you access to your phone's data records.

However, you still have to be careful when you want to use this feature as it is one of the most sensitive features and can only be used by developers or if they are familiar with it. You will also get a warning before you can actually use this feature.
However, if you are fully aware of how it works and the risks involved, you can still proceed. Check the statement first and then press the "OK" button.
Also, at the bottom is the "Revoke USB debugging authorizations" menu. You can use this menu to revoke all USB debugging access from all previously authorized or connected computers.
You can also set it to automatically revoke using the "Disable adb authorization timeout" menu. By enabling this feature, systems that are not connected for a period of 7 days will be automatically unplugged.
Besides using a USB cable, debugging is also possible without a cable. You can accomplish this by selecting "Wireless debugging" and connecting your phone and computer over Wi-Fi.
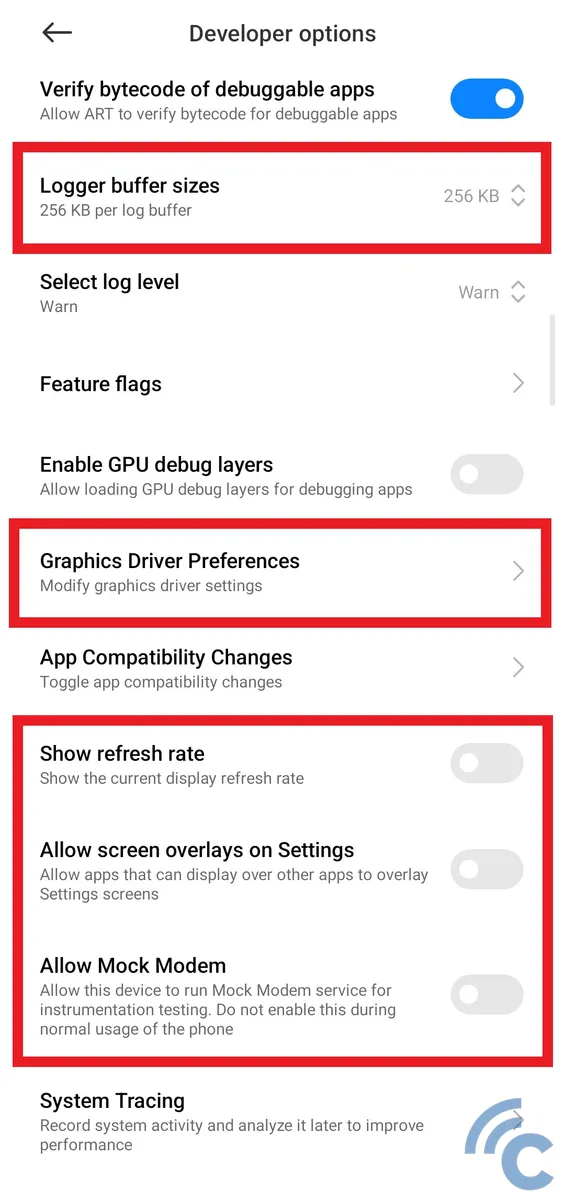
As explained earlier, debugging is the process of reading computer code against the phone. In the next menu, you can set the size of the logger buffer used in the "Logger buffer sizes" menu. You can change the size from 64 KB to 8 MB. You can also turn it off so that the debugging process does not take up too much of your memory capacity.
The "Graphics Driver Preferences" menu is one of the interesting features. One of the functions of this menu is to improve the graphics in certain applications, including games. After selecting the menu, search and select your application or game, then change the graphics driver with "System Graphics Driver".
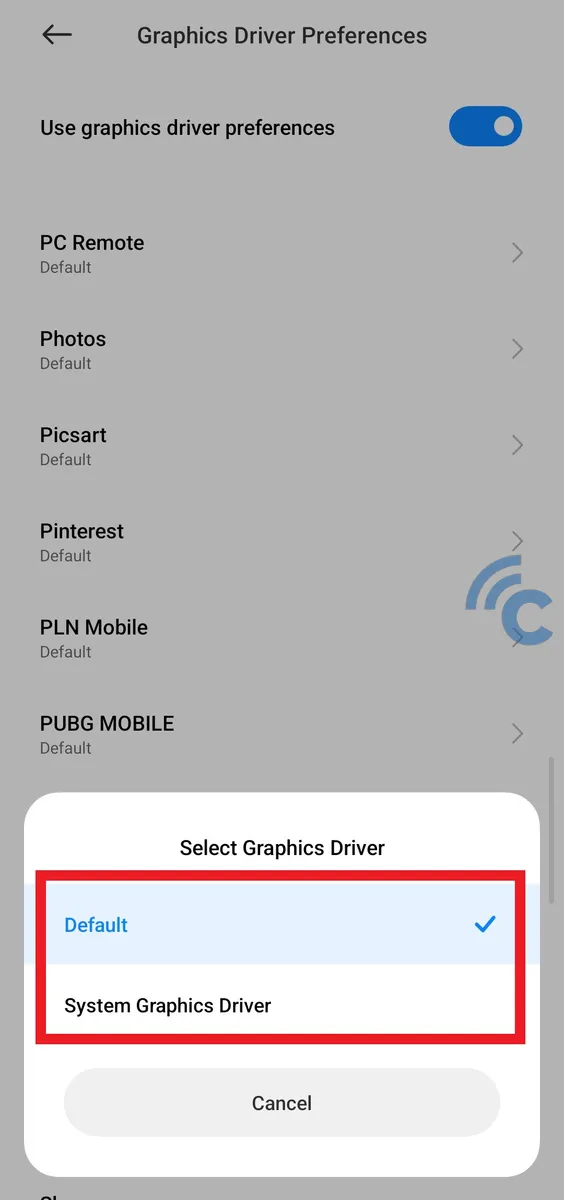
Unfortunately, this feature usually consumes more battery power. So, when you're done playing games, it's recommended that you change the driver back to "Default" so that the battery doesn't drain quickly.
At the bottom, there are several menu options that you can activate. Starting from "Show refresh rate" to see the refresh rate used according to the activity performed. Then "Allow screen overlays on Settings" to allow applications that can be displayed on top of other applications to open the settings screen.
And the last, "Allow Mock Modem" allows the device to run a mock modem for instrumentation testing. However, it is not recommended that you enable this feature if you are using your device or phone normally.
3. Networking
The next section in the developer options is Networking. The menus in this section have quite useful functions. Some of these menus or features allow you to set or configure settings on Wi-Fi or DHCP on your Xiaomi phone.
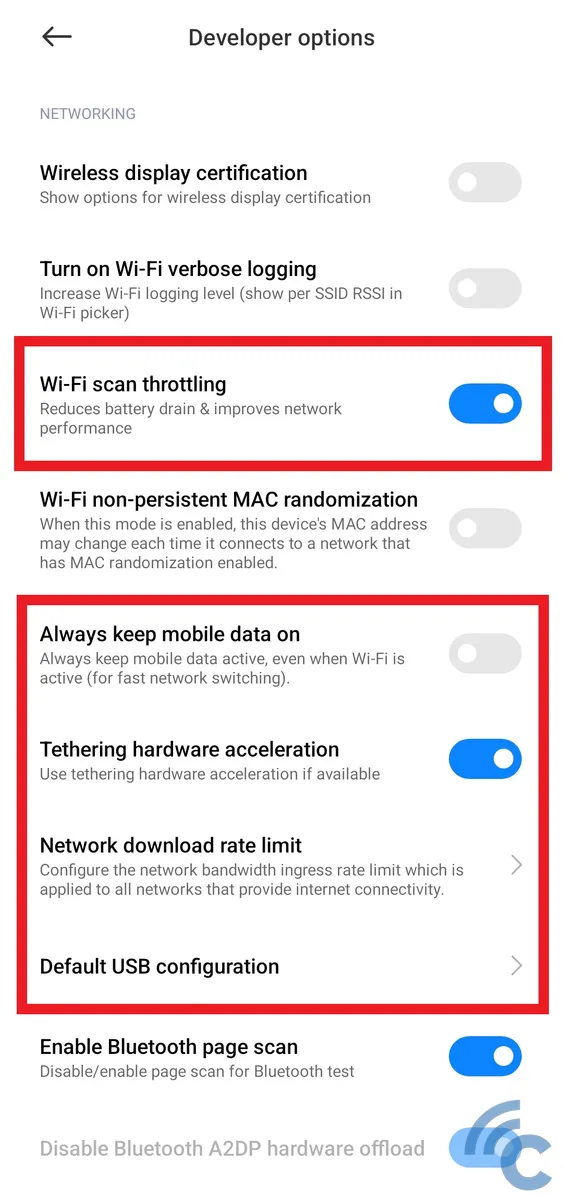
One of the available features you can exploit is "Wi-Fi Scan Throttling". This function enhances your device's capability to detect potential throttling risks, thereby reducing unnecessary battery consumption and simultaneously improving network performance.
Another feature you can use is "Always Keep Mobile Data On". This feature allows your device to keep cellular data enabled even while connected to Wi-Fi. It's particularly useful when gaming as it swiftly switches to mobile data should the Wi-Fi connection suddenly drop or fail.
Towards the bottom, there's also a "Tethering Hardware Acceleration" feature which helps optimize your device's performance. If available, this feature enables the use of hardware tethering acceleration. Additionally, you can manage your download speed through the "Network Download Rate Limit" feature.
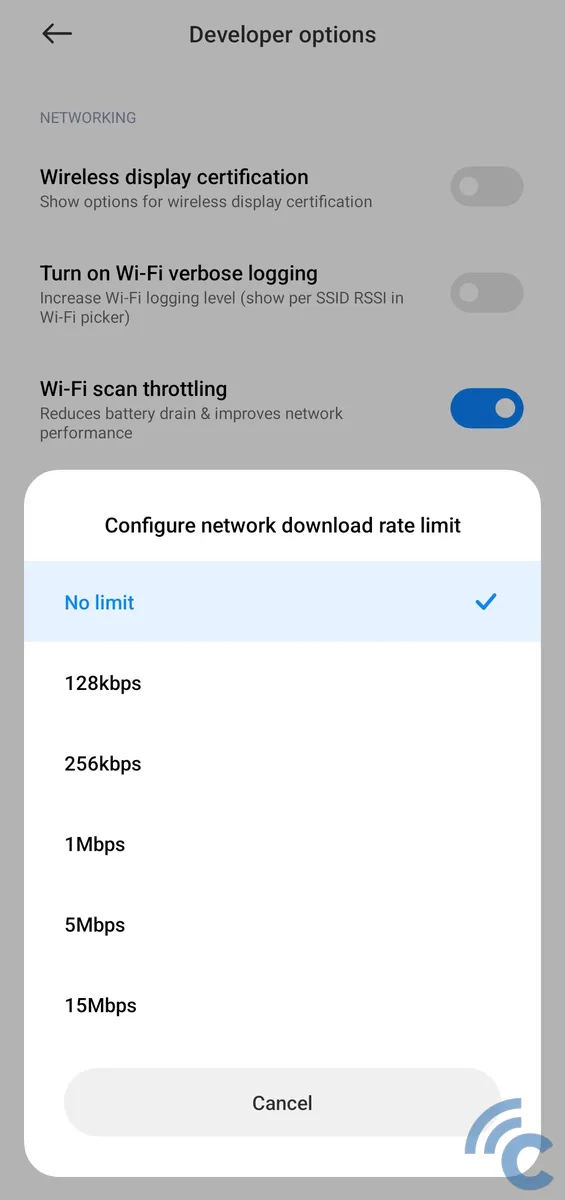
This menu is used to configure the network bandwidth access speed limit for those who provide an internet connection. You can keep it set at the "No limit" option so that there is no limit to the download speed.
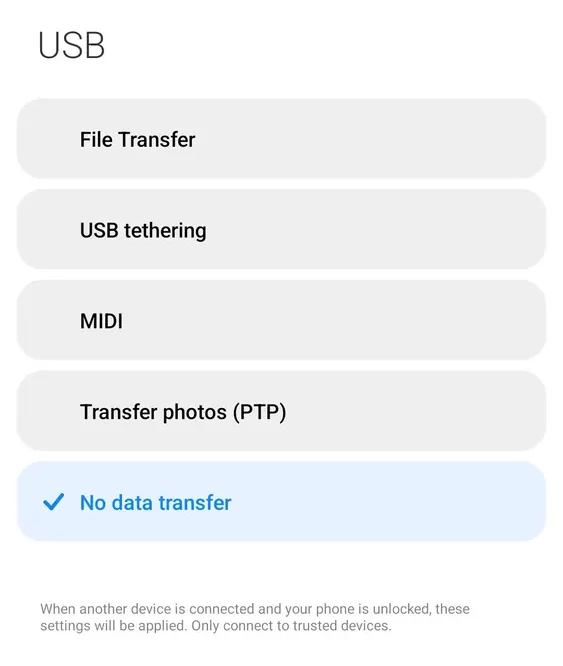
One menu that is often used is the "Default USB configuration". This menu allows the computer to identify your Xiaomi phone. For example for "No data transfer", "File Transfer", "USB tethering", "MIDI", or "Transfer photos (PTP)".
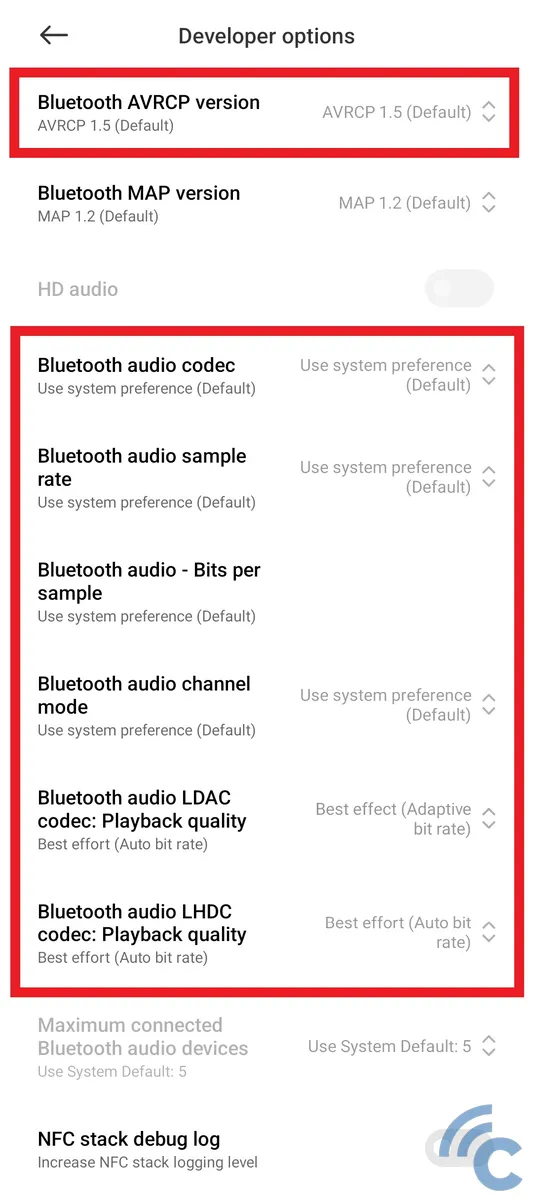
In addition, you can adjust set the "Bluetooth AVRCP Version" to set the profile version used. This version will dictate the control over Bluetooth A/V equipment accessible from your Xiaomi phone.
In the same section, you can optimize audio playback on your device using the "Bluetooth Audio Codec". For instance, you can switch it to SBC, AAC, aptX for high-quality wireless audio, aptX HD for high-resolution streaming, LDAC for superior quality wireless music, and so forth.
In addition, you can customize a number of other settings related to the Bluetooth audio being used. These include the "Bluetooth Audio Sample Rate", "Bluetooth Audio - Bits Per Sample", "Bluetooth Audio Channel Mode", "Bluetooth Audio LDAC Codec: Playback Quality", and "Bluetooth Audio LDHC Codec: Playback Quality".
It's important to note, though, that these settings are preset to a default mode. These defaults are generally considered to provide the best balance between quality and performance. Therefore, there's typically no need to adjust these settings unless you have specific requirements.
4. Input
The following section in the Developer Options is related to inputs. Many of the settings in this section are safe to manipulate and won't significantly affect your device. In fact, some of these features can be particularly useful for certain requirements.
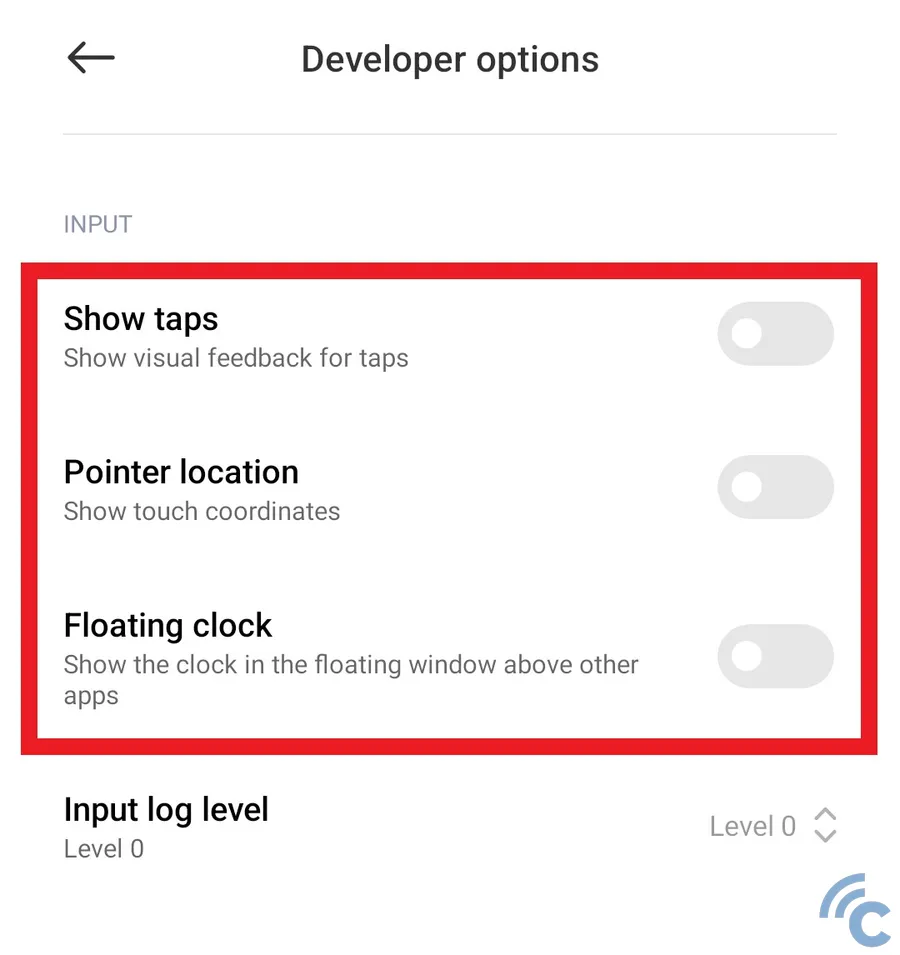
The first option you can explore is "Show Taps". When activated, this feature provides visual cues on the screen for every tap you make. This is especially useful when creating video tutorials involving screen recording, as the visual representation of taps helps guide your viewers through your actions.
Next, there's the "Pointer Location" feature. When enabled, this option provides not only visual feedback for each tap, but also displays a trace line complete with coordinates on your screen.
Finally, there's the "Floating Clock" option. As the name suggests, turning this feature on will display a movable clock on your screen. The intriguing part is that you can drag or shift the clock around to avoid obscuring other on-screen elements.
5. Drawing
The subsequent section provided by the Developer Options is no less interesting, particularly concerning screen displays and animations. While most of these settings are relatively safe to modify, it's essential to have a sufficient understanding before making changes.
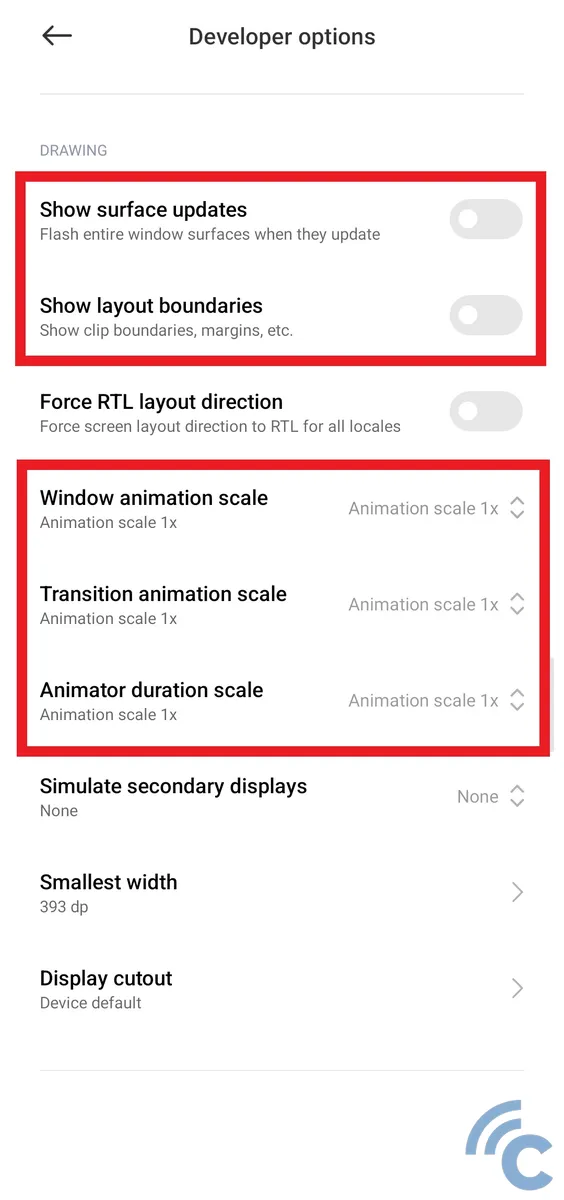
The first feature you can experiment with is "Show Surface Updates". When activated, a light or flash will appear on the screen surface whenever it's updated. While it might sound intriguing, caution is advised when using this feature, as the emitted light may be discomforting, especially for those sensitive to bright lights.
Additionally, there's a "Show Layout Boundaries" feature. When enabled, this option displays the raw layout of each screen element, including the boundaries, margins, and more for every icon or display.
In this drawing section, you can also adjust animation movements. The following are the options available in this menu.
- Window animation scale, an option to set the animation speed when opening a window.
- Transition animation scale, an option to set the transition speed of the animation.
- Animator duration scale, an option to set the duration of the displayed animation.
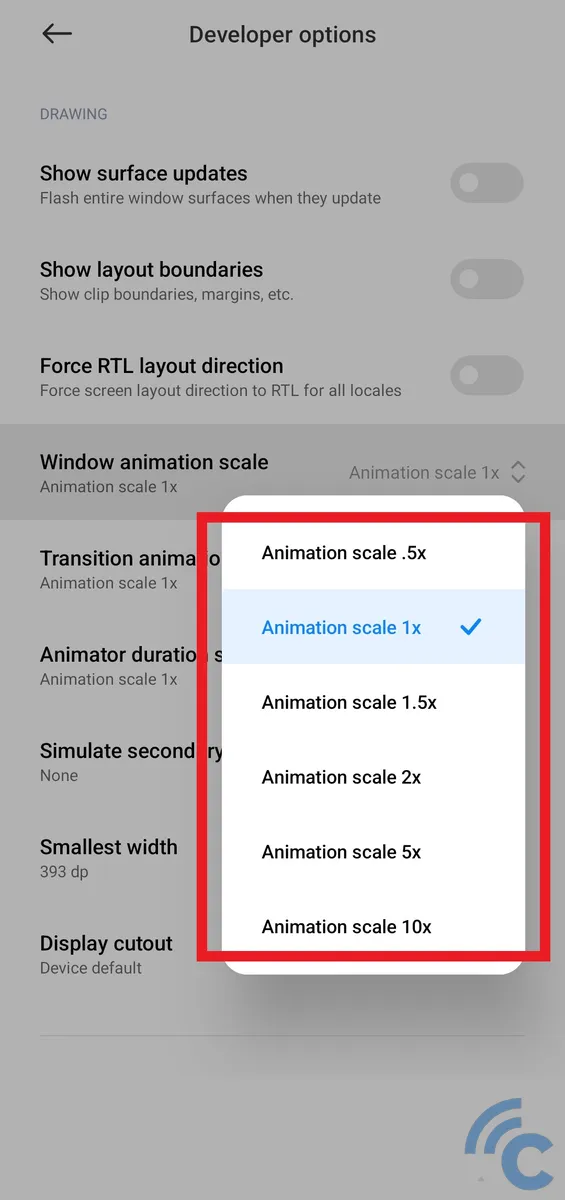
Actually, all mobile phones would already have the right animation movement time or duration as their default setting. Therefore, there's typically no need for adjustments unless you have a specific purpose in mind. However, if you're curious or want to experiment, you have the flexibility to alter the scale speed anywhere from .5x up to 10x.
6. Hardware Accelerated Rendering
The developer options do offer some pretty interesting settings, one of which is to adjust the rendering acceleration of the hardware. You can use some of the menus in this section if you need to.
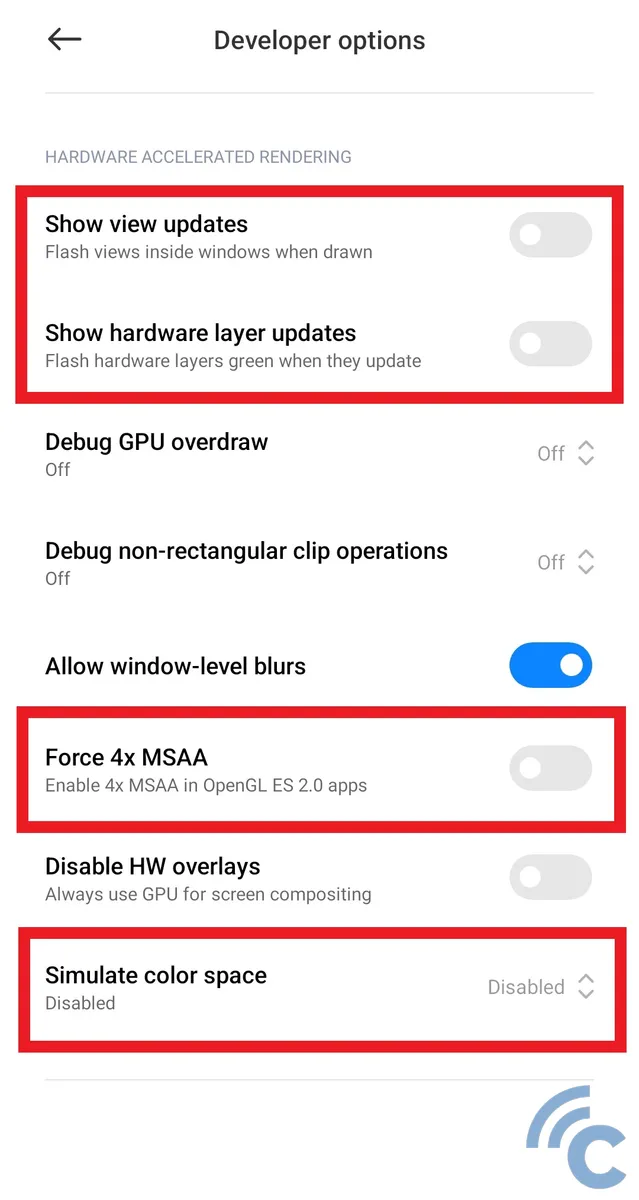
The first feature you can explore is "Show View Updates". Similar to the previously mentioned "Show Surface Updates", enabling this feature will cause your phone screen to flash a light each time a view gets updated. However, proceed with caution, as the flashing light might be uncomfortable for some users.
This feature closely resembles the subsequent option, "Show Hardware Layer Updates", with the difference being that the flash appears less frequently and only on specific buttons or icons.
Another commonly utilized feature is "Force 4x MSAA". This is frequently used to enhance gaming performance, allowing games to run more smoothly. Not only games, some apps also perform better with this feature enabled. Be mindful, however, as this can lead to increased battery consumption and faster temperature rise in your device.
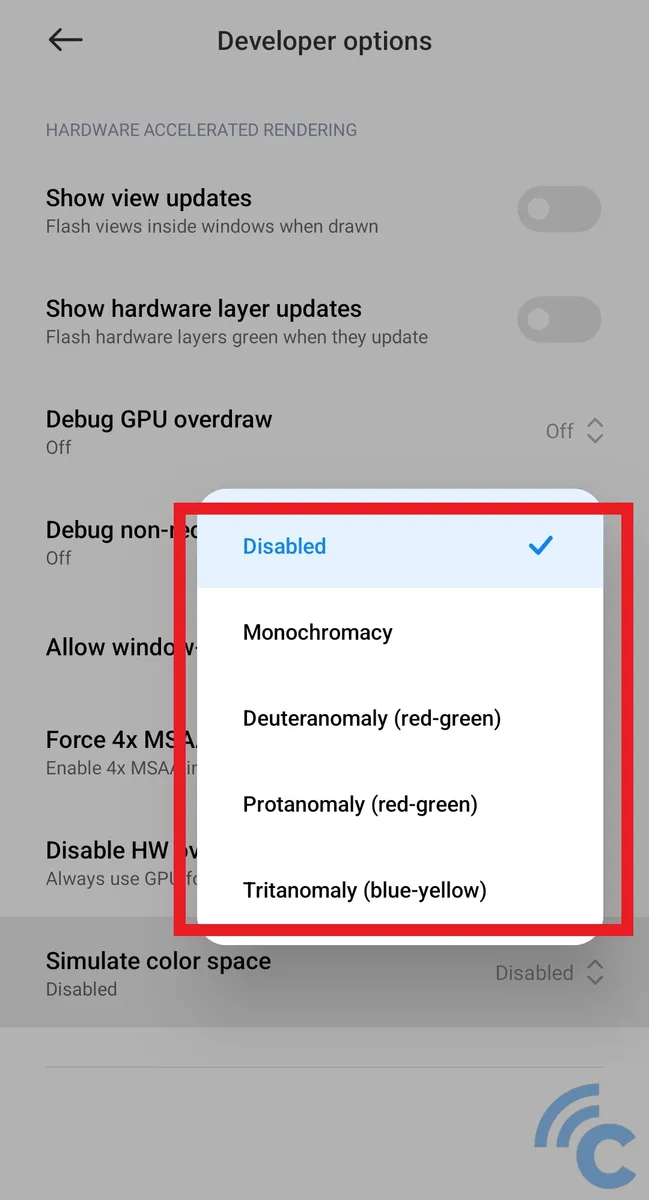
The final feature you can explore is "Simulate Color Space". This setting allows you to adjust the displayed color space. Options include "Monochromacy" (black and white), "Deuteranomaly" (red-green), "Protanomaly" (red-green), and "Tritanomaly" (blue-yellow). This feature is particularly helpful if you have specific color vision deficiencies, making your phone usage more comfortable.
7. Media
The following section within Developer Options is "Media". This section does not offer too many different features or settings.
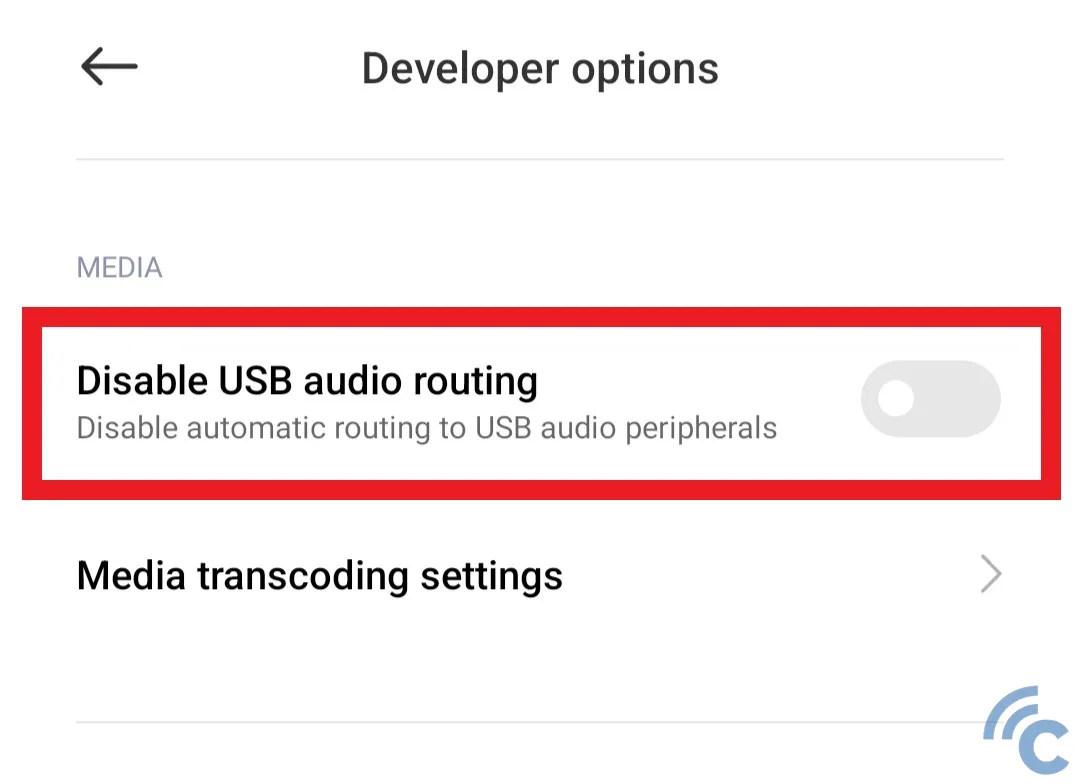
One of the menus offered in this section is "Disable USB audio routing". You can enable this menu to turn off automatic routing to external audio devices that were previously connected via the USB port. Automatic routing itself can be annoying for USB-sensitive applications if not turned off.
8. Monitoring
As a developer, you have the freedom to monitor the status of the device you're using. Accordingly, the Developer Options also includes a monitoring section for this purpose.

One of the features available is "Profile HWUI Rendering". When enabled, this feature allows you to monitor the ongoing rendering process displayed at the bottom of the screen, represented through color-coded level bars.
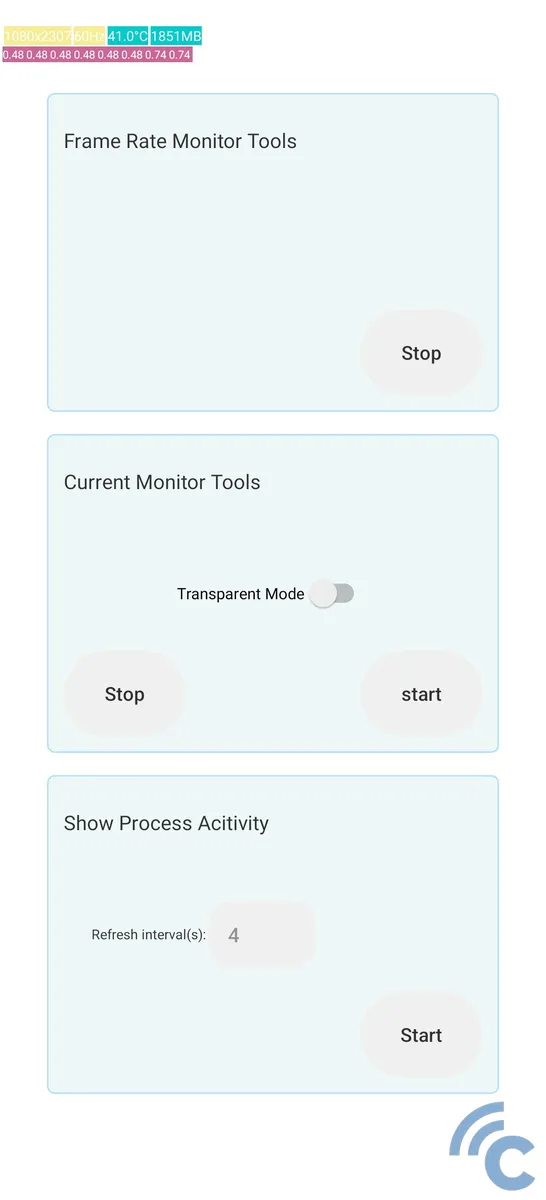
Another useful feature is "Power Consumption". This provides tools for directly monitoring energy usage. It includes options like "Frame Rate Monitor Tools", "Current Monitor Tools", and "Show Process Activity".
9. Apps
The subsequent section provided by Developer Options is "Apps". As the name suggests, this section is responsible for managing the functionality of the applications installed on your device.
The first feature you can explore is "Background Process Limit". This allows you to set the number of processes that remain active in the background. You can set it to "No Background Processes" to halt all background activities, or limit it to 1 to 4 processes. Alternatively, you can stick with the "Standard Limit", which is the default setting.
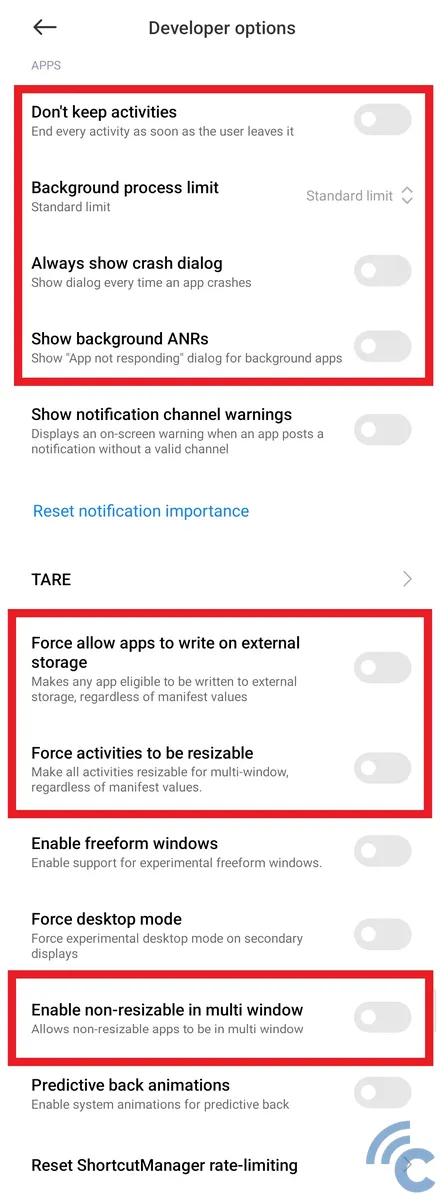
Moreover, several other options are available for activation. The "Don't Keep Activities" option ensures no activities are saved and will terminate upon exiting certain applications. "Always Show Crash Dialog" displays information whenever an app crashes, and "Show Background ANRs" continues to display information about unresponsive apps running in the background.
Additionally, there's a feature titled "Force Allow Apps to Write on External Storage". This forces apps to be installed on external storage like a microSD card, which can help save your Android phone's internal storage space. This is because by default, almost all installed applications are stored in internal memory, not external.
You can also adjust the functioning of apps on your device. For instance, by activating the "Force Activities to be Resizable" feature. This setting allows all apps to use the split-screen function, sometimes even forcing it. This can enhance your multitasking capabilities, as not all applications natively support split screen.
To further facilitate multitasking, you can activate the "Enable Non-Resizable in Multi Window" feature. This allows apps that were previously non-resizable or couldn't split screen to do so, much like other apps. However, the appearance of some applications may slightly vary as they didn't originally support these functions.
That concludes the explanation about Developer Options. For more detailed information, you can refer to the comprehensive Developer Options guide in the Android Developers user manual. This was a basic introduction to what Developer Options are and how they work. Best of luck.