
How to Format an SD Card on Mobile Phones and Laptops
Have you heard about SD cards? These handy devices are perfect for storing files. They're often found in gadgets like digital cameras, smartphones, tablets, and music players. SD cards come in three sizes: the regular SD Card, the miniSD, and the microSD. They offer various storage capacities, starting from a few gigabytes (GB) up to several terabytes (TB).
Sometimes, you might face difficulties in saving or copying files to your SD card. A good solution for this issue is to format the SD card. Are you wondering about the simplest and safest method to format an SD card? Follow these steps to format your SD card on mobile phones and laptops, whether they run Windows or Mac.
Formatting an SD Card on Your Android Phone
Every Android smartphone equipped with a microSD card slot typically includes a function to format the SD Card, specifically microSD in this context. The process is straightforward, although it might vary slightly across different brands.
In addition to the phone's built-in capabilities, formatting an SD Card can also be done using third-party applications. I'll describe both methods of formatting an SD Card below.
1. Using Built-in Features
This tutorial on formatting an SD Card with built-in features is based on the Samsung Galaxy M22. The steps might differ a bit depending on your phone model, but the overall process remains similar. Follow these steps carefully:
- First, insert the SD Card (microSD) into your phone. Ensure that it's recognized as installed.
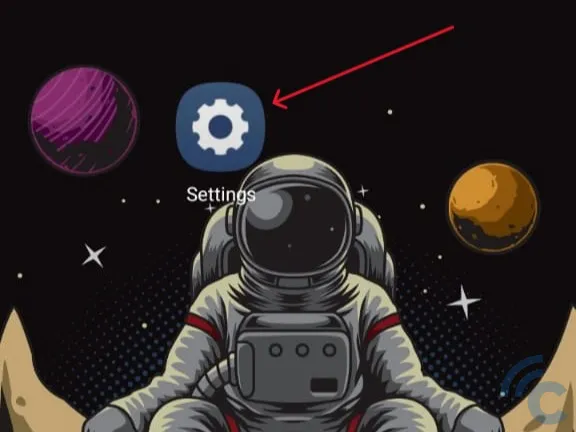
- Open the "Settings" menu on your phone.
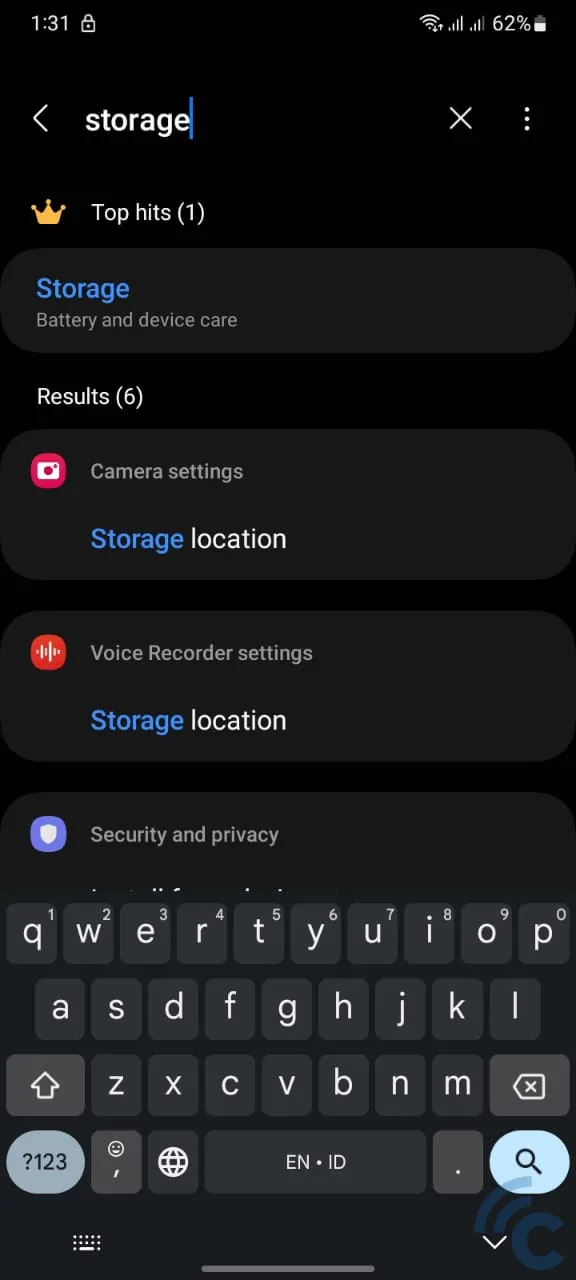
- Tap on the search icon, which looks like a magnifying glass.
- In the search field, type "storage."
- Select the "storage" option that appears first in the search results.
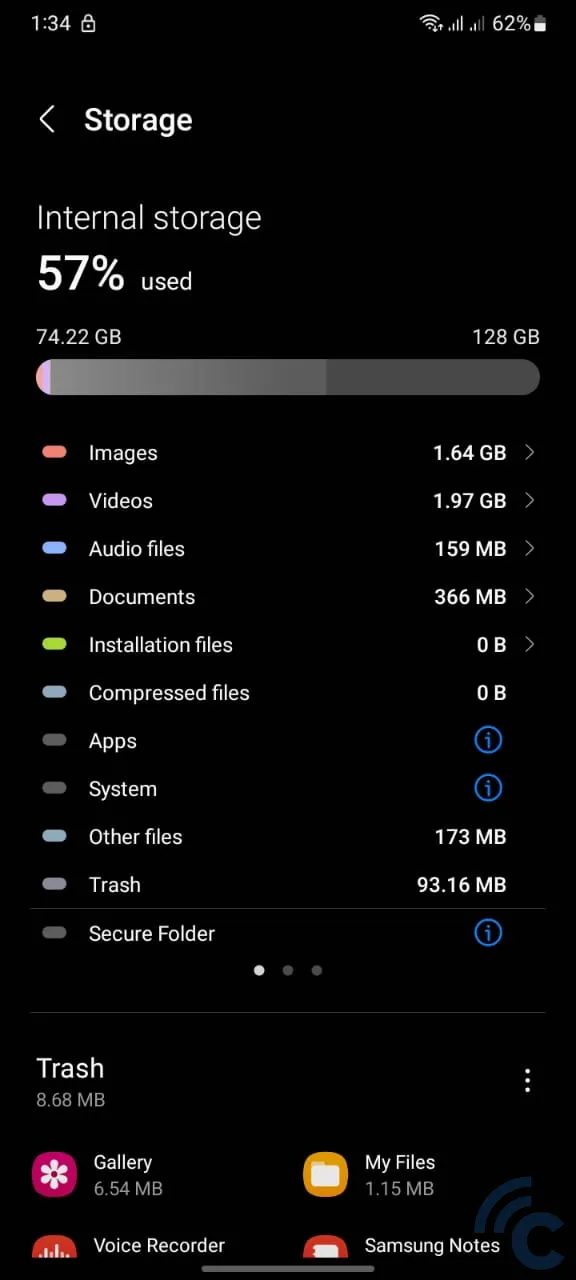
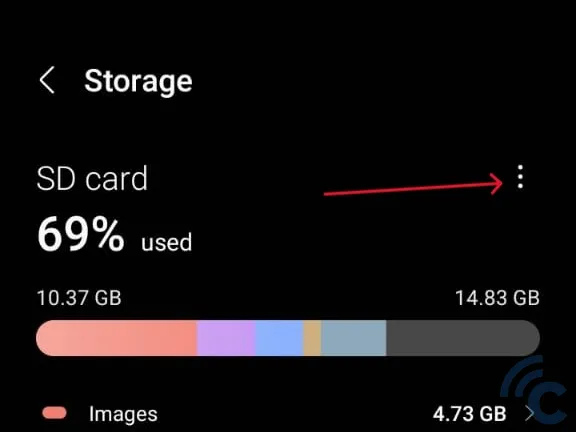
- You'll now see the status of your phone's internal storage.
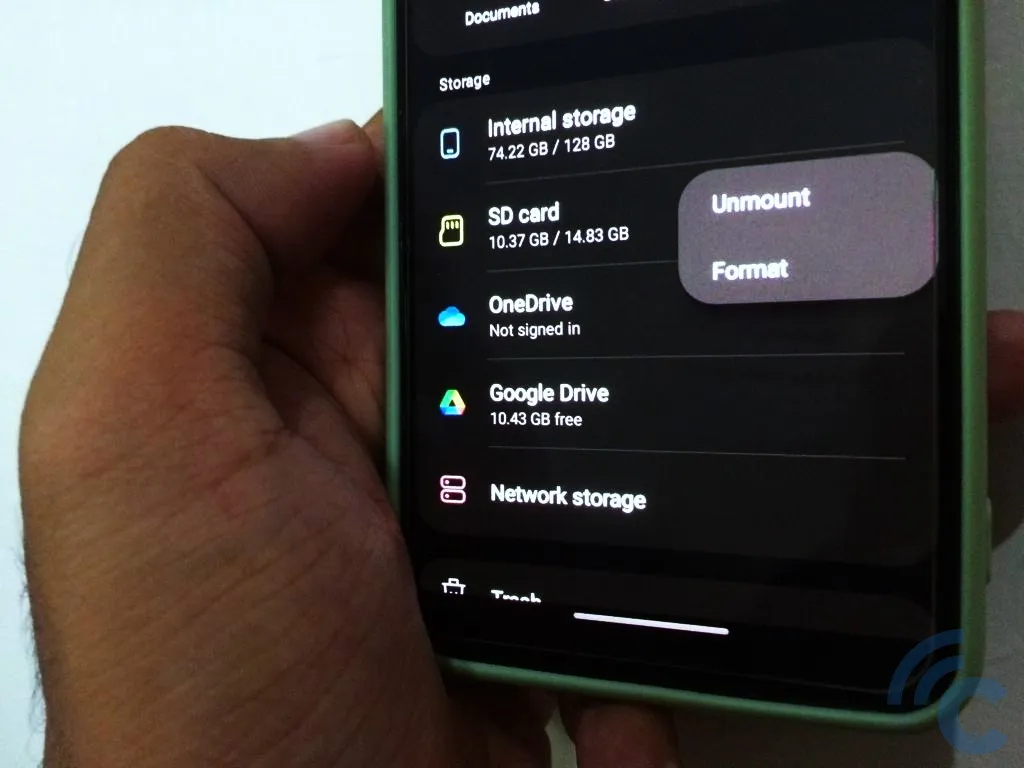
- Swipe the screen to the left to view the SD Card's storage status.
- Tap the three-dot icon in the upper right corner of the screen.
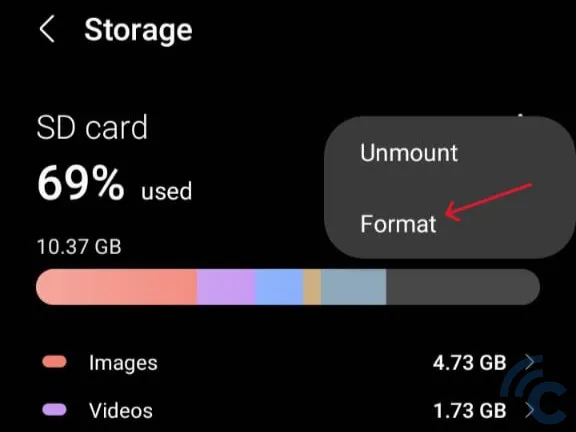
- Choose "Format", and when a warning message appears, select "Format" again to confirm.
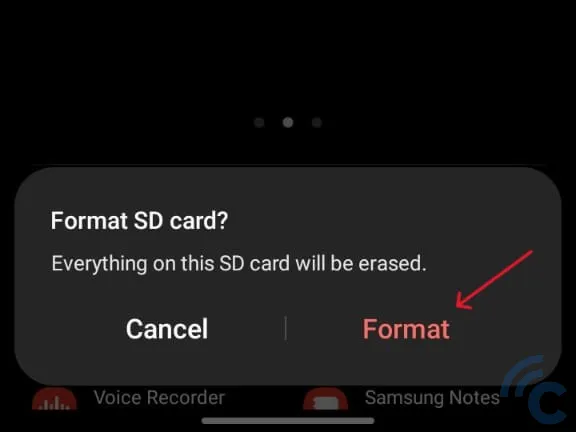
- Wait for the formatting process to finish.
2. Using Third-Party Applications
Another way to format an SD Card is through a file manager application. It's important to note that not every Android phone comes with a pre-installed file manager. In such cases, opting for a third-party file manager application is a useful alternative.
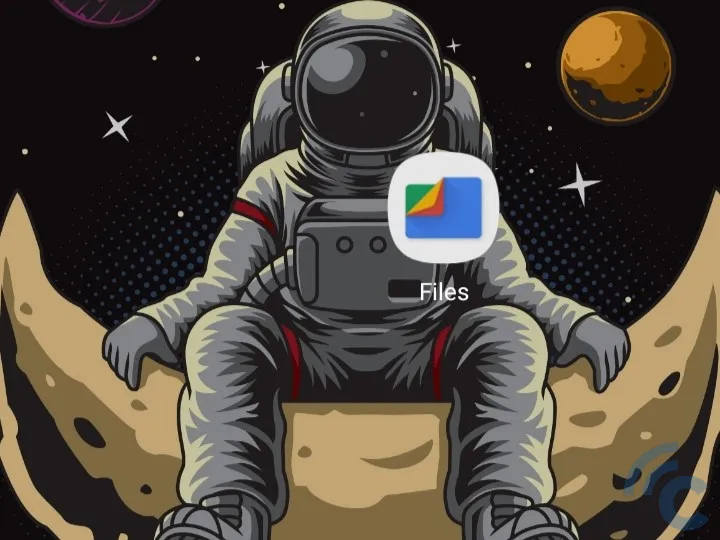
A recommended file manager to try is Files by Google. Here's how to use this app for formatting an SD Card:
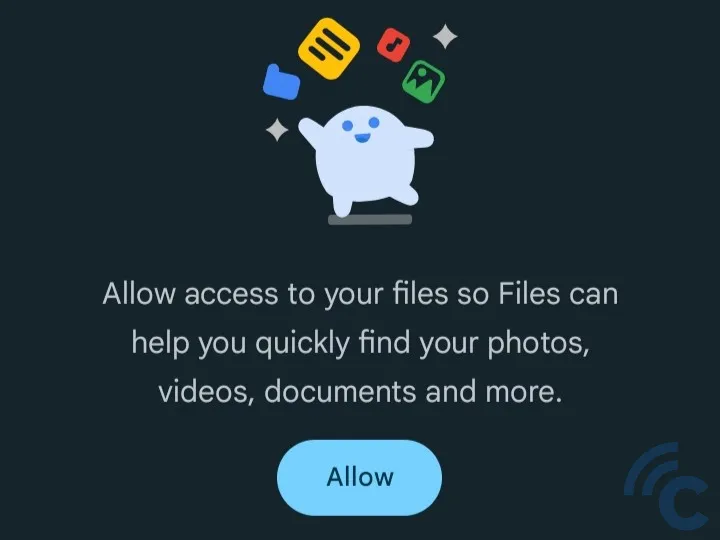
- First, download and install the Files app from the Play Store.
- Open the Files app on your device.
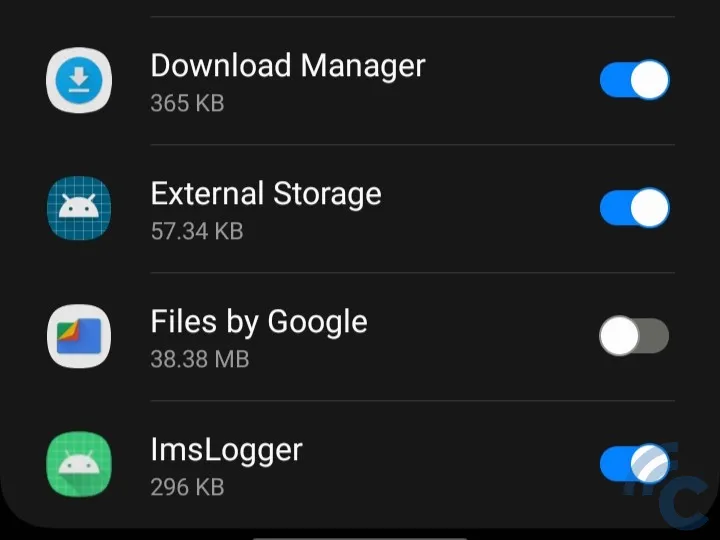
- The app will ask for permission to access files on your phone. To grant permission, click the "Allow" button and then toggle the switch to the right.
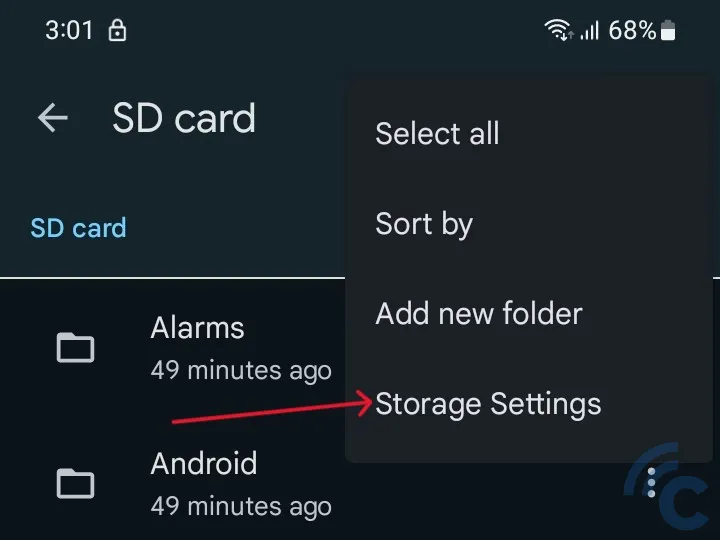
- On the app's main screen, scroll down until you find the "SD Card" option.
- Tap on "SD Card."
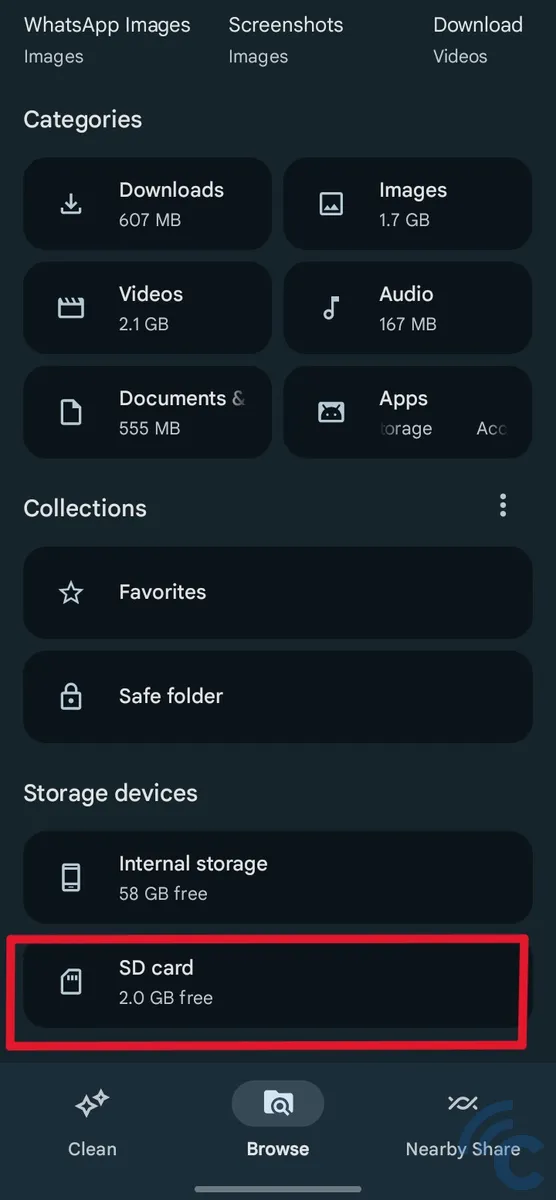
- Next, click on the three dots located next to the SD Card option.
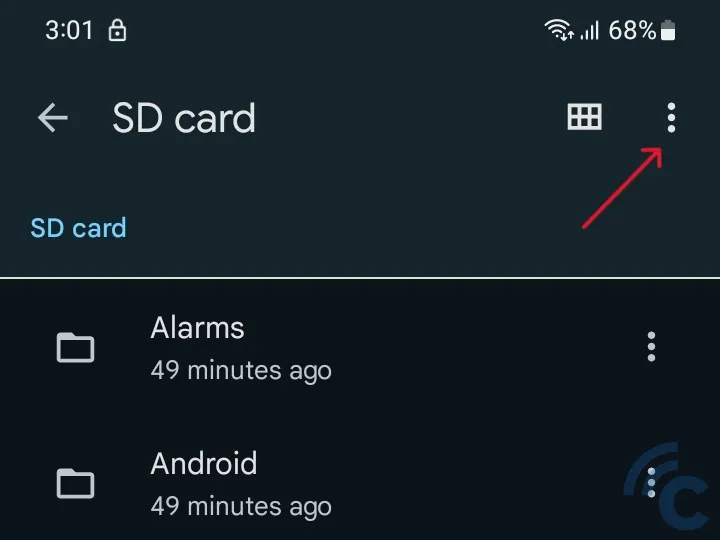
- Choose "Storage Settings" from the menu.
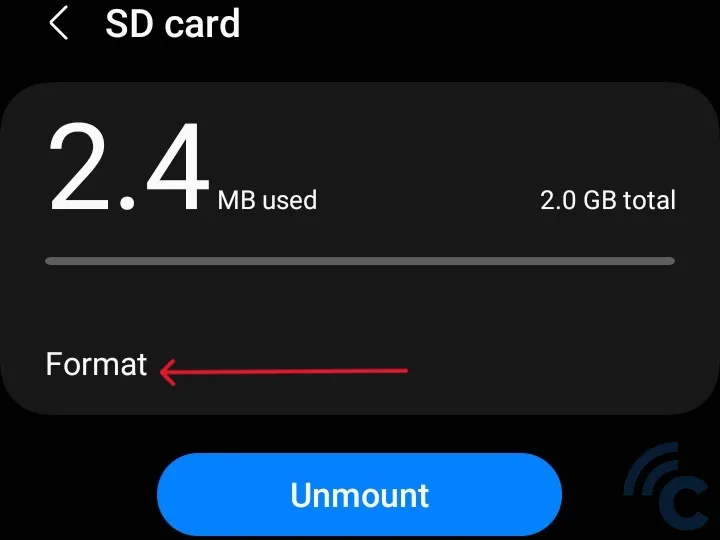
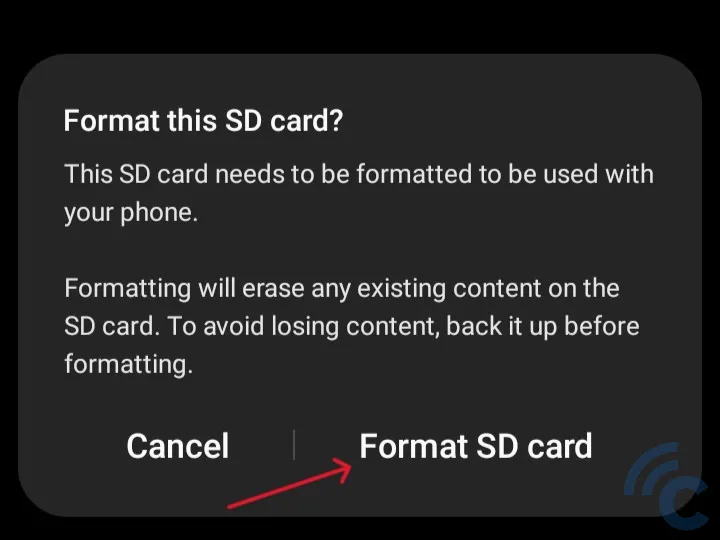
- Tap on "Format", and then select "Format SD card" to start the process.
- Wait for a little while as the formatting completes.
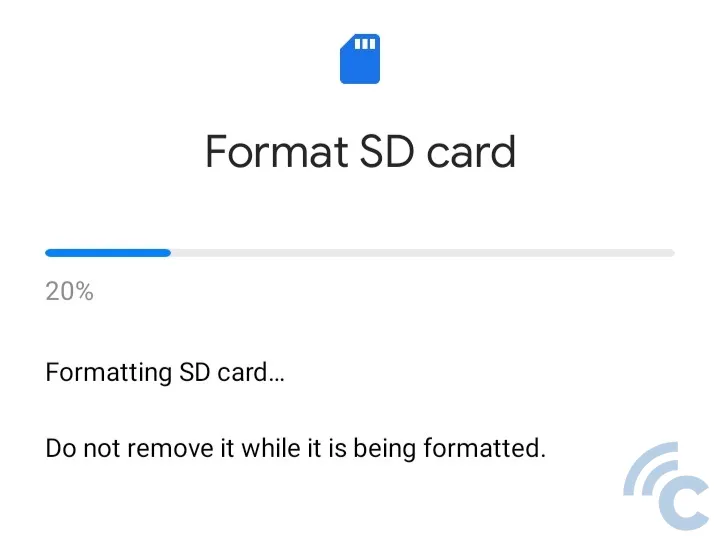
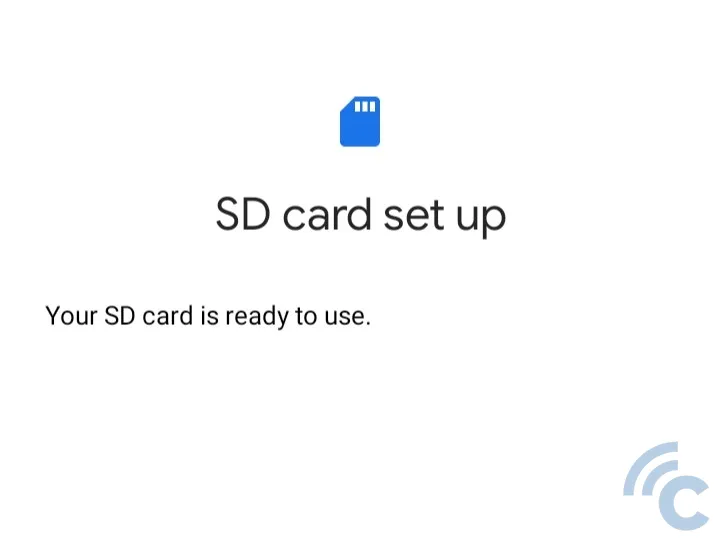
- Once done, the SD Card will be formatted and ready for use.
Formatting an SD Card Using a Windows PC
This method is useful for those who have phones without external memory support, face issues with an SD card that's prone to errors, or simply prefer using a Windows PC for formatting.
While there are instances where it might not work, attempting to format an SD card via a PC is worth trying if you're unable to do it through your phone. The process involves using either the built-in features of Windows Explorer or third-party applications, similar to the methods used on phones.
1. Using Windows Explorer's Built-in Features
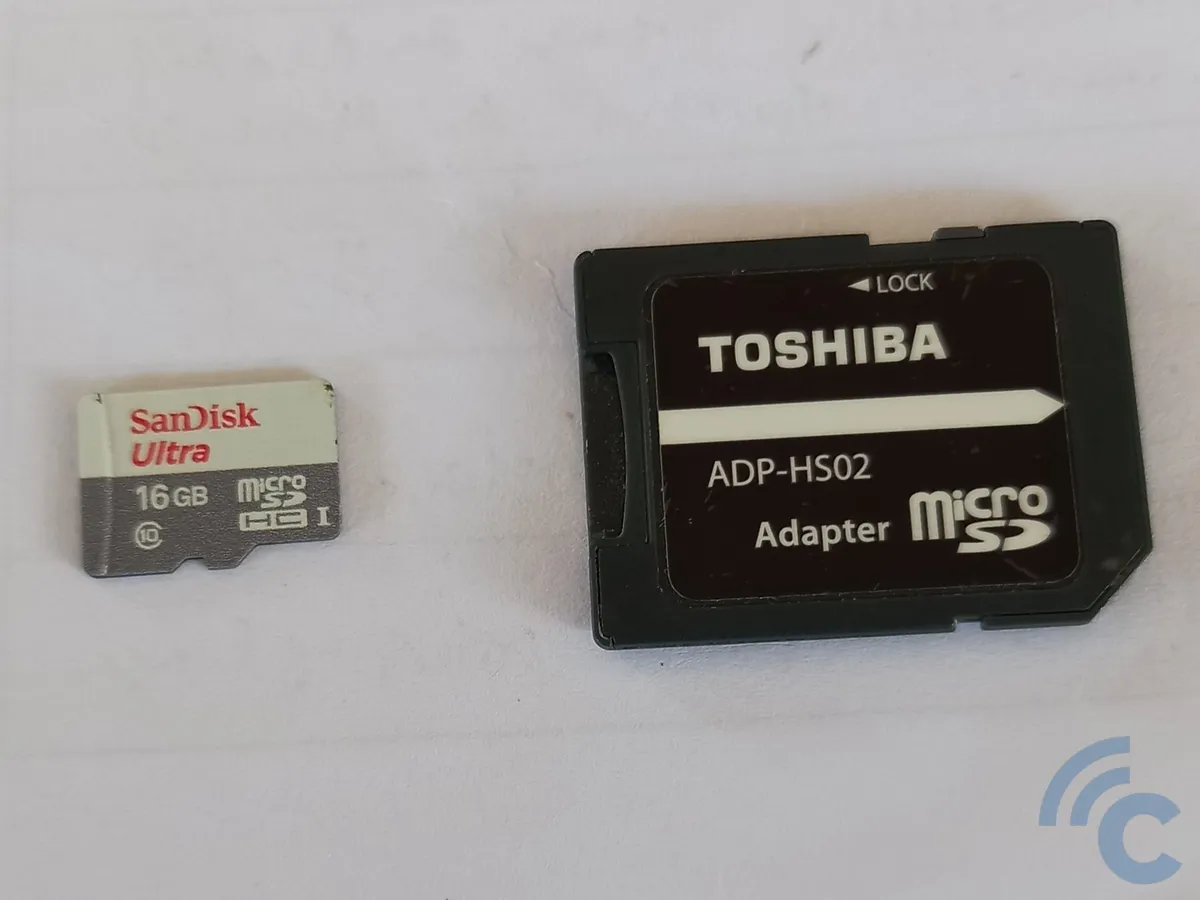
Many desktops and laptops are equipped with an SD Card or microSD slot. If your device doesn’t have one, you'll need a card reader or an adapter. For this tutorial, I'm using a laptop that has an SD Card slot.
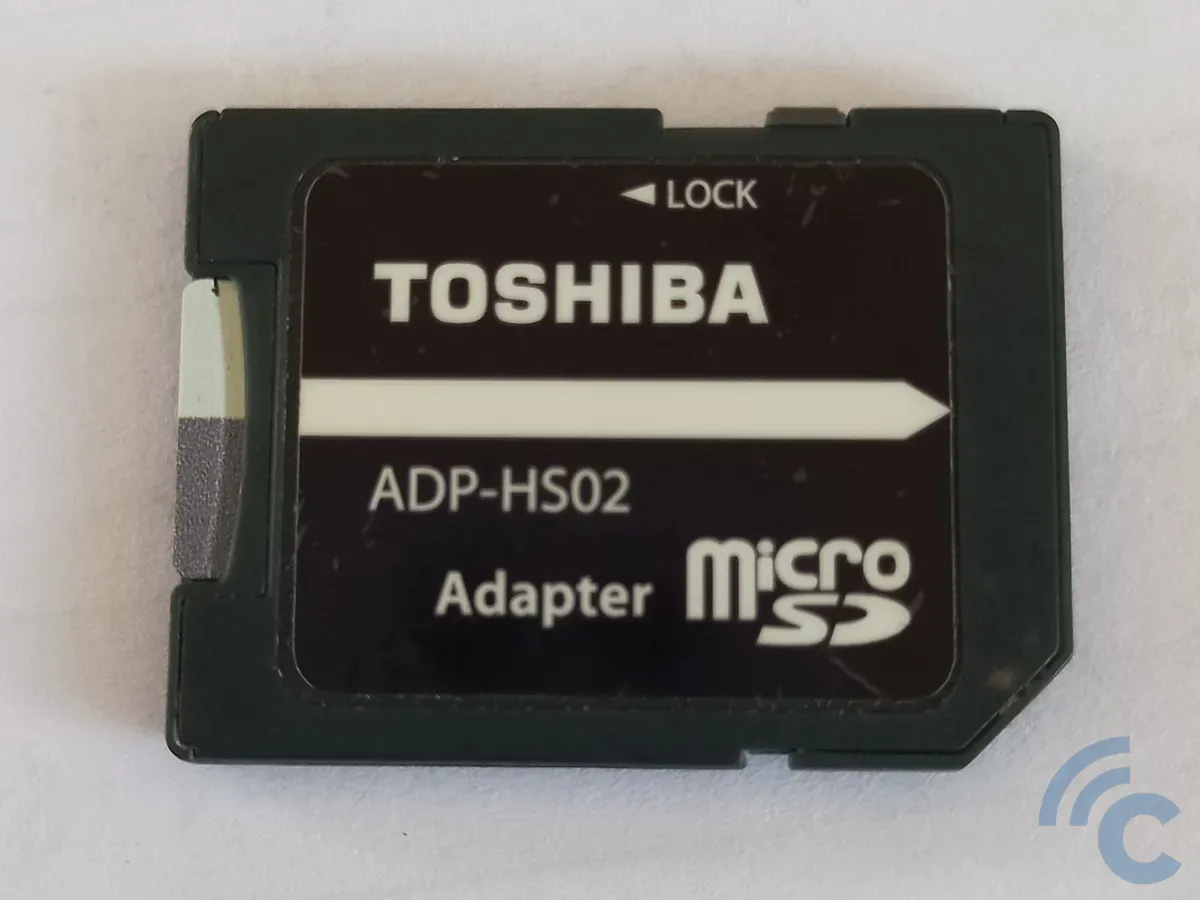
However, since we're formatting a microSD card, an SD Card adapter is necessary. Here are the steps to format an SD Card using Windows Explorer:
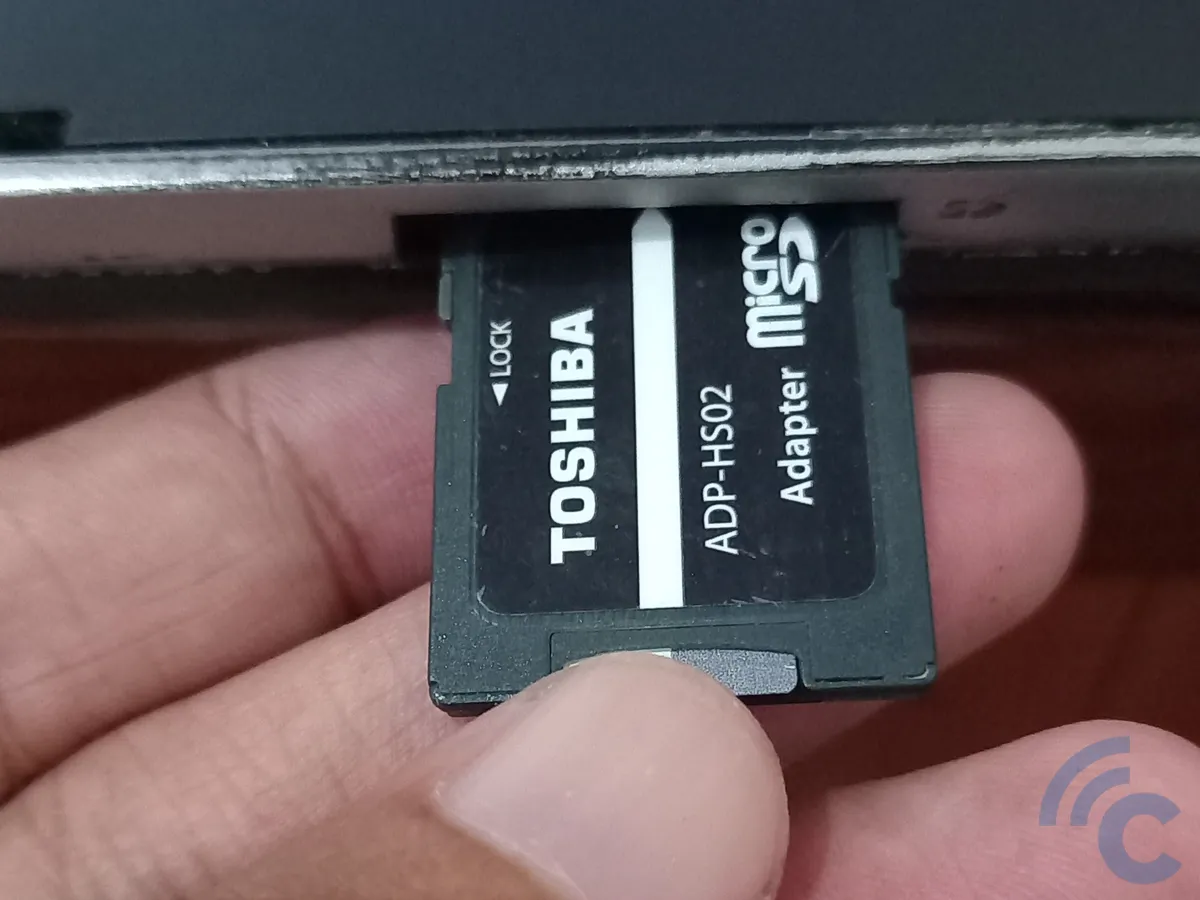
- Connect the microSD card to the SD Card adapter.
- Insert the SD Card into your PC or laptop's SD Card slot.
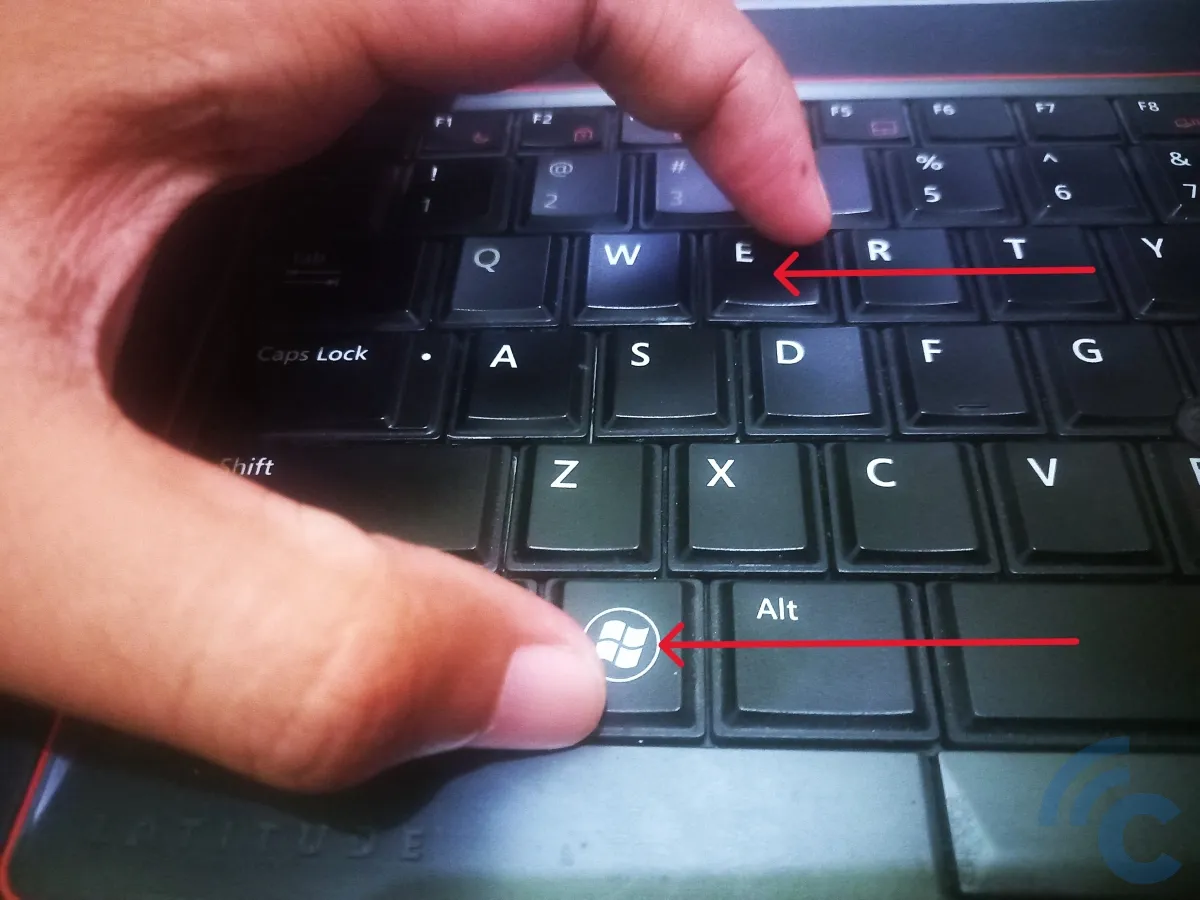
- Open Windows Explorer by pressing the Windows + E keys at the same time.
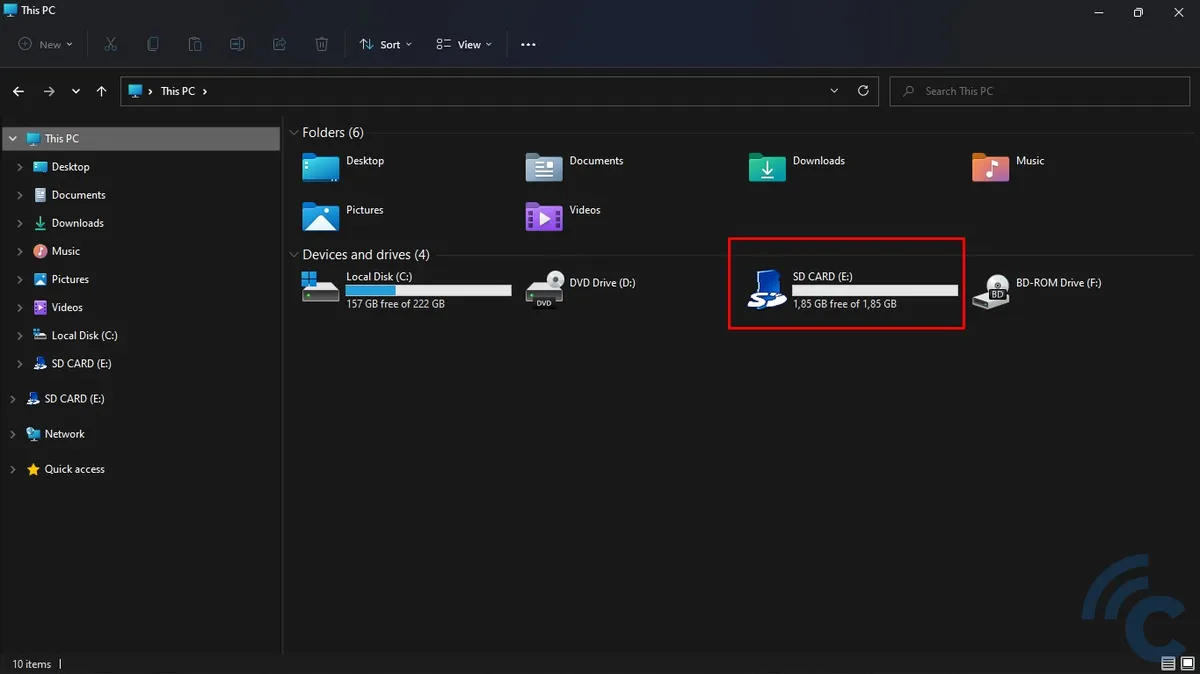
- Look for the drive where your SD Card is located. In this example, it's in drive E.
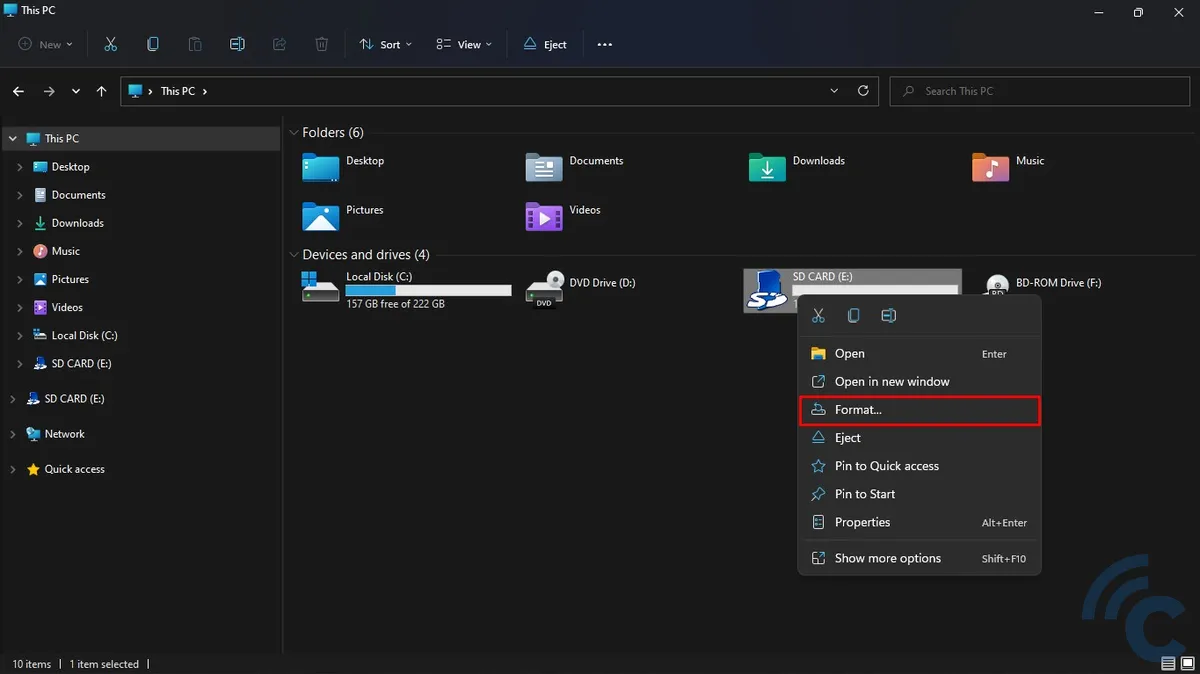
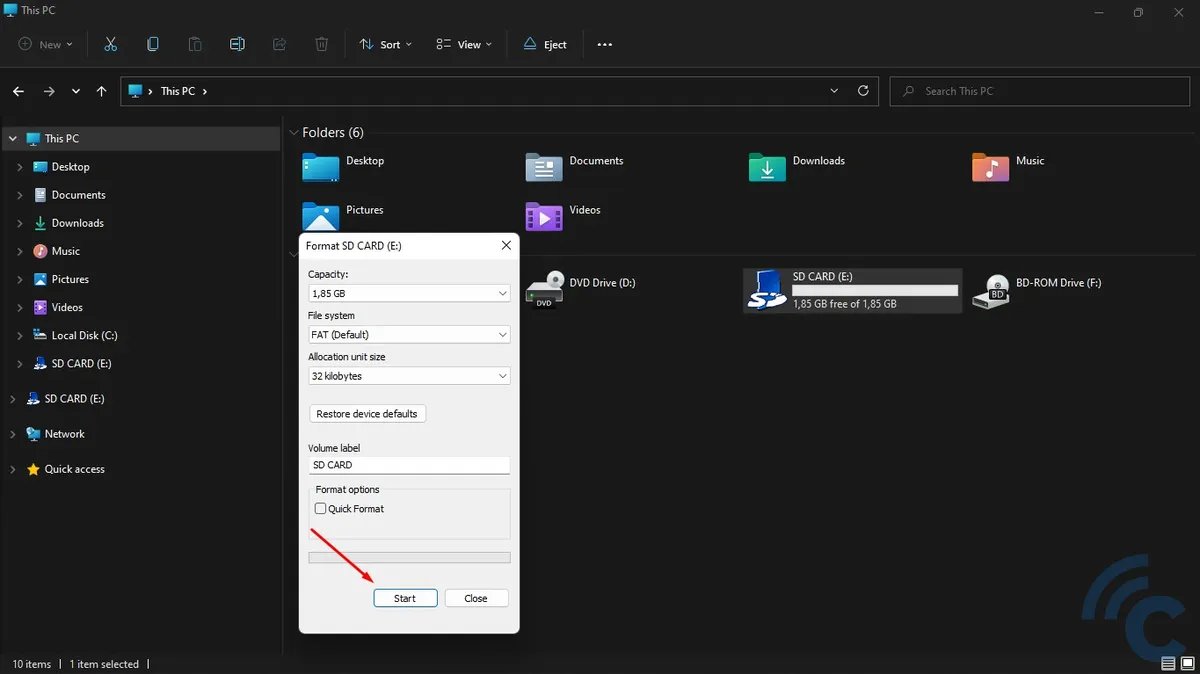
- Once you find it, right-click on the SD Card and select "Format".
- Set the file system of the SD Card to the default. In this tutorial, we're using "FAT". You can also choose ExFat, which is compatible with both Windows and MacOS devices.
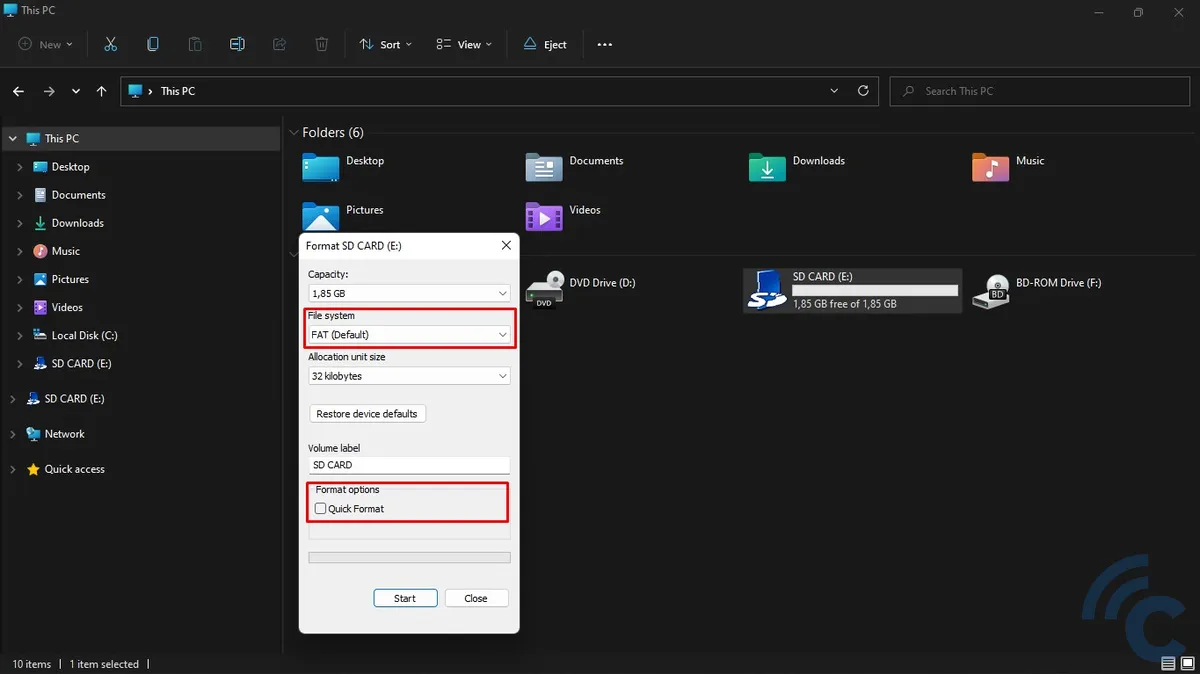
- Decide if you want to use the "Quick Format" option. Selecting it speeds up the process. But, if your SD Card has issues, it's better to leave Quick Format unchecked for a more comprehensive format that can fix damaged parts of the card.
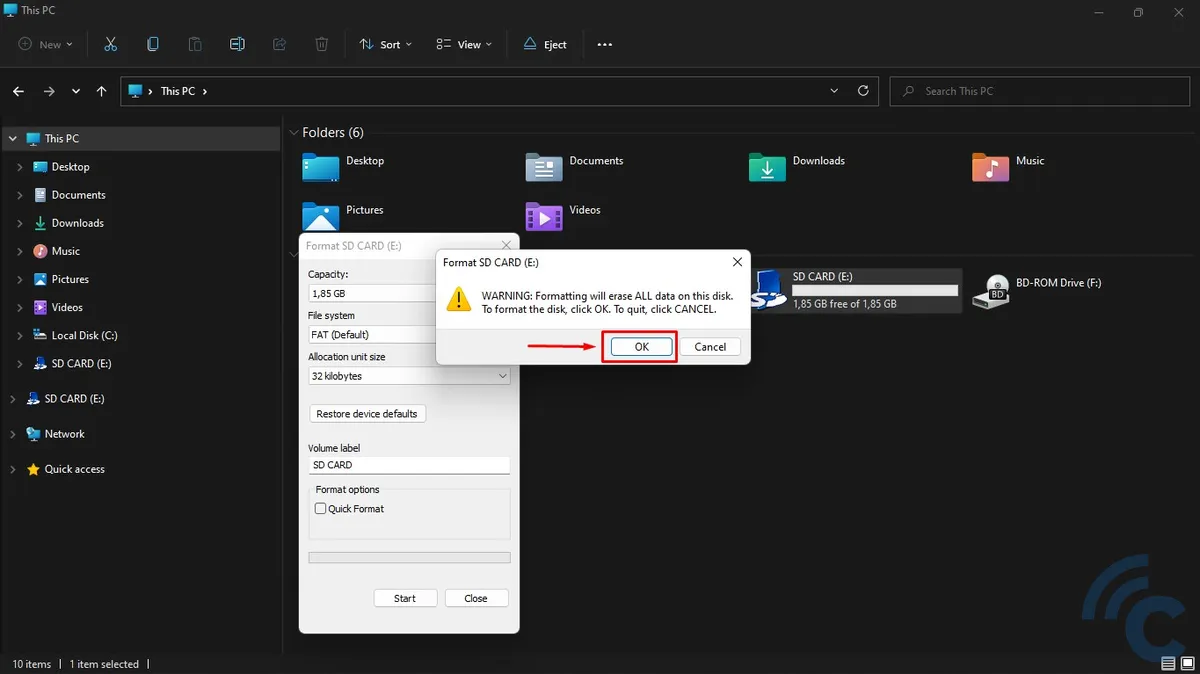
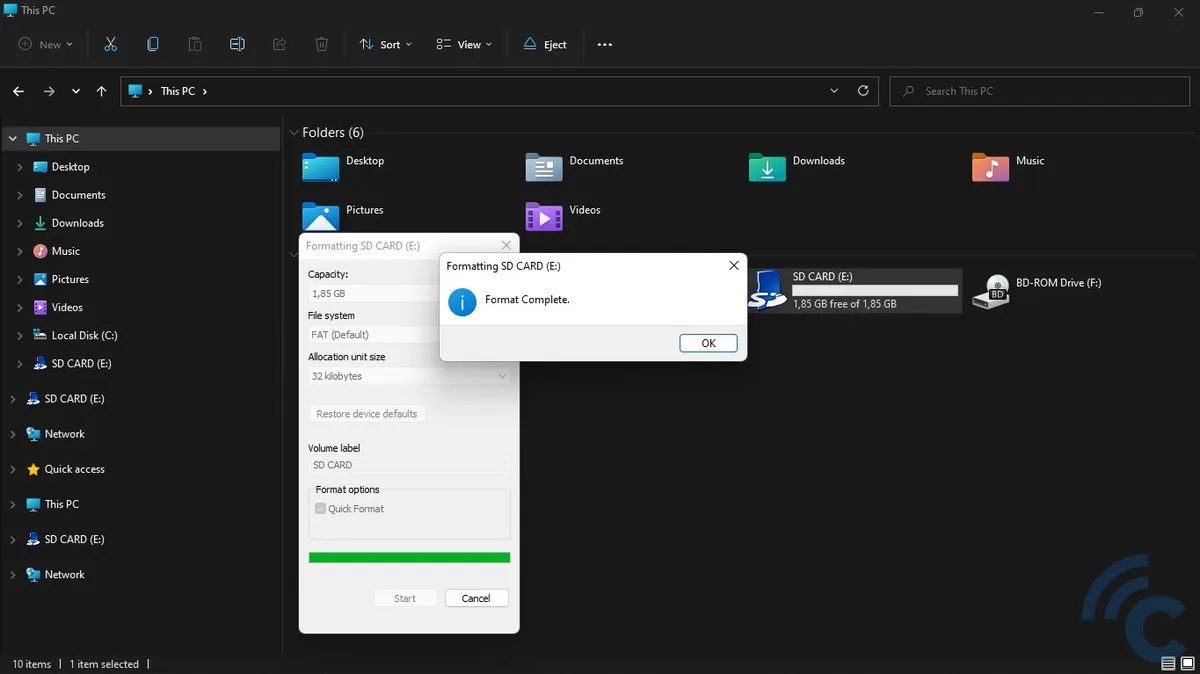
- Click "Start" and then "OK", and wait for a bit while the formatting completes.
- The process is finished.
2. Using Third-Party Applications
If the built-in features in Windows Explorer don't resolve your SD card issues, trying a third-party application is a good alternative.
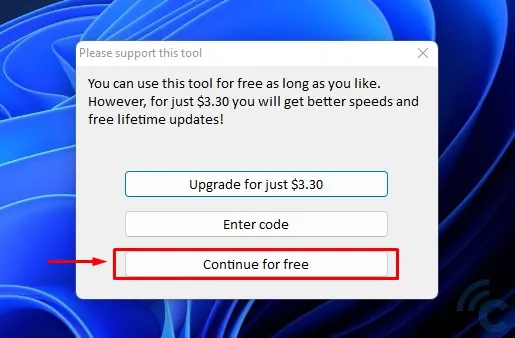
A recommended application is the HDD Low Level Format Tool from HDD Guru, which is free for personal use. Here’s how you can use this tool to format your SD Card. Remember to connect the SD Card to your computer before starting.
- Download the HDD Low Level Format Tool from the HDD Guru website.
- Install the application by double-clicking the downloaded .exe file.
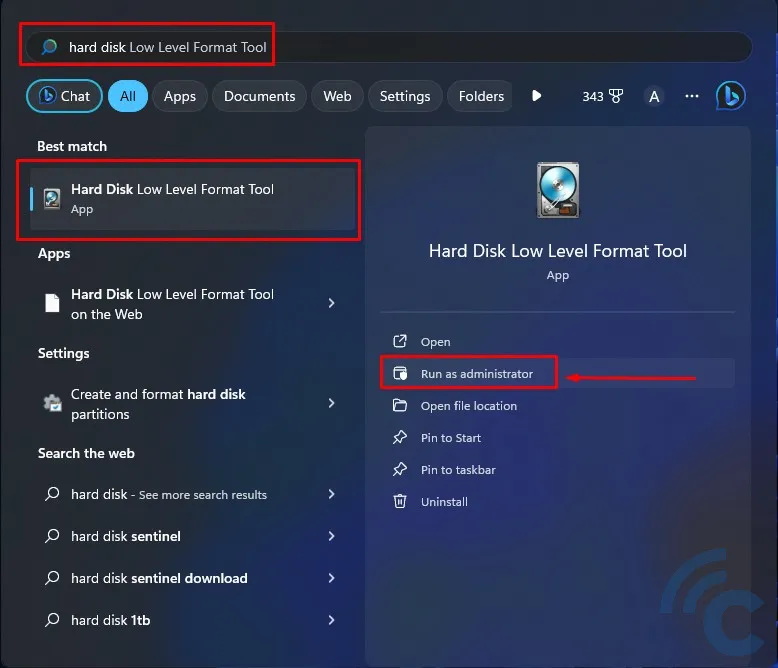
- Open the application. You can do this by pressing the Windows key and typing "Hard Disk Low Level Format Tool" in the search field.
- Choose "Run as administrator".
- Click on "Continue for free" since you are using it for personal purposes.
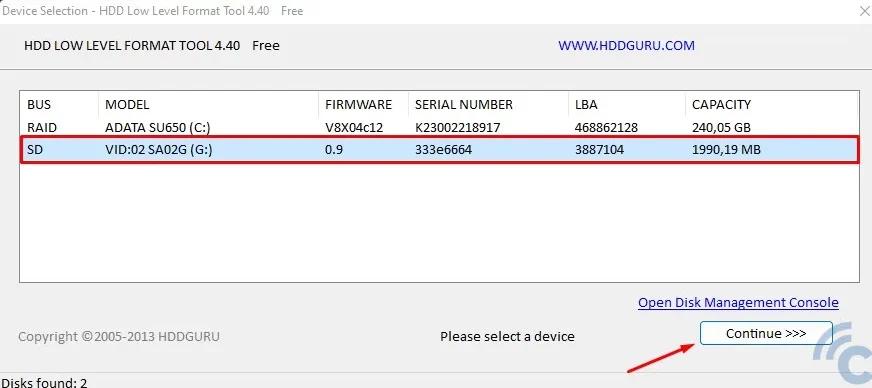
- Select the SD Card you wish to format. You can identify it by the "SD" code on the Bus label.
- Press "Continue".
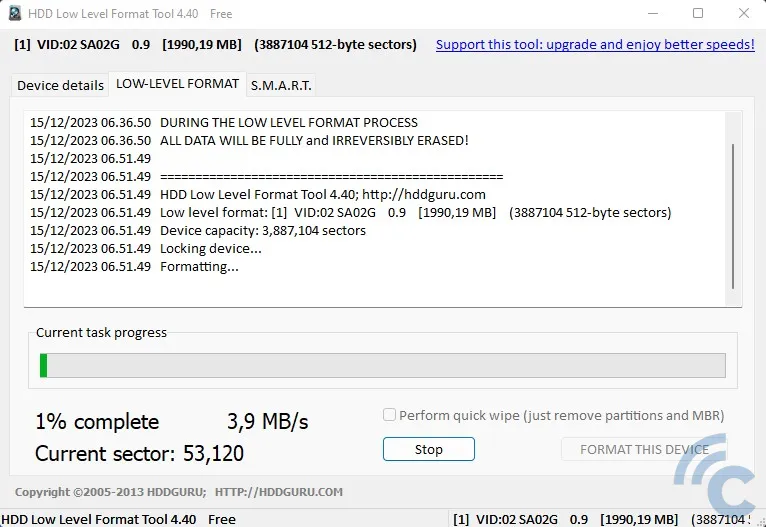
- Go to the "LOW-LEVEL FORMAT" tab. Here, uncheck "Perform quick wipe (just remove partitions and MBR)" if your goal is to format and also repair the SD Card's components.
- Click "FORMAT THIS DEVICE" and wait until the process is complete.

- Once done, your SD Card will be formatted and ready for use.
3. Formatting an SD Card on a Mac
The process of formatting an SD Card on a Mac is quite similar to doing it on a Windows PC. If you're not familiar with MacOS computers, here’s a simple guide to help you.
- First, connect the SD Card to your Mac. You can use an adapter or a card reader.
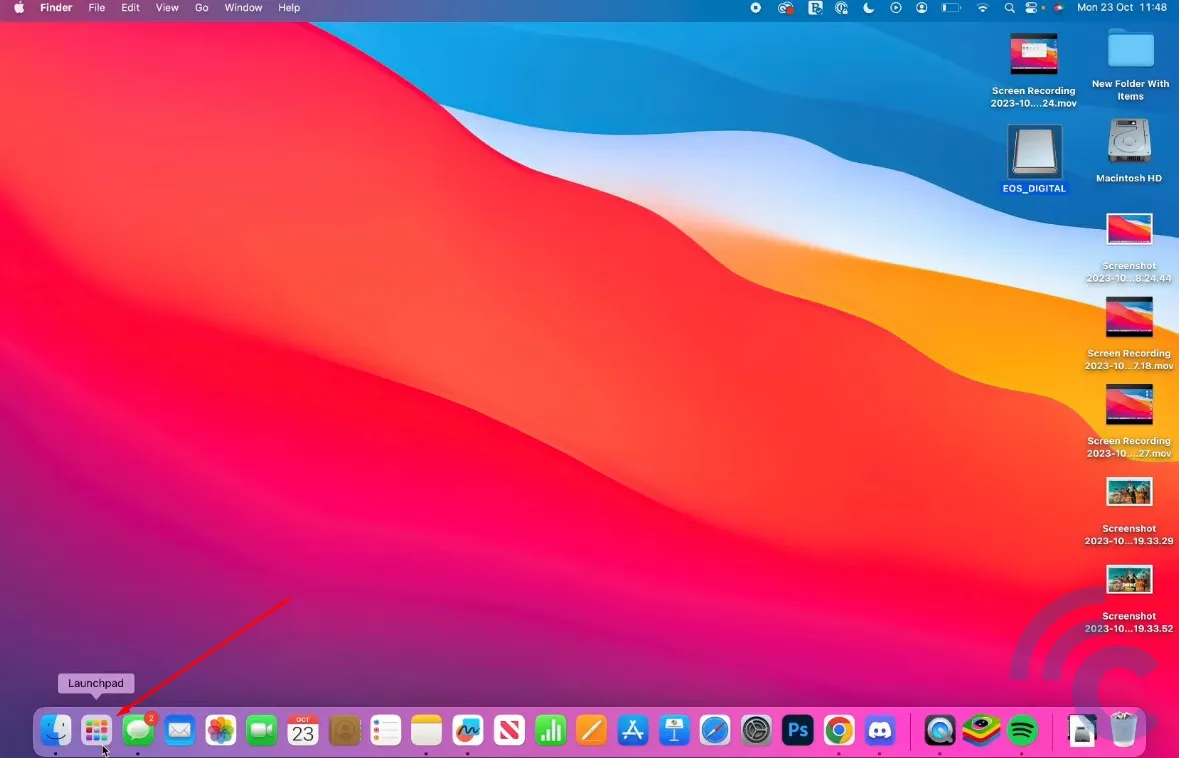
- Once the SD Card is recognized, open Launchpad.
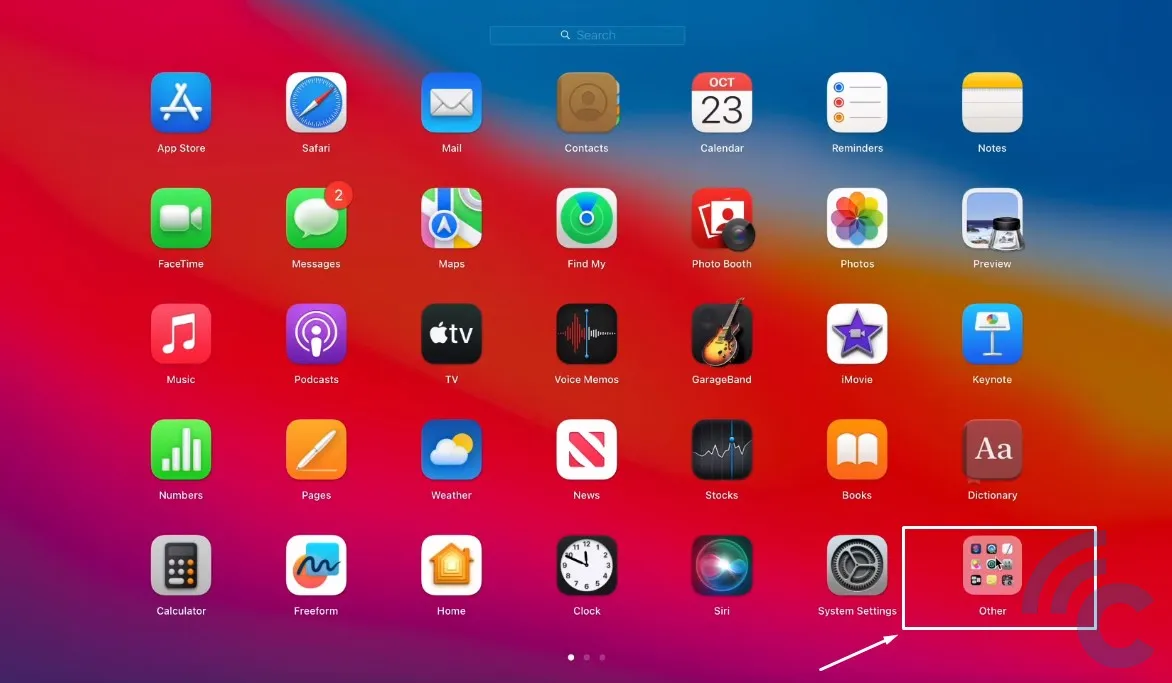
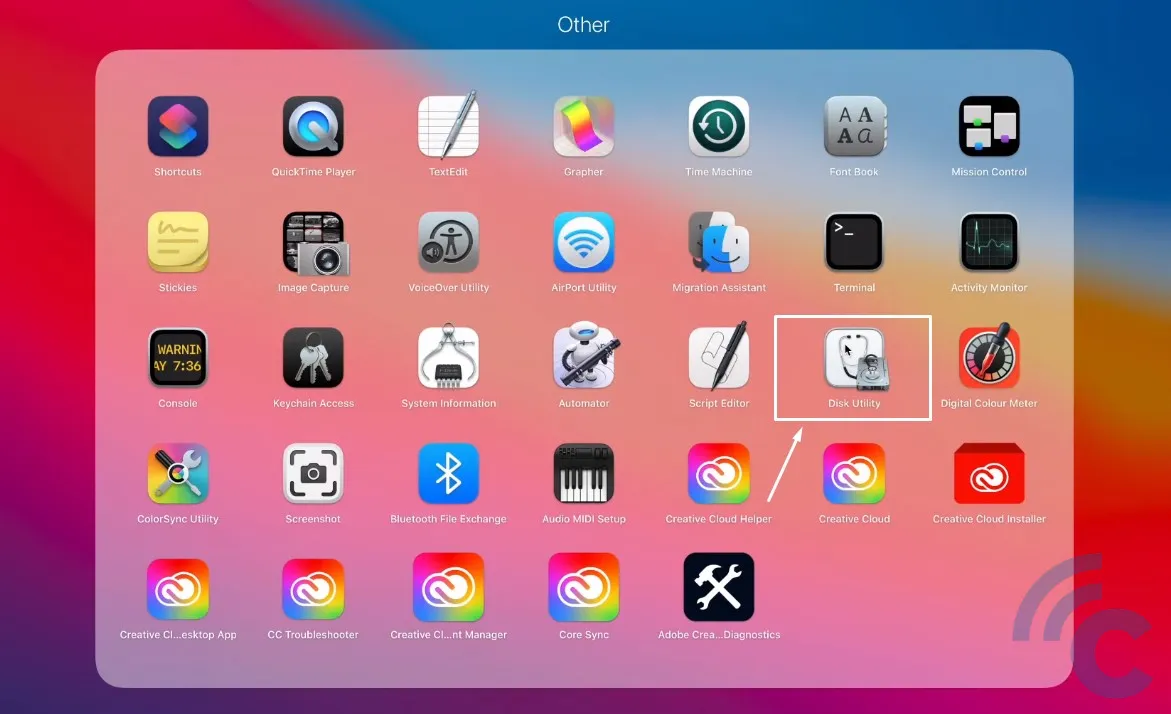
- Look for the "Disk Utility" application in the 'Other' folder, or you can search for it in the search bar by typing "Disk Utility".
 Source: GuideRealm
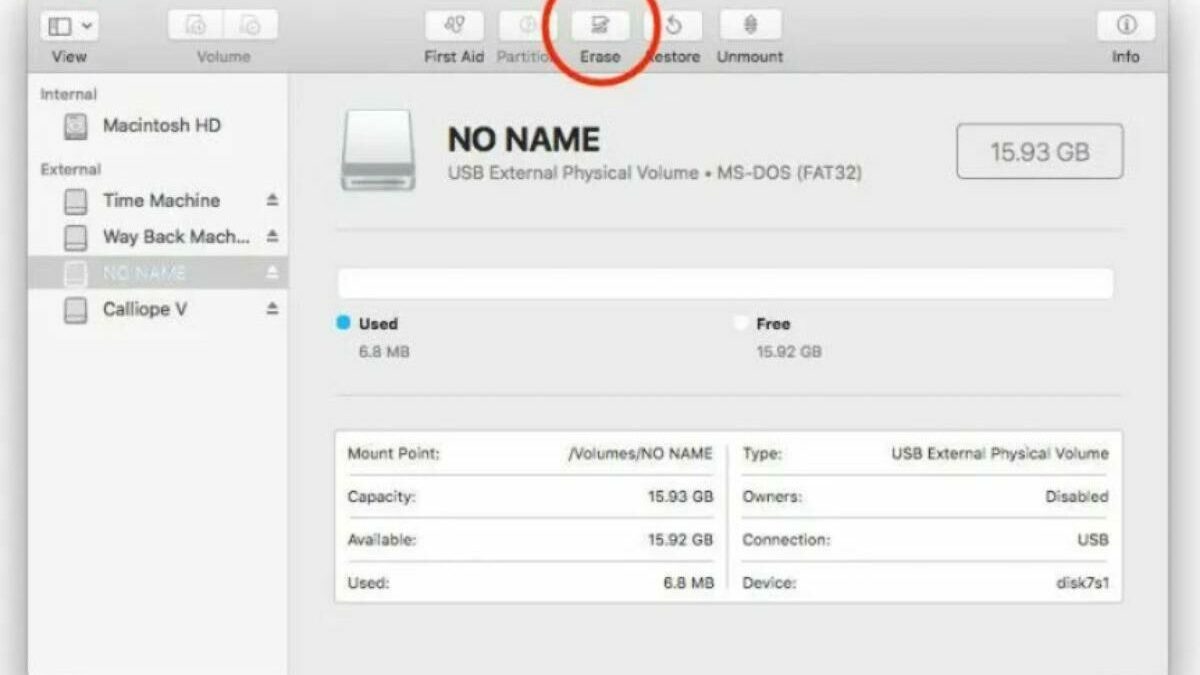
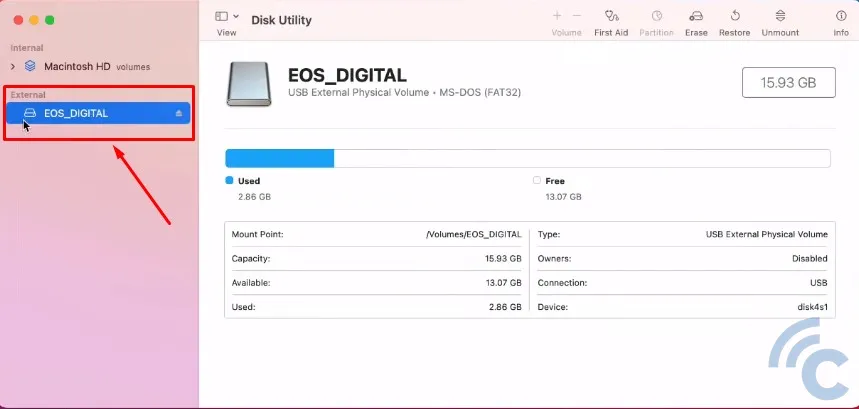
- In Disk Utility, click on your SD Card's name listed under the 'External' section.
 Source: GuideRealm
- Find and click the "Erase" button at the top of the application window.
 Source: GuideRealm
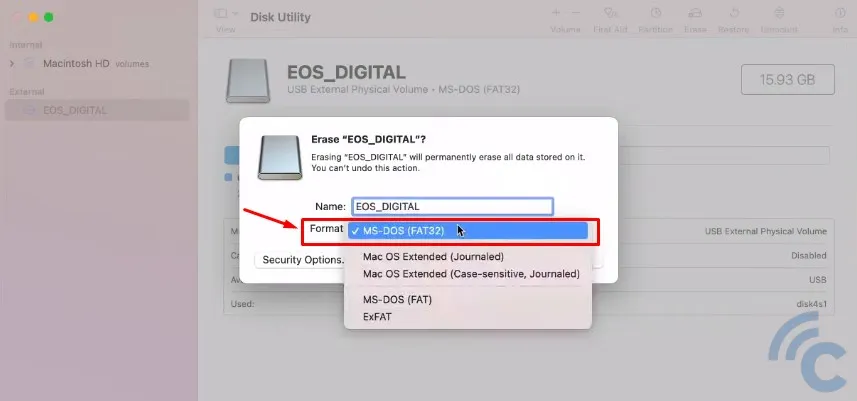
- You'll then need to specify a name and choose a format (file system) for the SD Card.
 Source: GuideRealm
- The options include MS-DOS (FAT32), which is often the default, or ExFAT. Both formats are compatible with Windows and Mac computers.
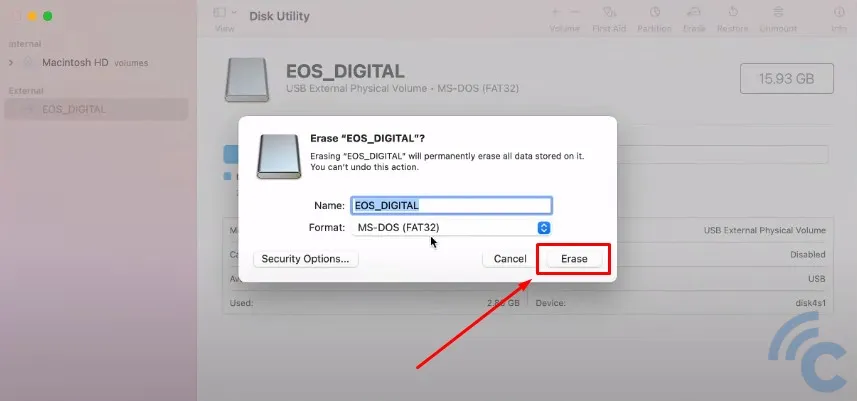
- After selecting the format, click the "Erase" button and wait for the formatting to complete.
 Source: GuideRealm
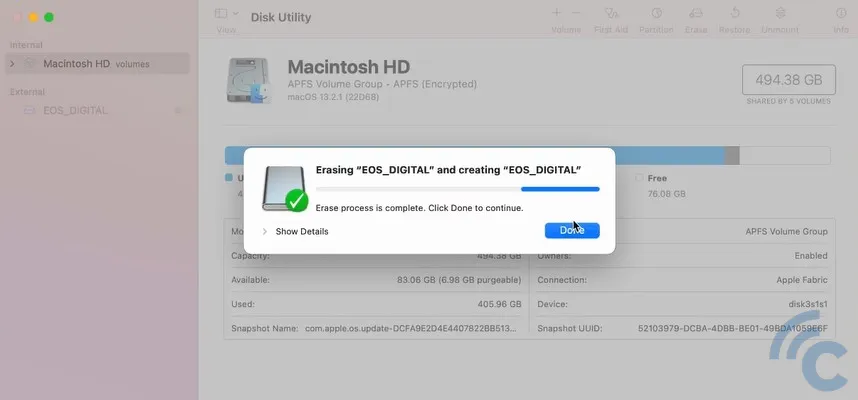 Source: GuideRealm
- Once finished, your SD Card will be formatted and ready for use!
In conclusion, formatting an SD Card, whether on a phone or a computer, is a straightforward process. Simply choose the method that you find most convenient. If you encounter any problems, refer to tips on troubleshooting SD Cards that can't be formatted. Good luck!