
6 Methods for Fixing an Unformattable SD Card
SD cards, or secure digital cards, are essential flash memory cards in today's world. These small cards are primarily used to store files like photos and videos in portable devices, including digital cameras, cell phones, and more.
There are three types of SD cards: the standard SD Card, miniSD, and microSD. Nowadays, the type commonly used in Android phones is the microSD.
A common issue faced by users of SD cards is their inability to be formatted. Several factors can lead to this problem. It could be due to virus attacks, aging components, accumulated dirt, or the card being locked. But there's no need to worry. Even SD cards that seem impossible to format can often be rescued!
Check the Condition of Your SD Card
Sometimes, when you try to format an SD Card, you might see a message saying "the disk is write protected." This usually means the SD Card is locked. Therefore, it's important to examine the SD Card's condition before attempting to format it.
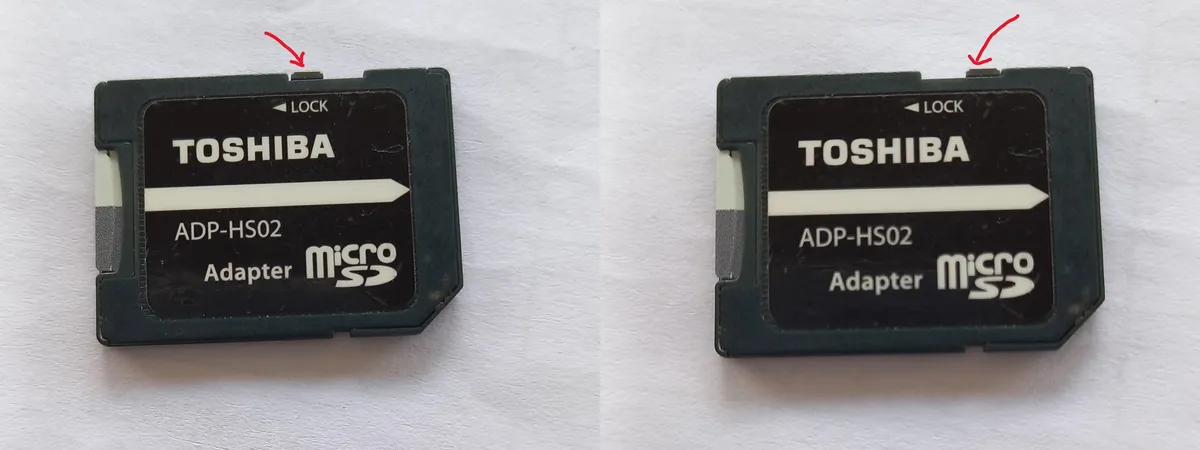
A locked SD Card is different from an unlocked one. If you find that your SD Card is locked, the first step is to unlock it. Once unlocked, try formatting it as you normally would. If this doesn't resolve the issue, consider trying the different formatting techniques outlined below.
Fixing an Unformattable SD Card
If you're struggling to format your SD card, don't be quick to discard it. There's a chance that it's not completely damaged and can be recovered. Keep in mind, formatting will erase all the data on the SD Card.
First, make sure to back up any data on the card. Once you've done that, you can try some of the methods below to format it.
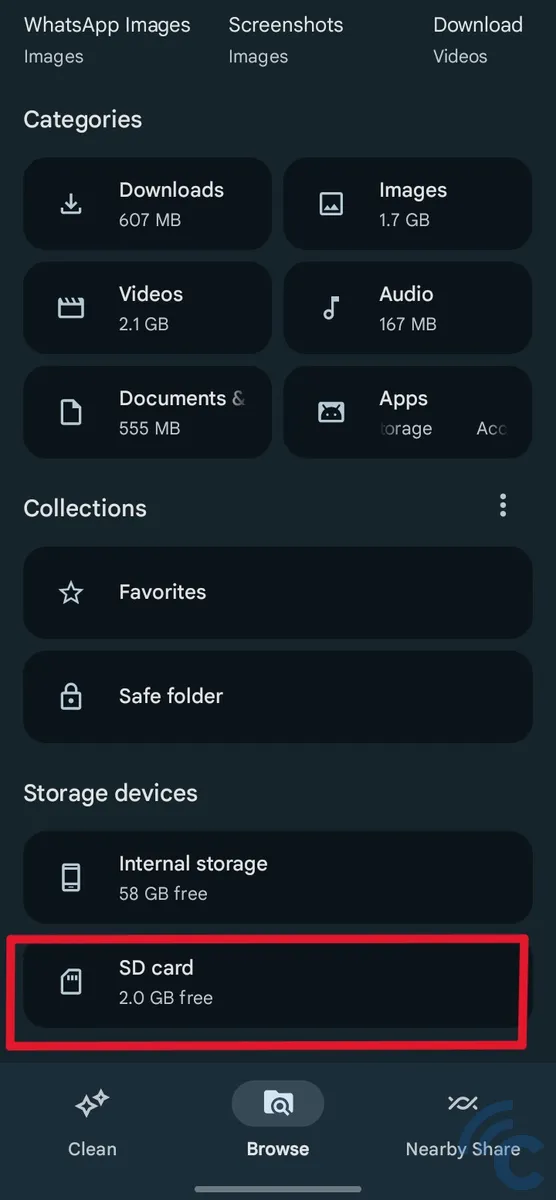
1. Use a Different Phone or Camera
It's possible that your current device is not compatible with the SD Card. In this case, you can try using another device, like a different phone or camera. If the new device can read the SD Card, back up the data immediately and then format it.
Here's a step-by-step guide using Samsung Galaxy M22 phone as an example. While these steps are a good reference, the process might vary slightly depending on your device.
- Insert the SD Card (microSD) into the phone.
- Once the phone detects the SD Card, open the file manager app. On Samsung devices, this app is usually called "My Files".
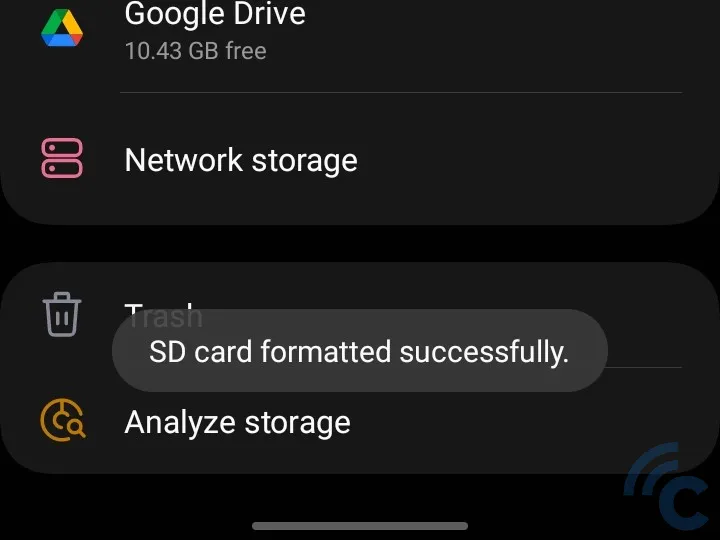
- Start by locating "SD Card" in the app.
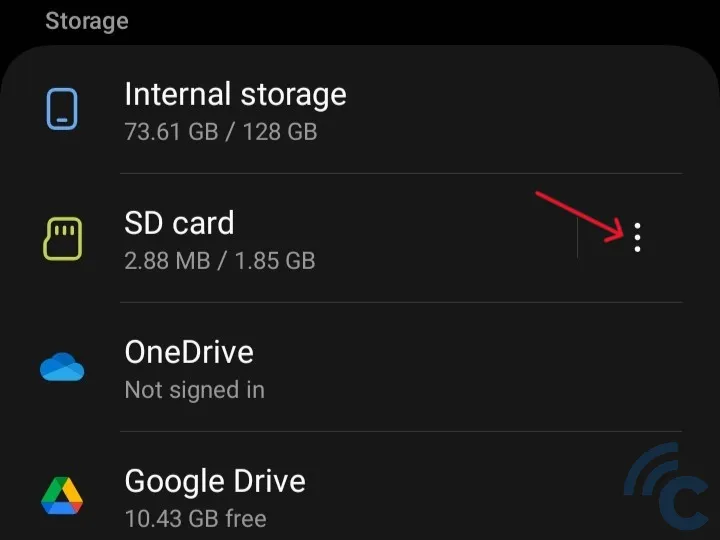
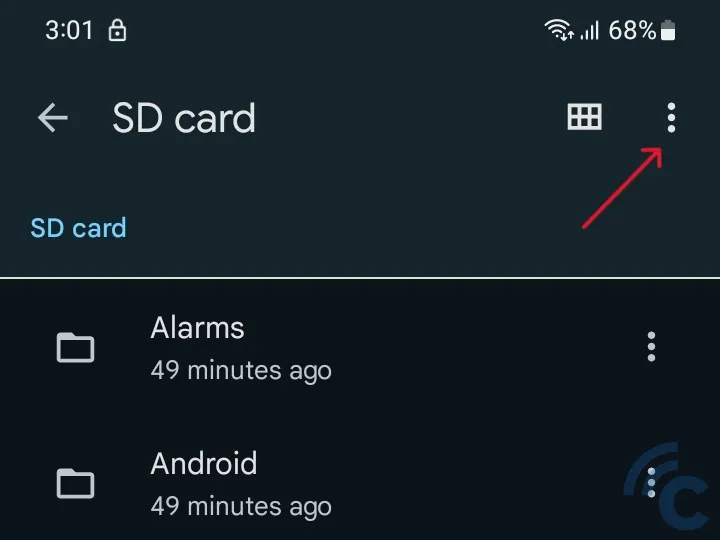
- Tap on the three-dot button next to the SD Card.
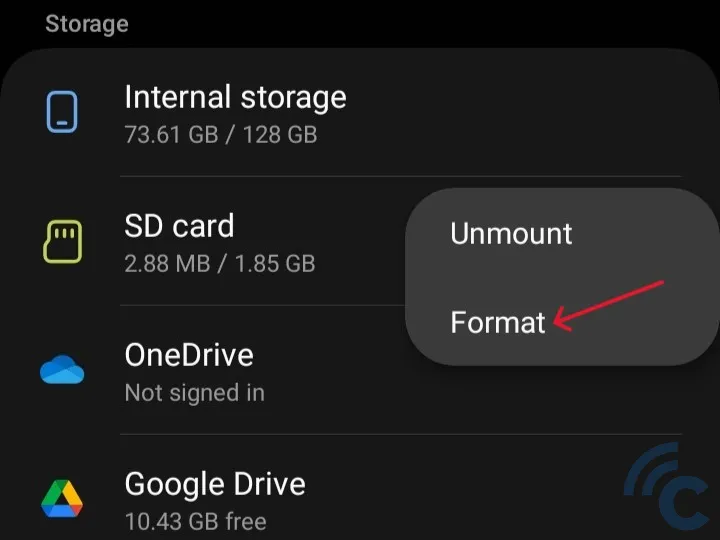
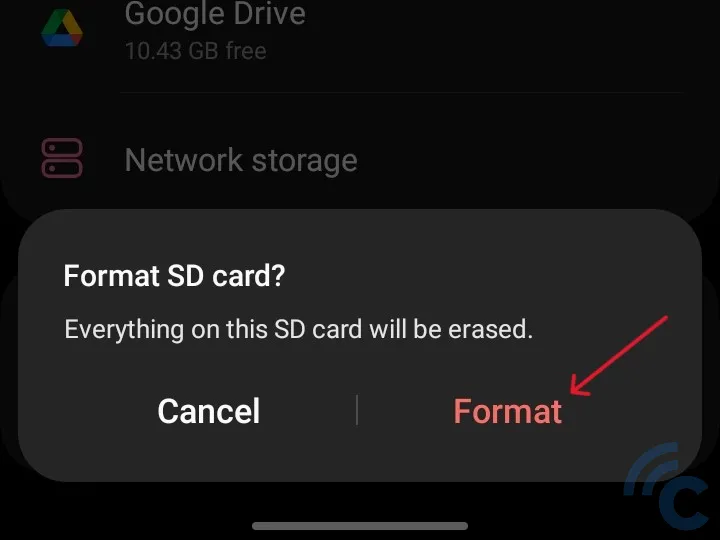
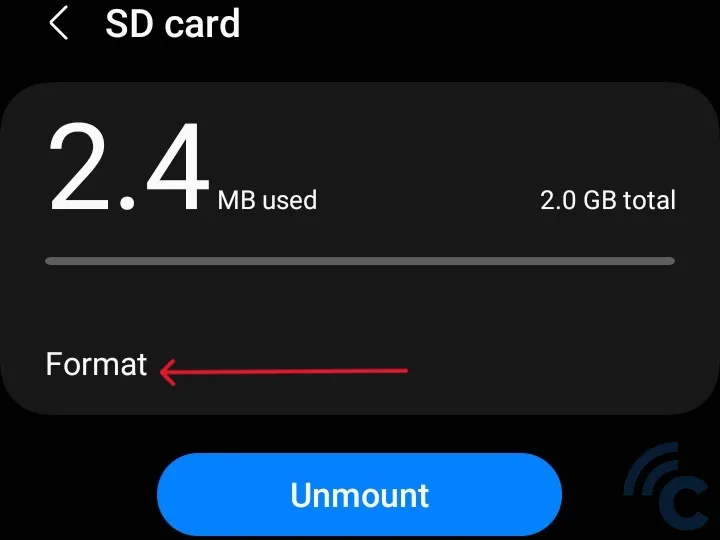
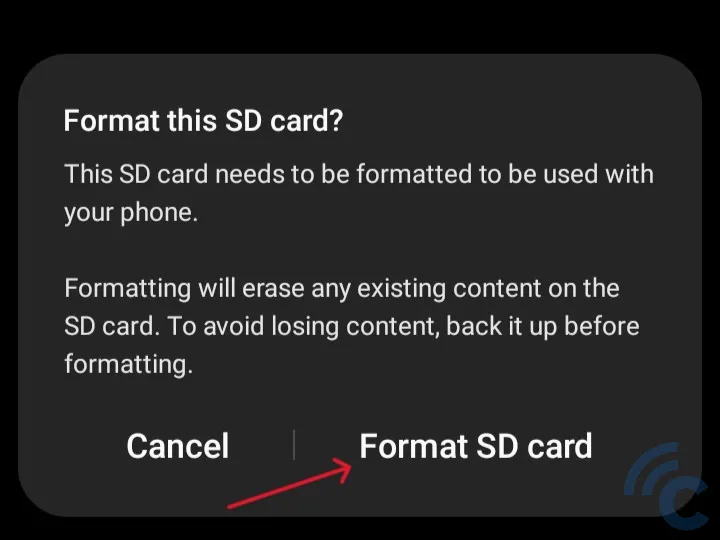
- Choose "Format" and wait for the process to complete.
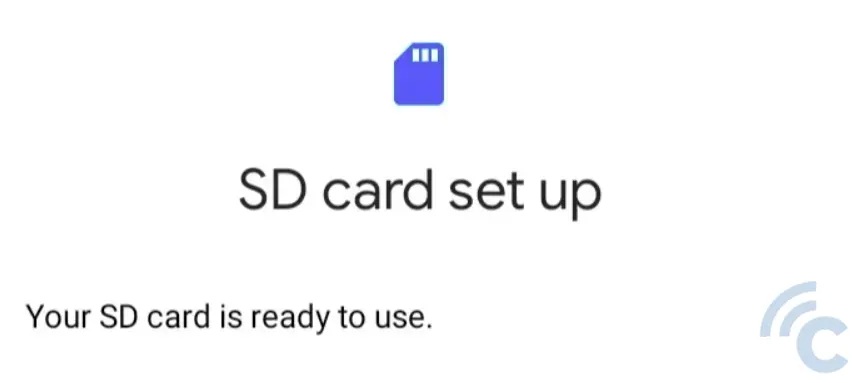
- Formatting process should be successful.
2. Use Android Apps
Besides using your phone's built-in file manager, you can format your SD Card with third-party apps. In this guide, we'll use the 'Files by Google' app, which you can download from Play Store. Here's how to format your SD Card using the 'Files by Google' app:
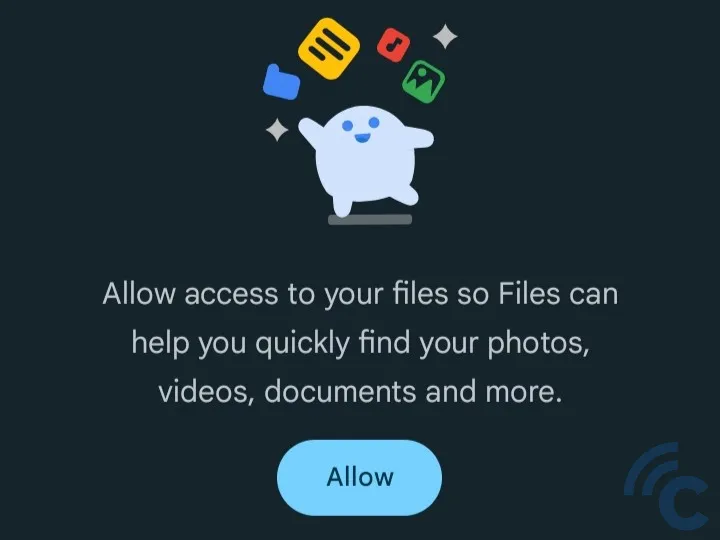
- Open the 'Files' app after installing it.
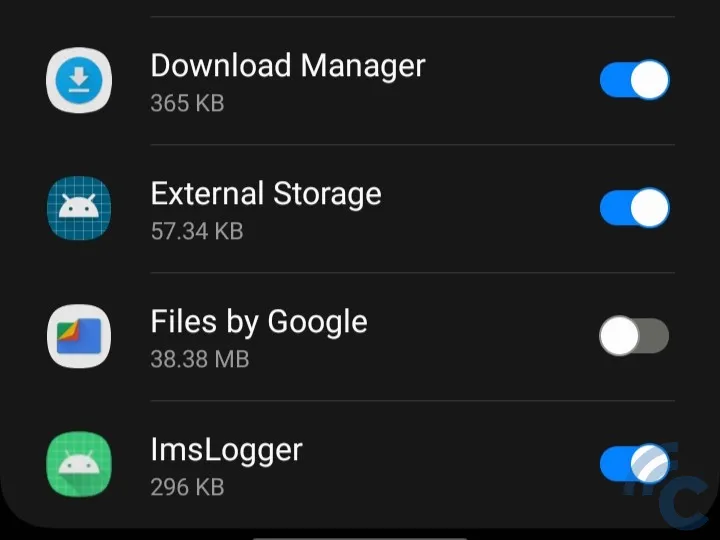
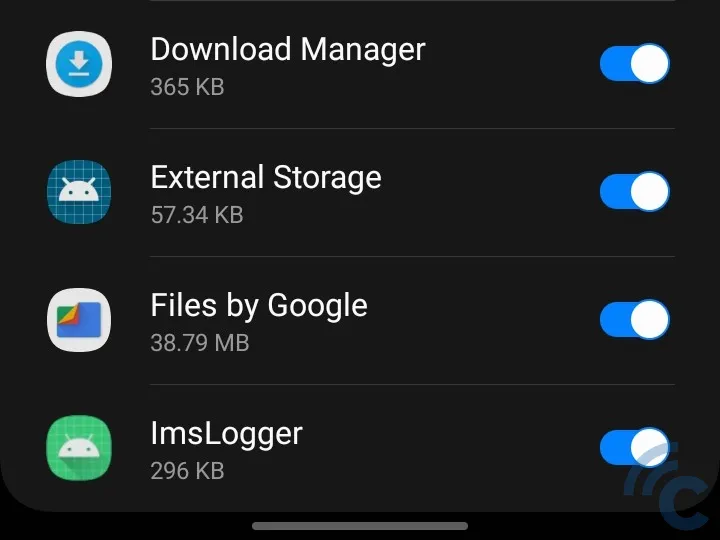
- The app will ask for permission to access files on your phone. To grant access, click the "Allow" button and then toggle the switch to the right.
- Once in the app, scroll down to find "SD Card".
- Tap on the SD Card.
- Next, click the three dots button next to the SD Card.
- Choose "Storage Settings".
- Tap "Format" and then select "Format SD card".
- Wait for a short while as the formatting takes place.
- Once these steps are completed, your SD Card should be successfully formatted.
3. Use Windows Explorer

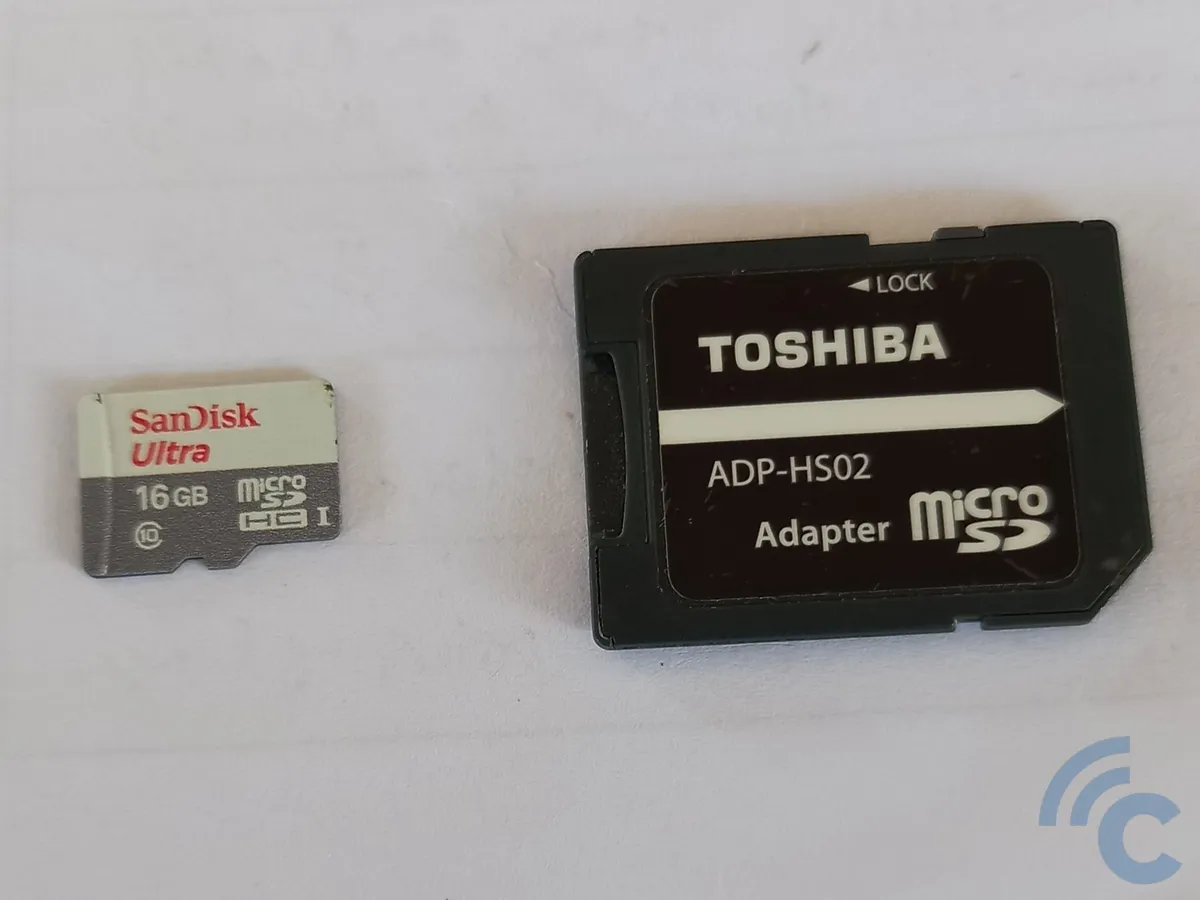
If you're having difficulty formatting your SD card using your phone, you can use a desktop PC or a Windows laptop. Many laptops come with a built-in SD Card or microSD slot. If yours doesn't, you'll need a card reader that connects via USB cable or adapter.
In this tutorial, we're using an SD Card to microSD adapter. If your computer has an SD Card slot, an SD Card adapter will work as well. Follow these steps:
- Insert the microSD into the SD Card adapter.
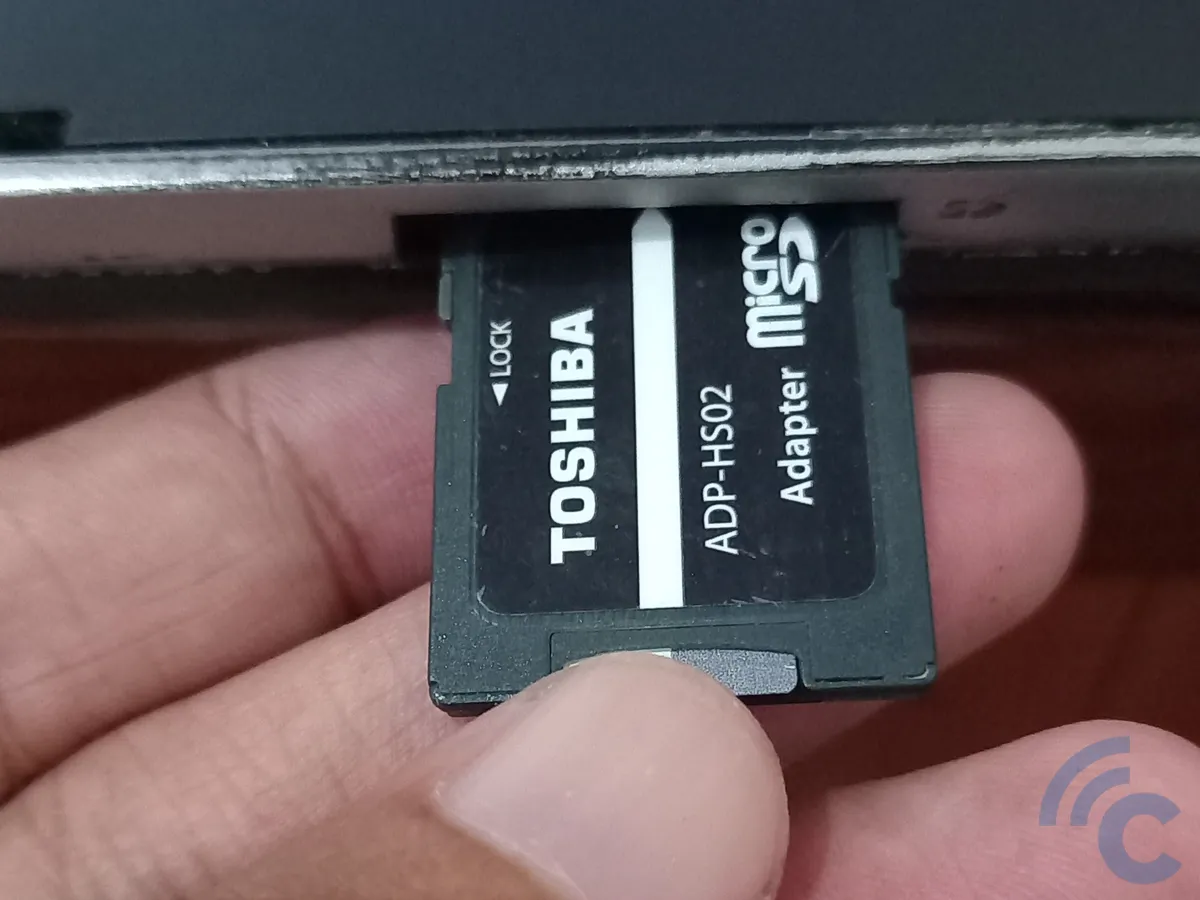
- Then, plug the adapter with the microSD into your laptop's SD Card slot.
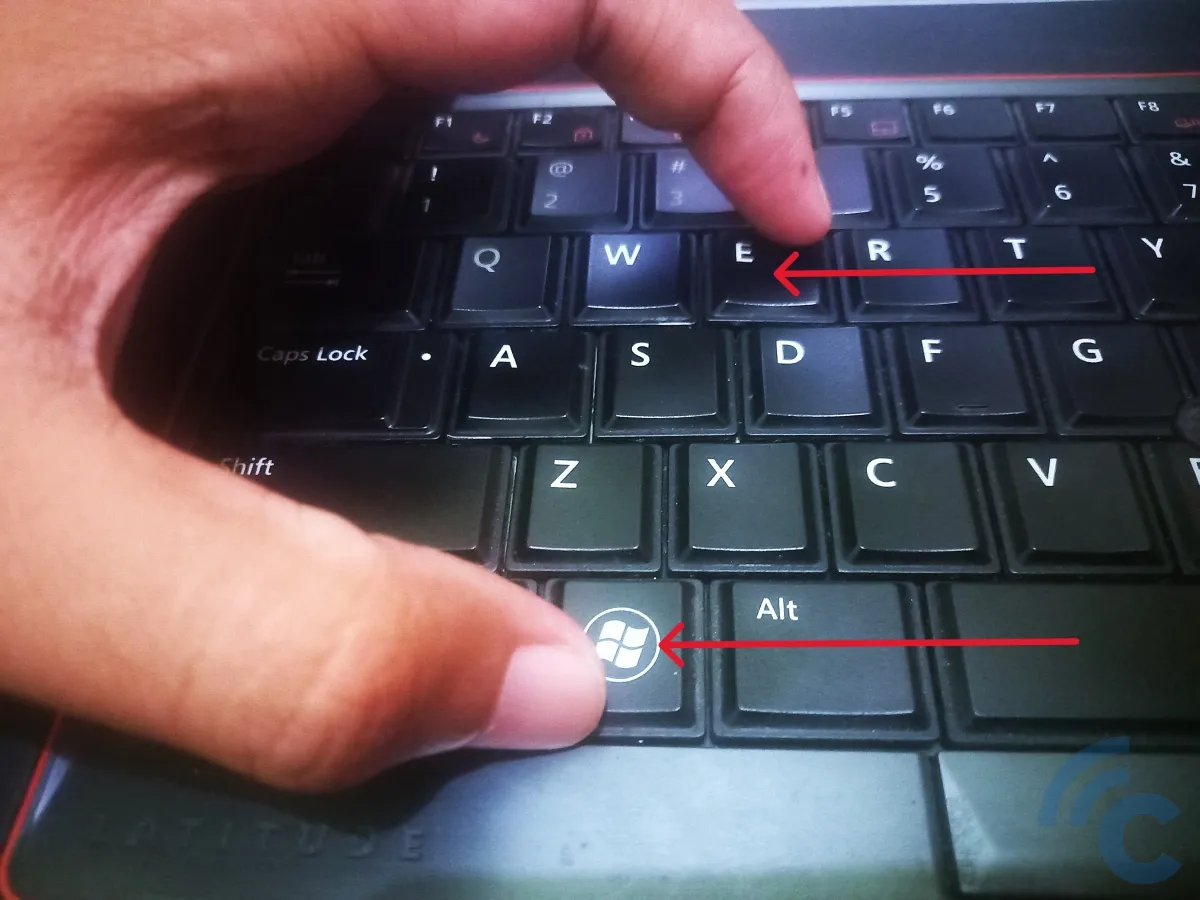
- Once your system recognizes the SD Card, open Windows Explorer by pressing the Windows + E keys.
- Locate the SD Card in Windows Explorer.
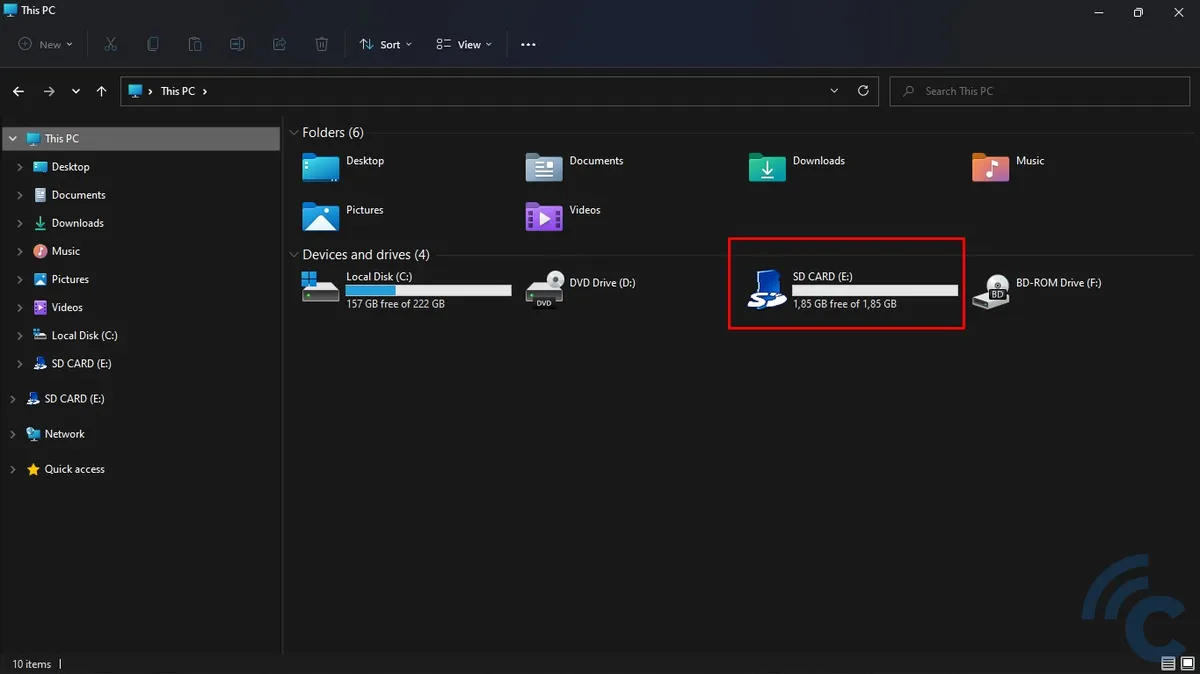
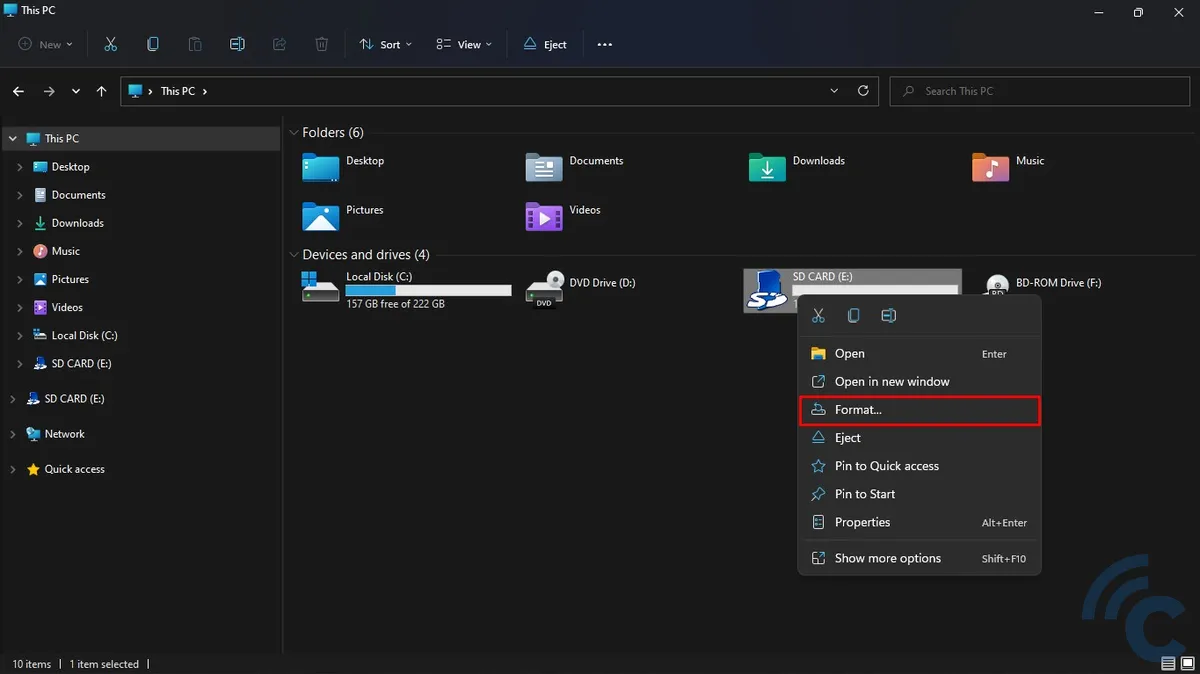
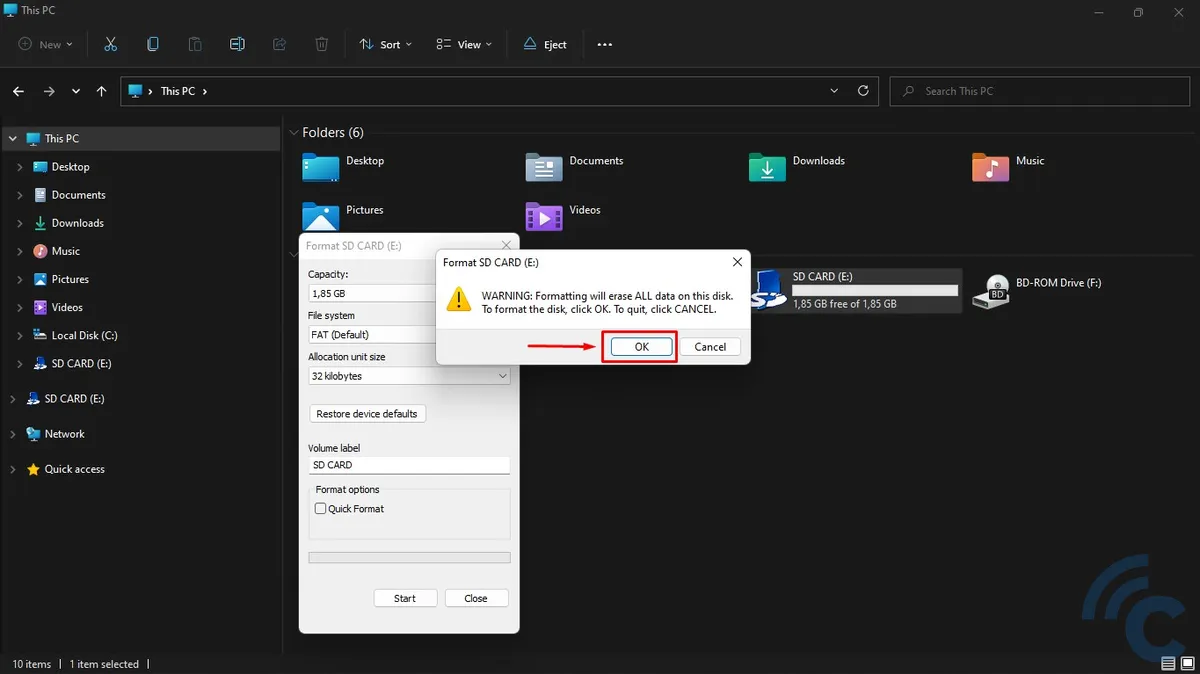
- Right-click on the SD Card and select "Format".
- Set the file system of the SD Card to the default setting, which in this example is "FAT".
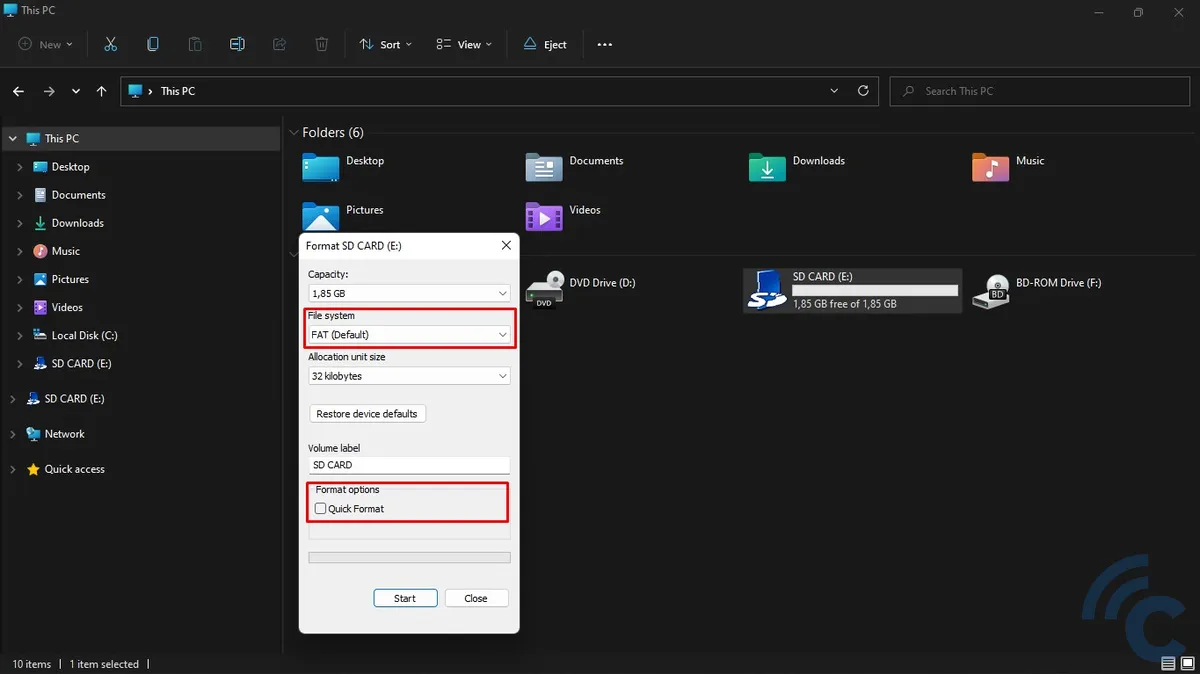
- You have the option to check "Quick Format". But for a thorough formatting, which can also help improve the SD Card's condition, it's better to leave it unchecked. Note that this will take more time.
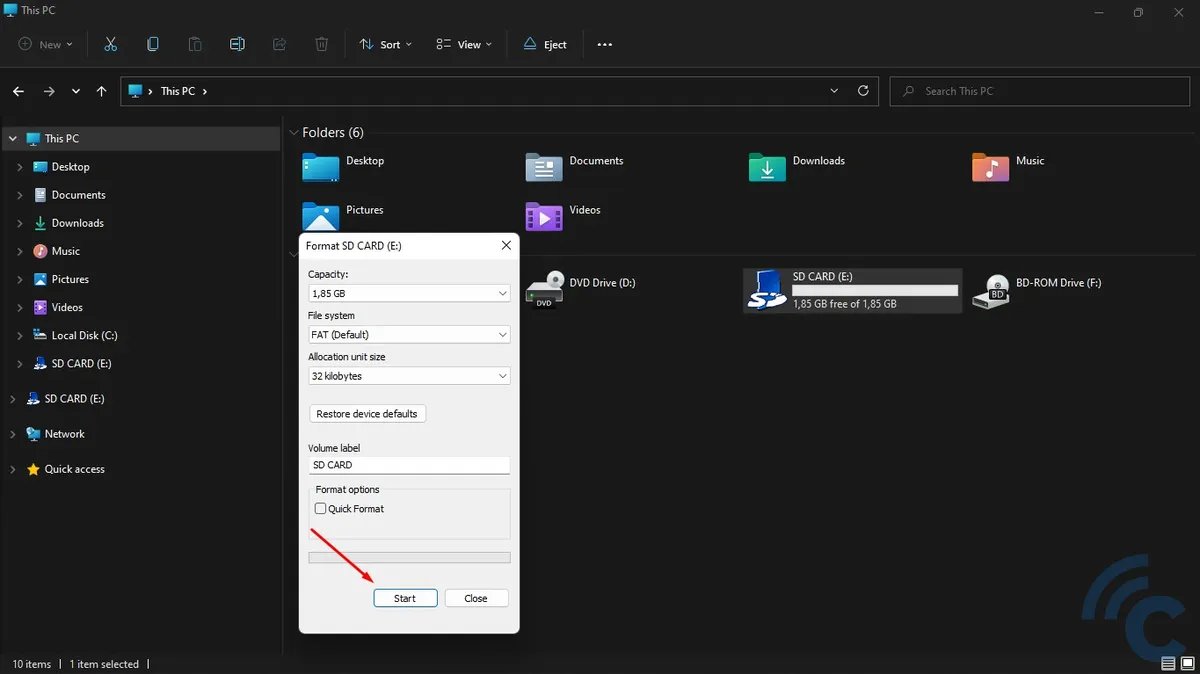
- Click "Start" and then "OK", and wait for the formatting to complete.
- Formatting SD Card is succesfully done.
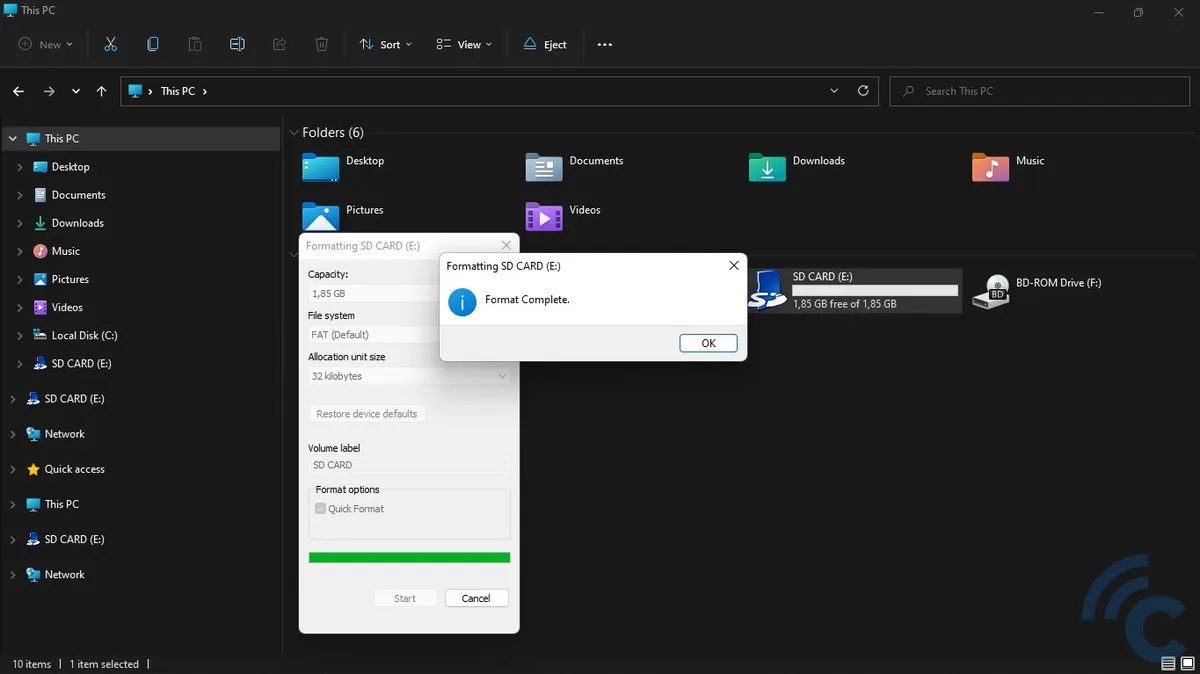
Once the formatting is done, all the data on the SD card will be erased, and the card will be as good as new.
4. Use CMD Commands
Another method to format an SD card is through CMD (command prompt) commands. You'll need the same equipment: an adapter or a card reader, and a Windows computer.
This method is a bit more involved but can be useful, especially if your SD Card is locked with a read-only attribute. This method will remove that attribute before starting the formatting process. Here's how to do it:
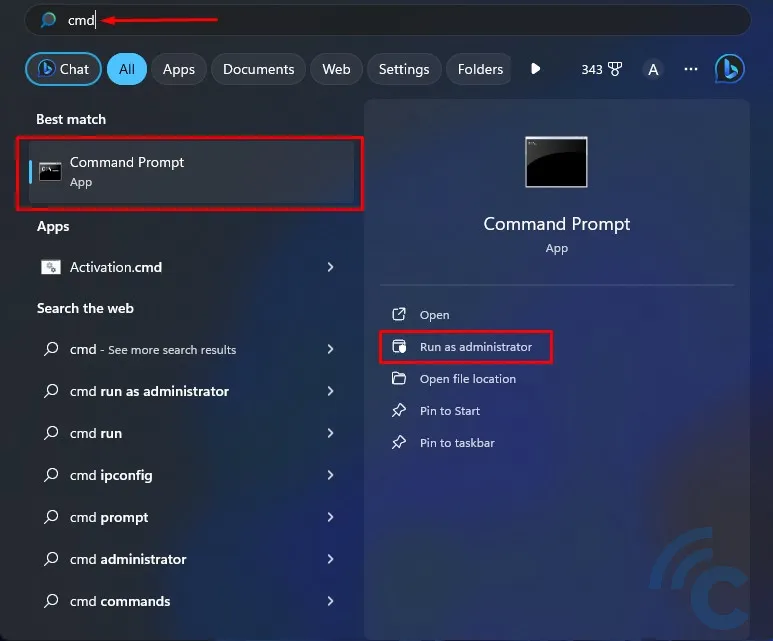
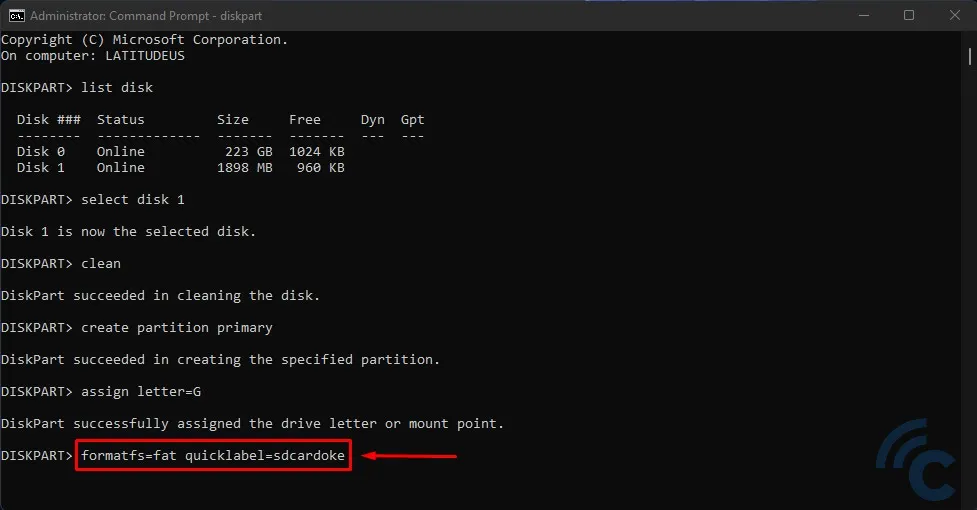
- Click "Start" on your computer, then type "cmd".
- When the "Command Prompt" menu appears, click "Run as administrator".
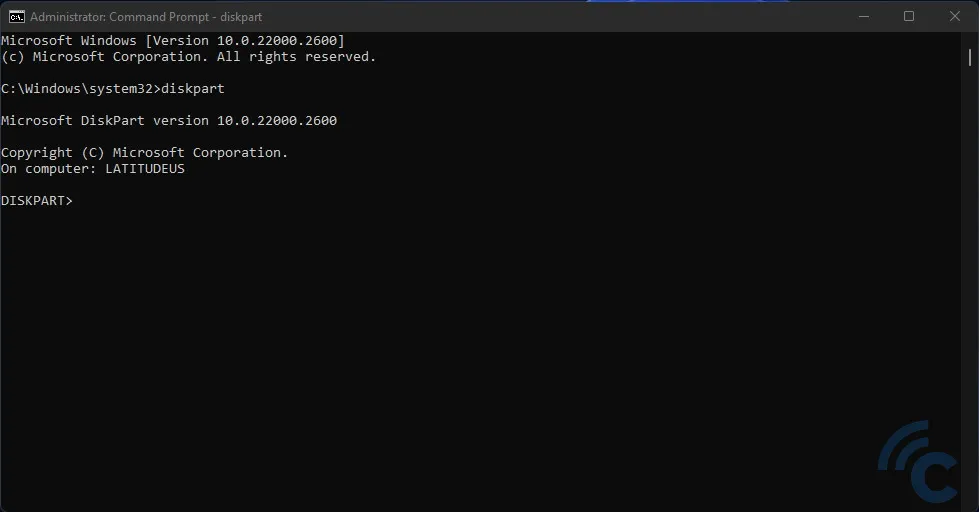
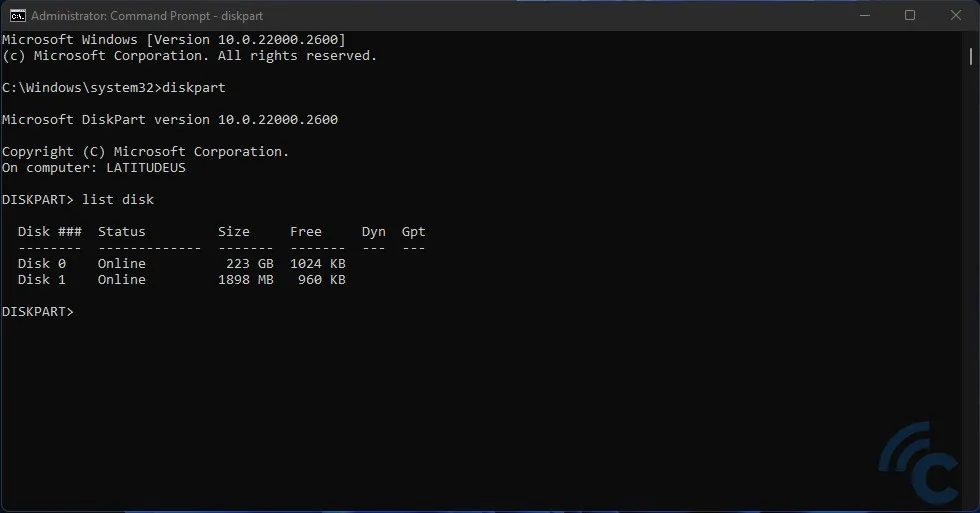
- Type "diskpart" (without quotes) and press Enter.
- Next, type "list disk" to see which number is assigned to your SD Card. For example, in this guide, the 1898 MB SD Card is "Disk 1".
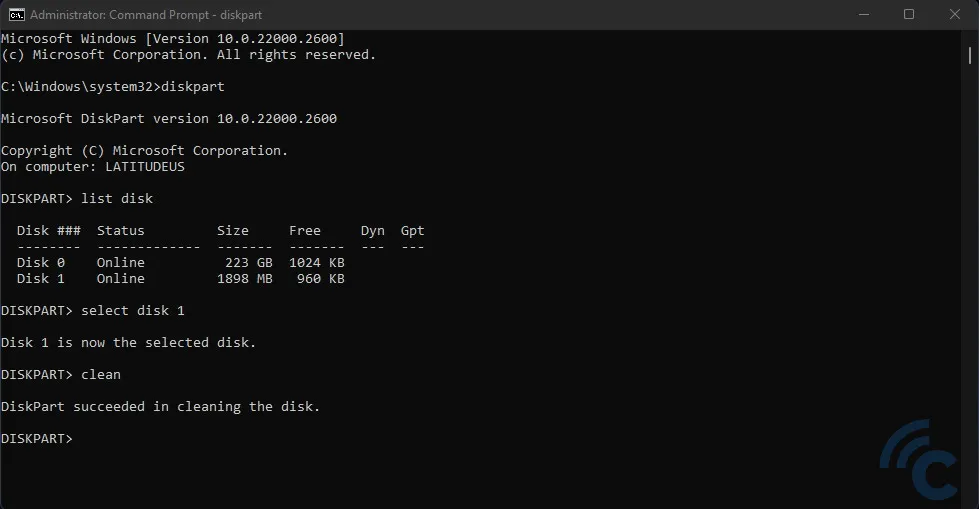
- Type "select disk 1" (or the number corresponding to your SD Card) and press Enter.

- Enter the command "clean" and press Enter. This will delete all partitions on the SD Card.
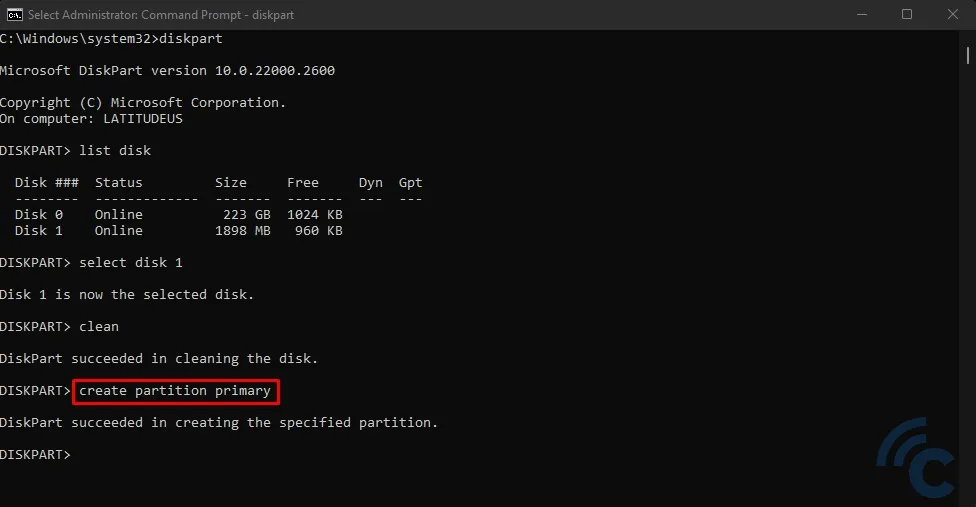
- To create a new partition, type "create partition primary" and press Enter.
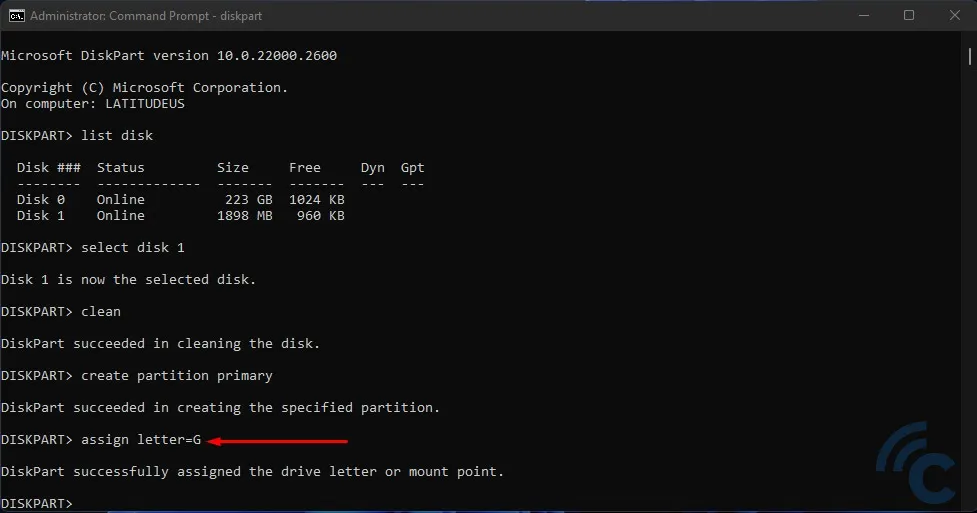
- Assign a drive letter by typing "assign letter=G" (or any letter you prefer), and press Enter. Your SD card will now be recognized as drive G.
- For formatting, type "format fs=fat quick label=sdcardoke" and press Enter. You can change the label to anything you like.
- Wait for the process to complete.
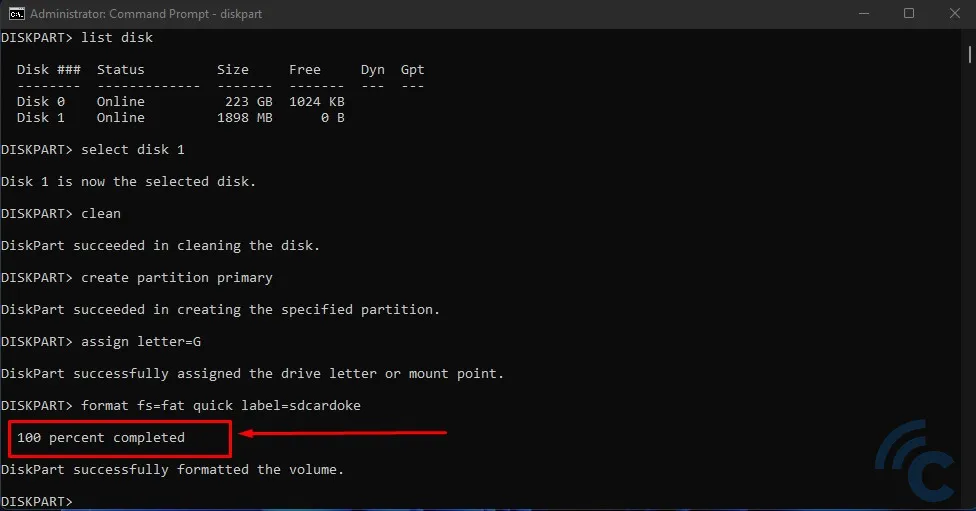
Note that formatting with the FAT system might not always work. Some computers use different systems like NTFS or FAT32. Make sure to match the file system to what your computer uses.
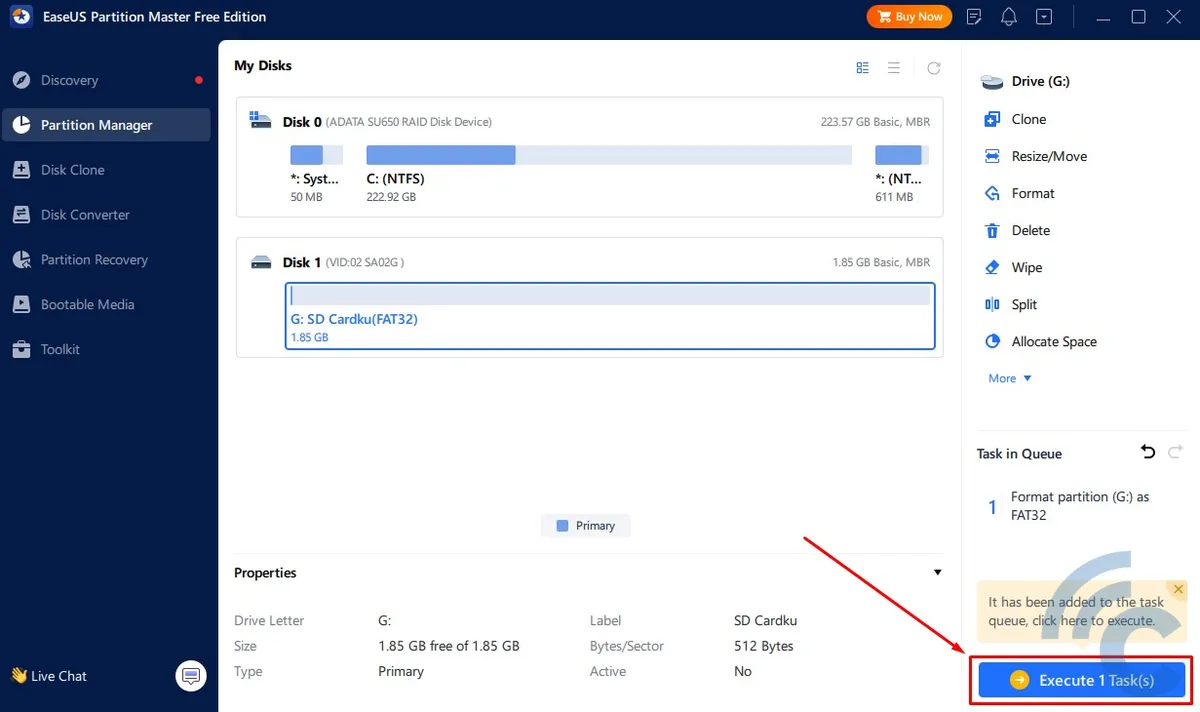
5. Use EaseUS Partition Master
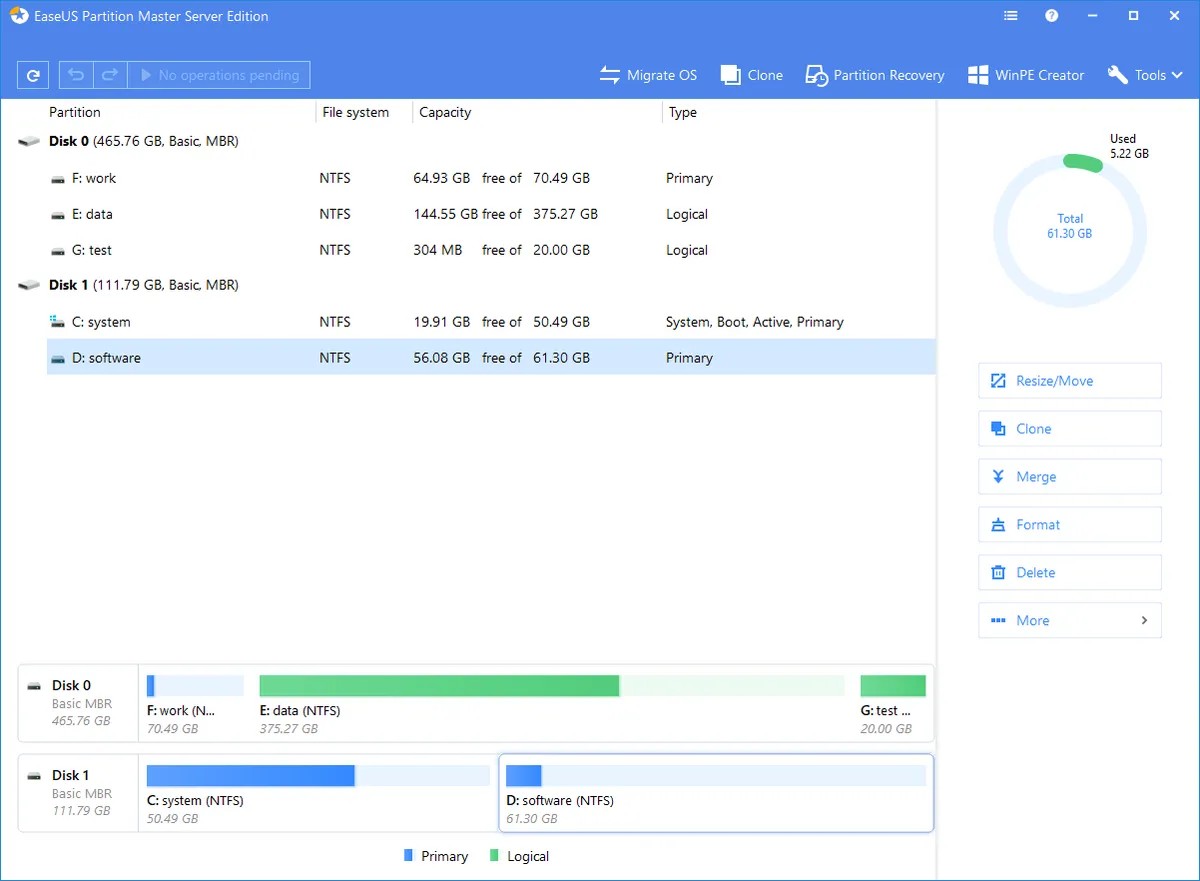
When CMD commands don't work for formatting your SD card, another option is to use third-party software. One such program is EaseUS Partition Master, which we'll use in this tutorial.
This application is free, and you can download it from the official EaseUS website. After downloading and installing, here's what to do:
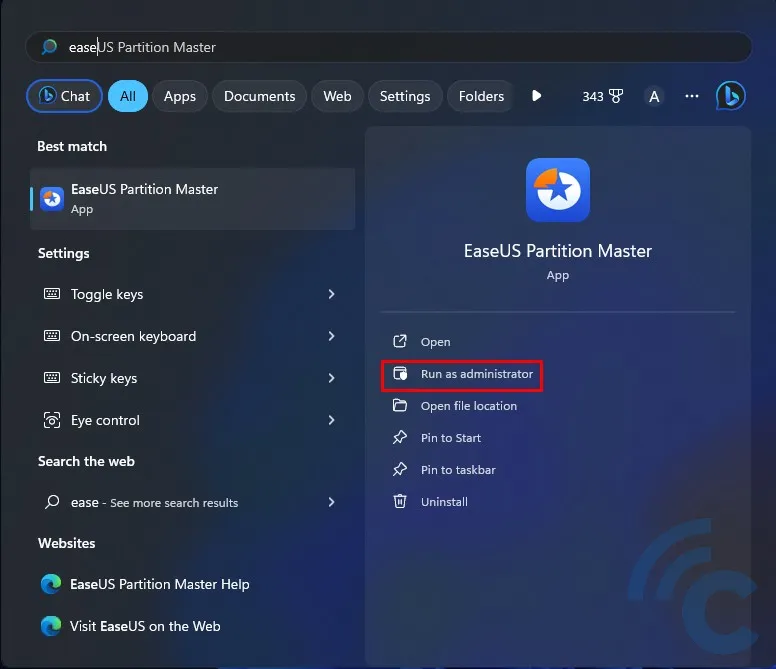
- Open EaseUS Partition Master and select "Run as administrator".
- Look for your SD Card, which in this example is labeled "Disk 1".
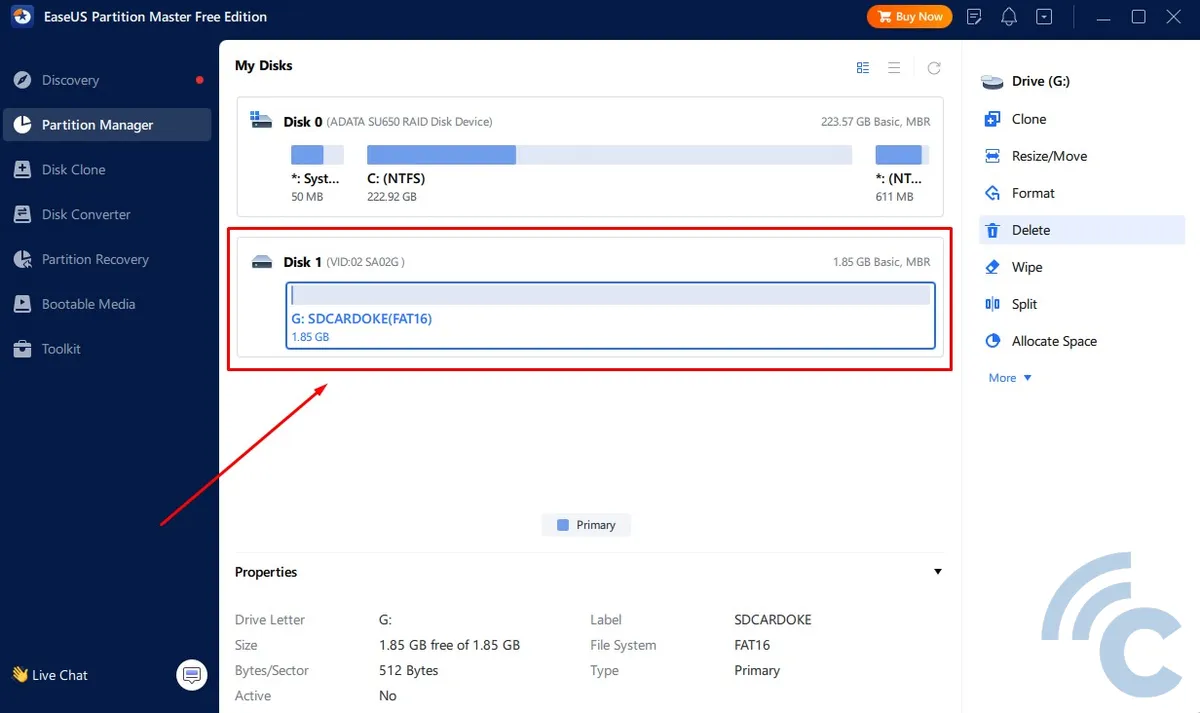
- Right-click on "Disk 1" and choose "Format".
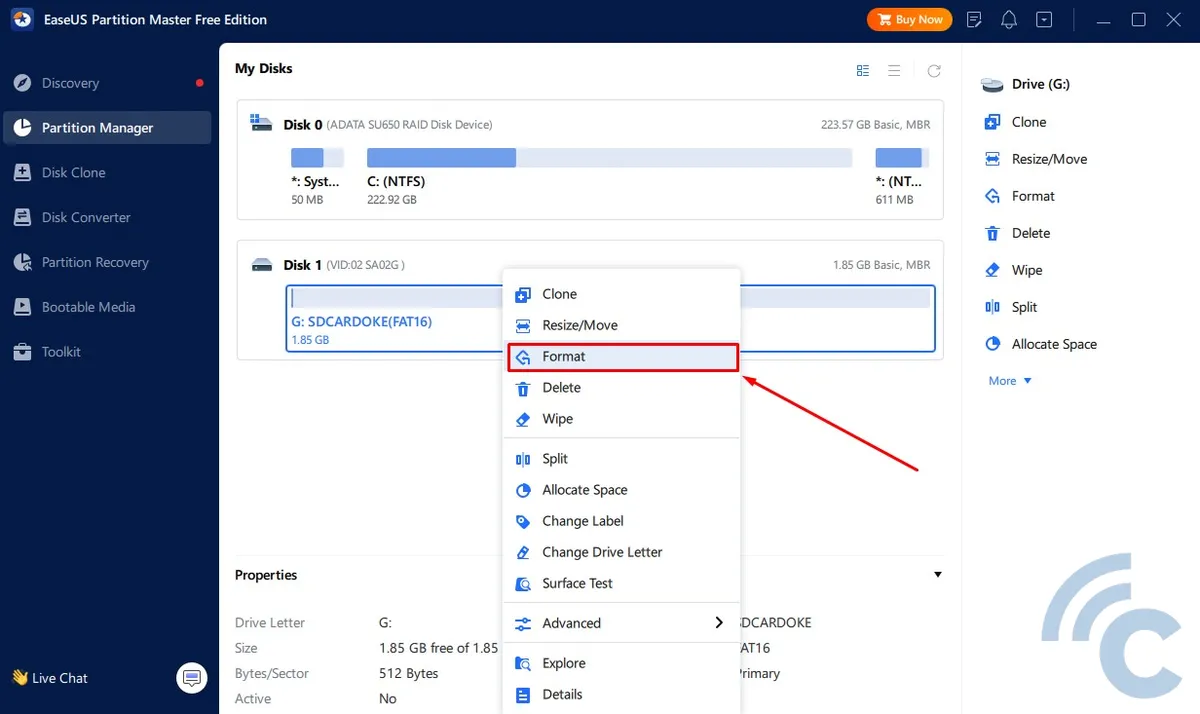
- You'll need to specify the "Partition label", "File system", and "Cluster size".
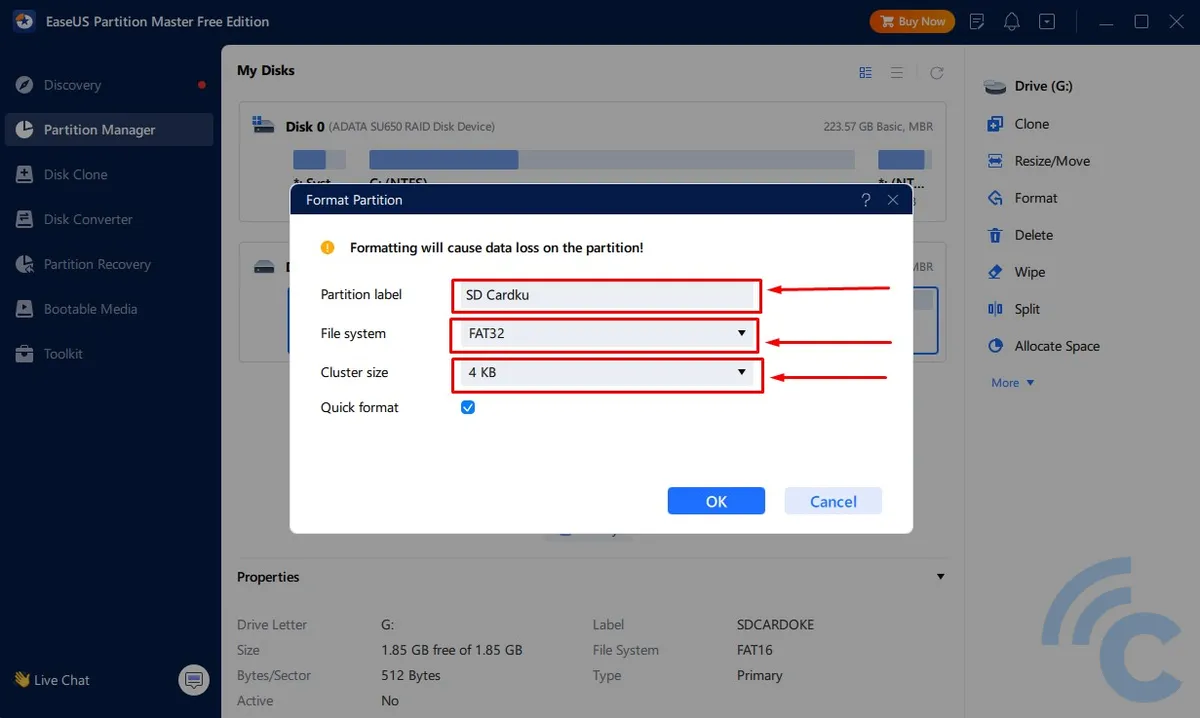
- For the File system, choose "FAT 32" or "exFAT" since SD Cards are usually for storage, not for installing applications.
- In Cluster size, pick "4K" for regular storage needs. Choose "8K" or "16K" if you plan to store high-resolution videos.
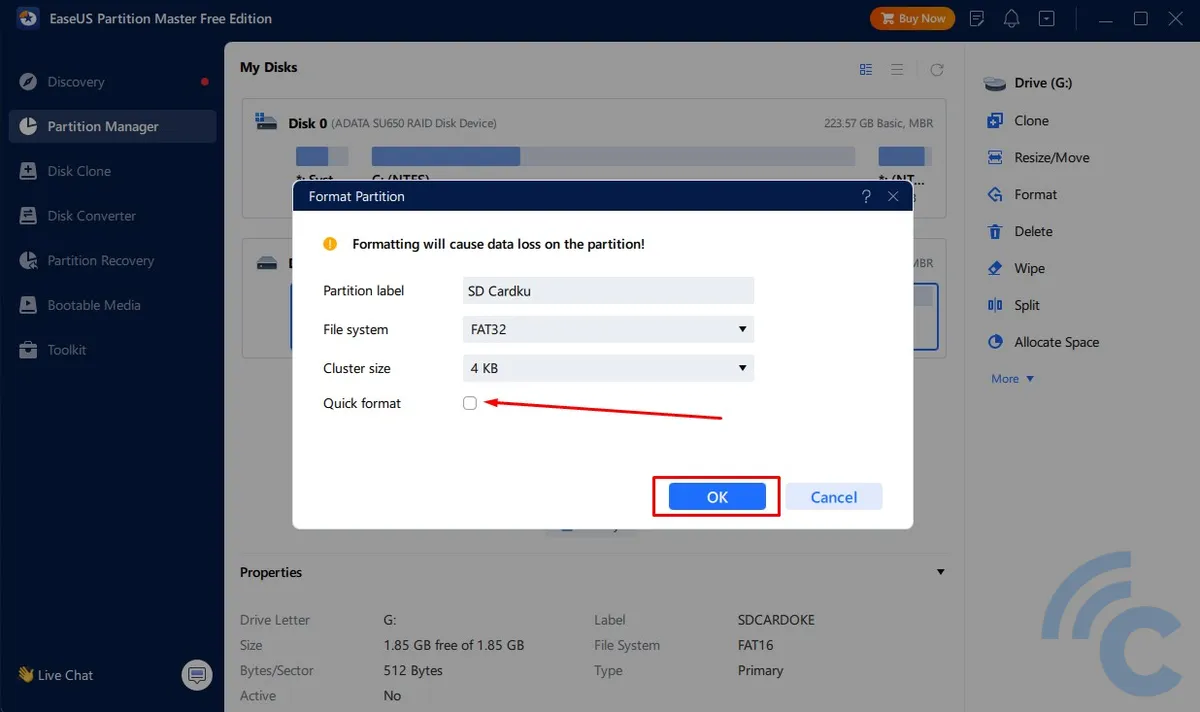
- If you want a thorough format, uncheck "Quick format". Then click the "OK" and "Yes" buttons.
- To start the formatting, click "Execute 1 Task" at the bottom right corner, followed by "Apply".
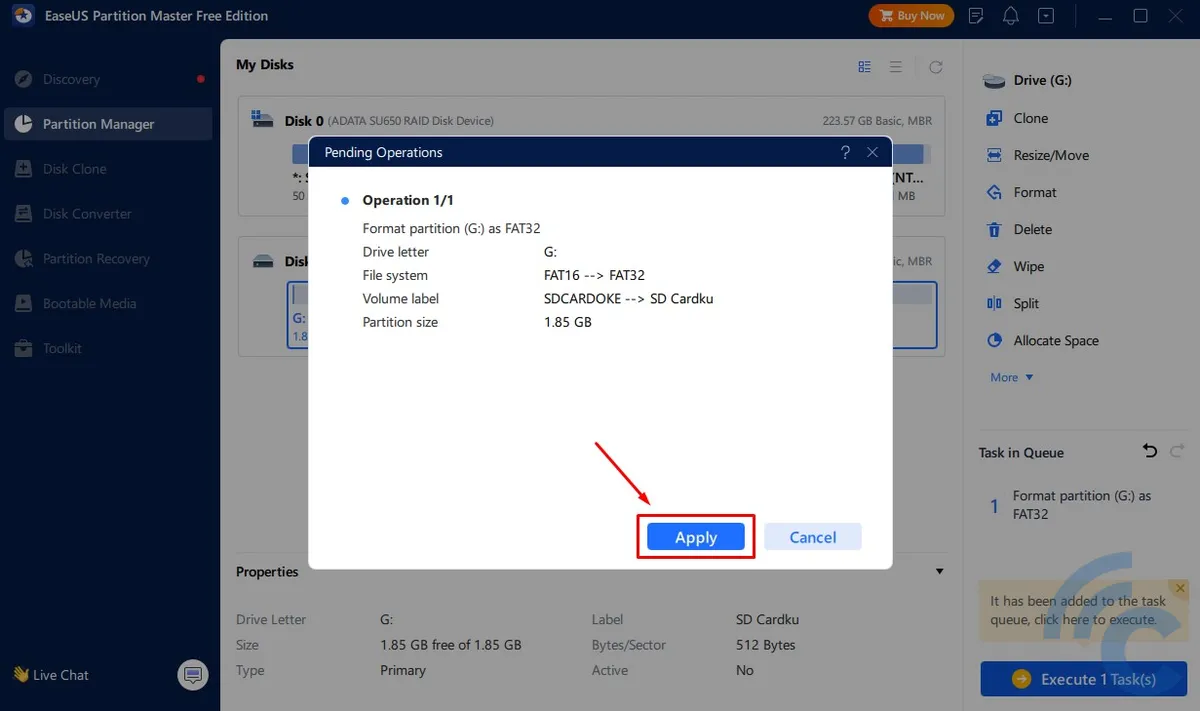
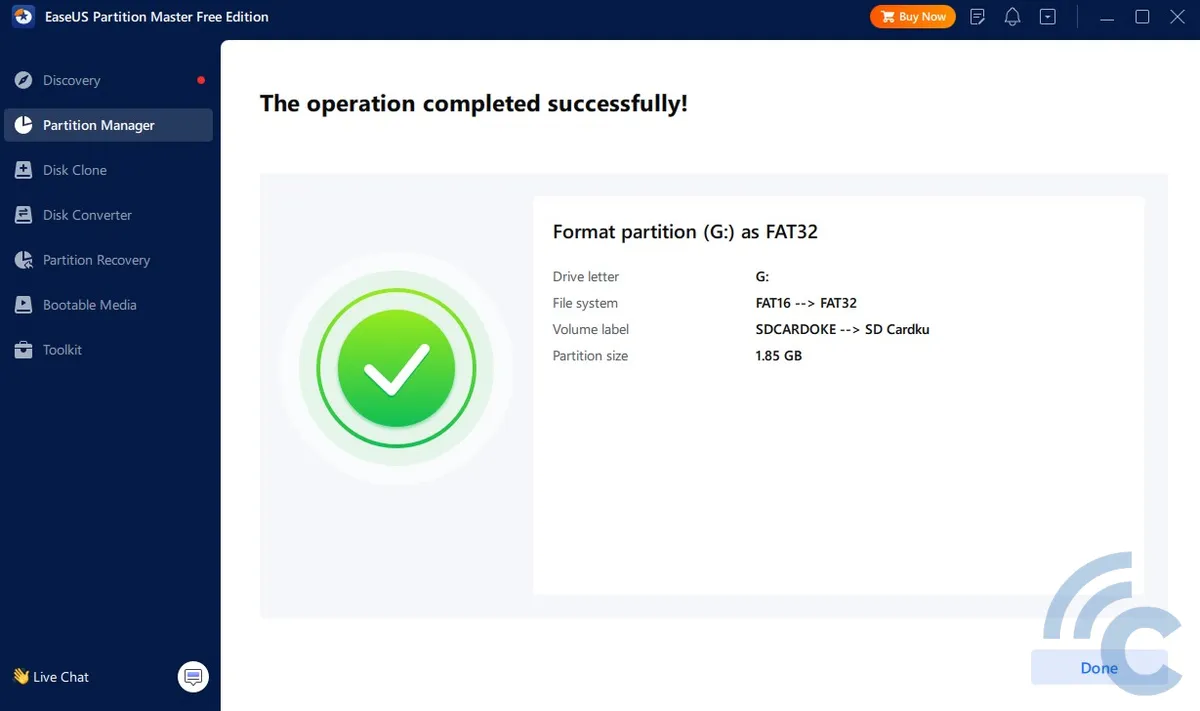
- Wait briefly for the formatting to finish.

- Once the process is complete, click "Done" and you can close the application.
6. Formatting an SD Card with Your MacBook
Formatting an SD card isn't just for Android devices and Windows PCs – MacBooks can do it too. If you have a MacBook Pro 14 or 16, you're in luck because they come with an SD card slot.
For formatting a microSD card, you'll need an SD Card adapter. But if you're using a MacBook Air, you'll require a card reader and a USB C cable. Here's how to format an SD Card on a MacBook:
- Connect the SD Card to your MacBook.
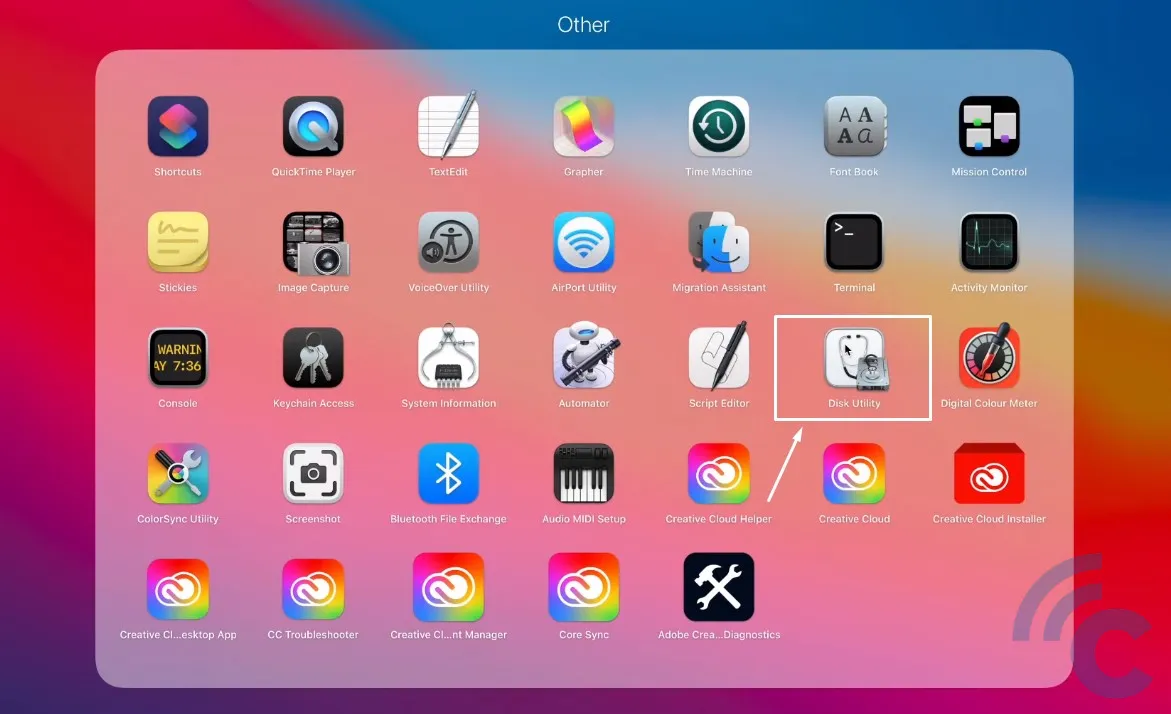
- Once the MacBook recognizes the SD Card, open Launchpad.
- Look for the "Disk Utility" application in the Other folder, or search for "Disk Utility" in the search bar.
 Source: GuideRealm
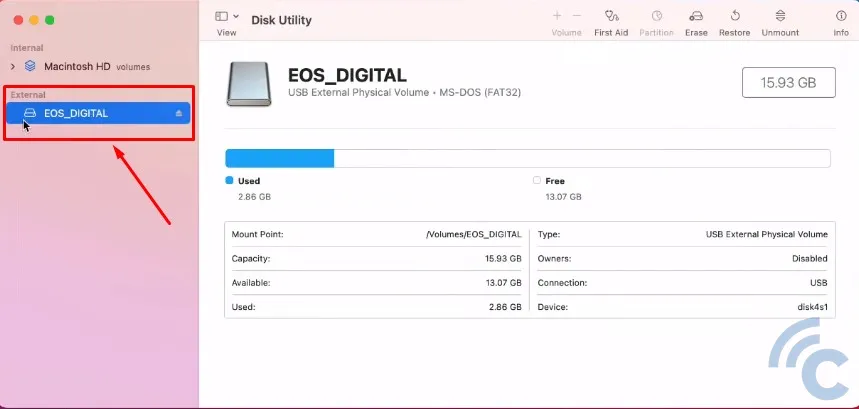
- In Disk Utility, click on your SD Card's name listed under the External section.
 Source: GuideRealm
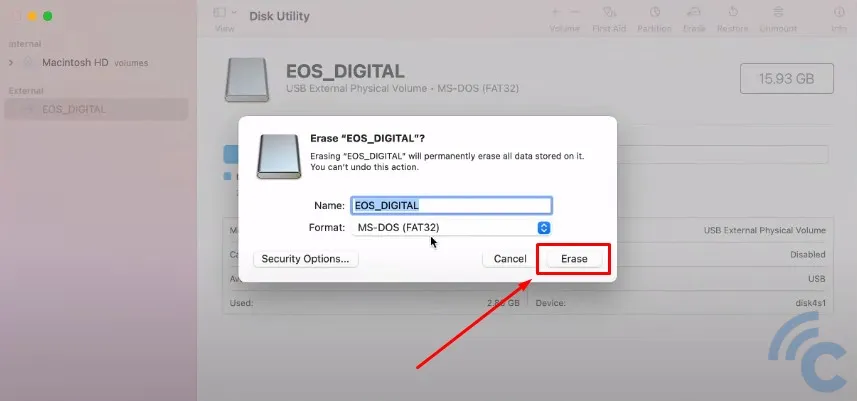
- Click the "Erase" button at the top of the window.
 Source: GuideRealm
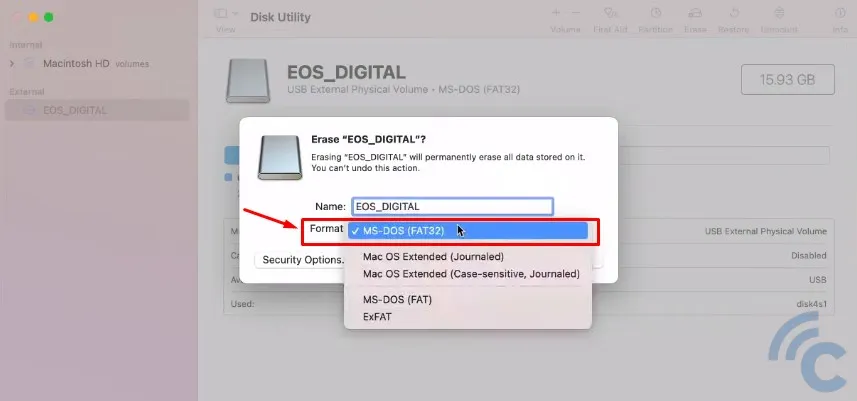
- Enter the name you want for the SD Card and choose the format (file system)
 Source: GuideRealm
- You can select MS-DOS (FAT32), which is usually the default, or ExFAT. Both formats are compatible with Windows and Mac computers.
- Press the "Erase" button and wait for the formatting to complete.
 Source: GuideRealm
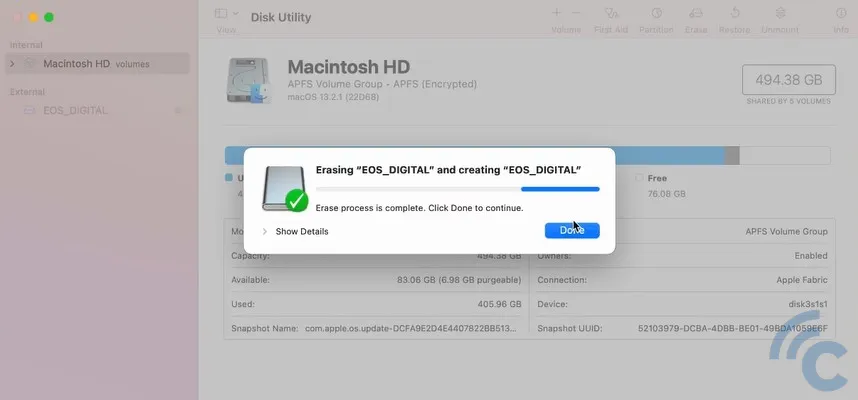 Source: GuideRealm
And that's how you can format an SD card that won't otherwise format. If you're still unable to delete data with these methods, try cleaning the SD card gently and repeating the process.
Do you know any other ways to fix this issue? Feel free to share your experiences in the comments section!