
How to Record Windows 11 Screen on Laptop or PC
The screen recording feature captures on-screen actions and converts them into a video format. Typically, this feature is used for activities such as lectures, webinars, tutorial creation, and even gaming sessions.
In Windows 11, this feature is already available. However, many Windows 11 users may not be familiar with how to utilize it. Let's explore how to record screen in Windows 11, keeping in mind that this method can also be applied on Windows 10.
1. Screen Recording with Xbox Game Bar
One of the most commonly used methods for screen recording is using the Xbox Game Bar feature, which is integrated into Windows 11 itself. One of the major advantages of the Xbox Game Bar is the customizable recording resolution.
However, please remember that higher resolutions result in larger video file sizes. This feature offers a level of security, preventing screen recording on the Windows desktop or File Explorer. Also, this feature is relatively easy and quick to use. However, before getting started, you must first enable it via the Settings menu. For a more detailed guide, please refer to the steps below.
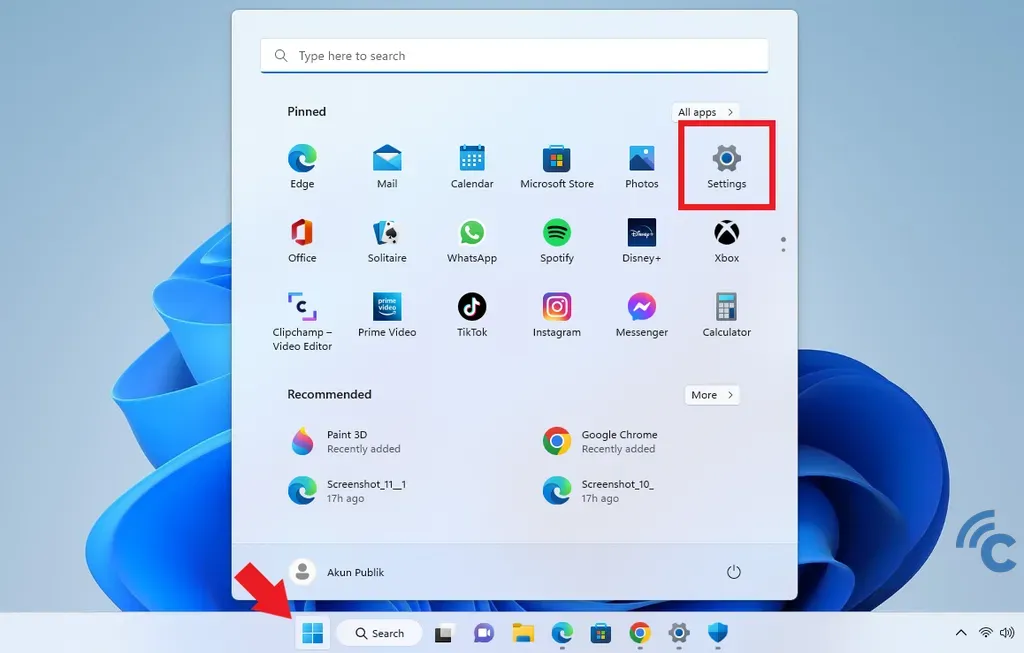
- To start, access "Settings" from the "Start/Windows" menu on the Taskbar.
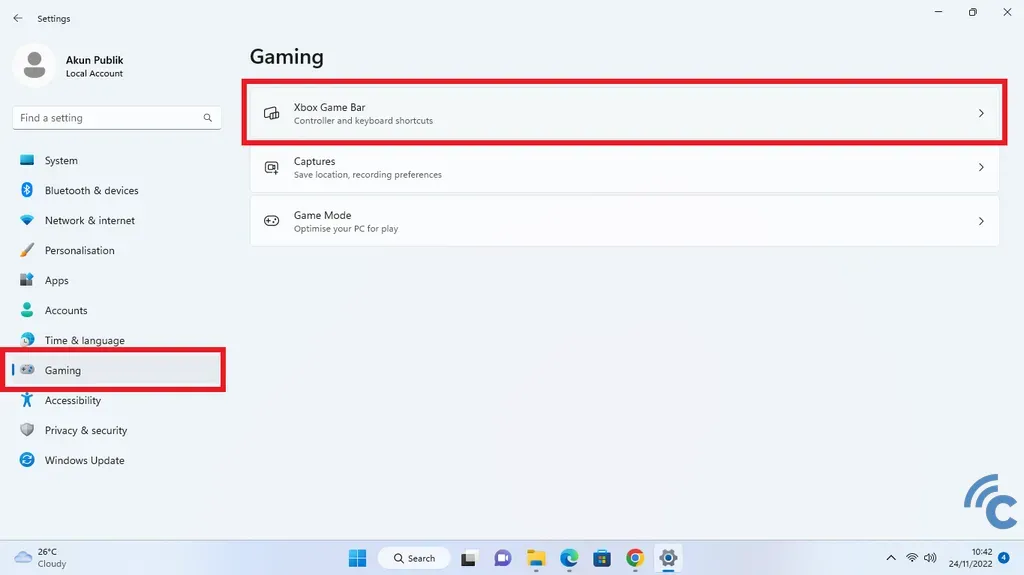
- Next, open the "Gaming" menu and proceed to the "Xbox Game Bar" section.
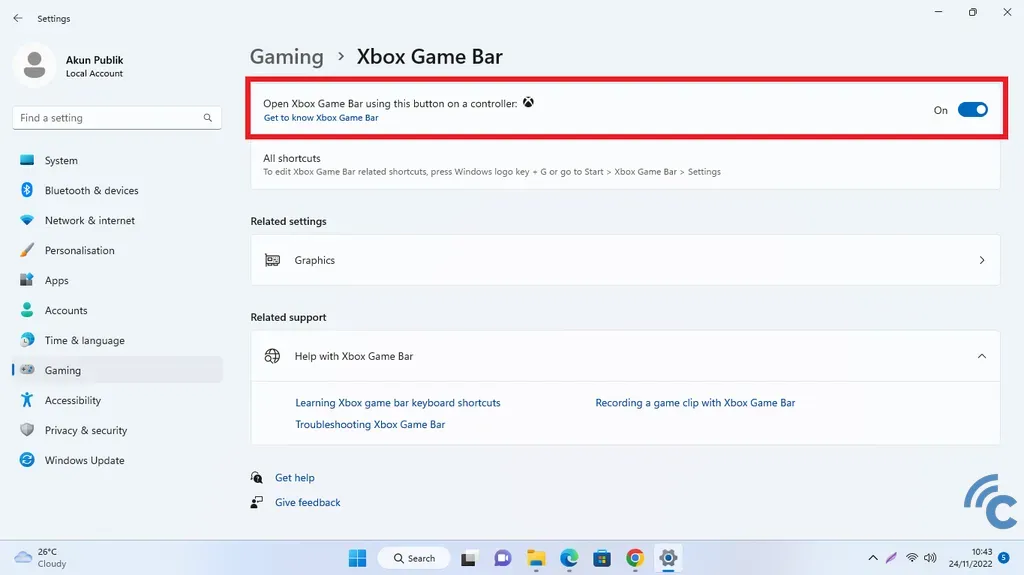
- Look for the top line that says "Open Xbox Game Bar using this button on the controller." You will find a switch on the right.
- Switch it to the "On" position by clicking on it until it turns blue.
- Now, the Xbox Game Bar on your PC or laptop is active and ready to use.
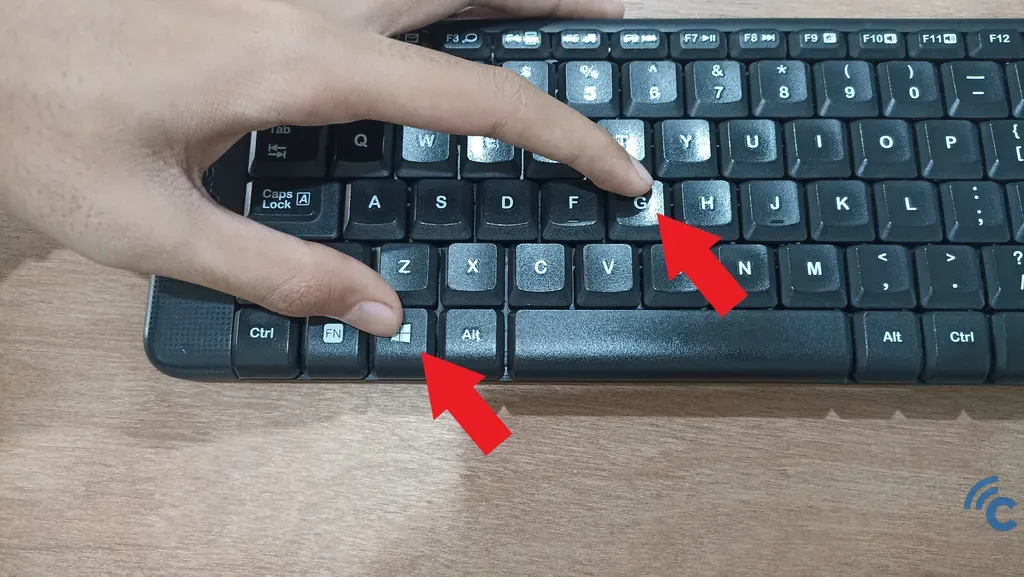
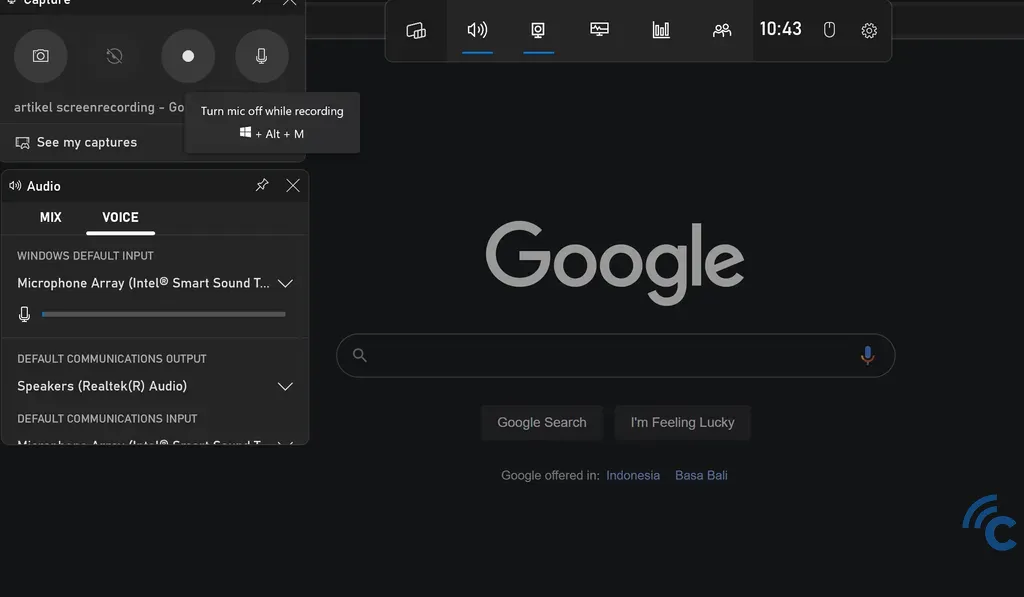
- To quickly start this feature, use the keyboard shortcut keys.
- Press "Windows + G" to access it quickly.
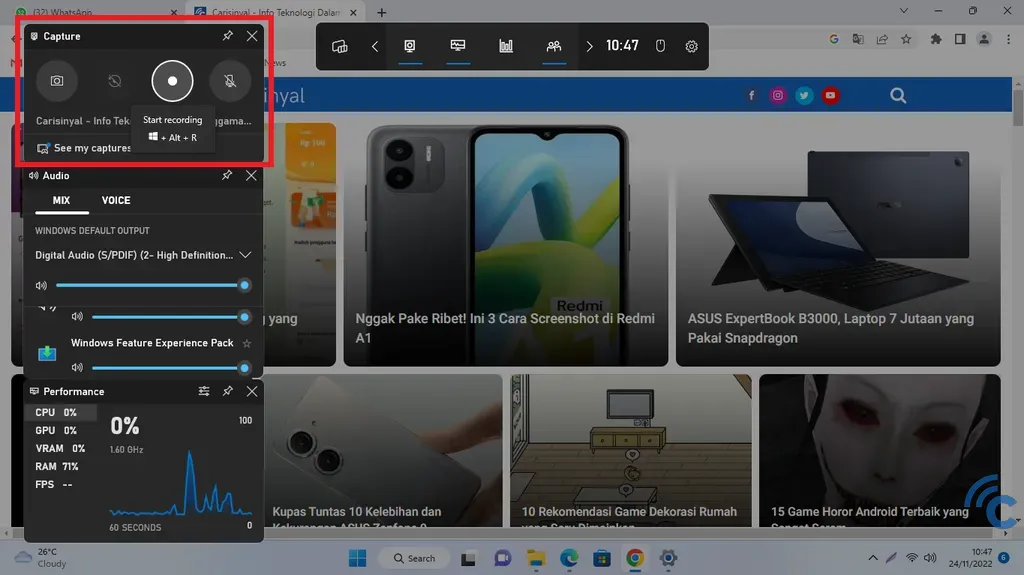
- In the "Capture" section, click the circular button to start screen recording.
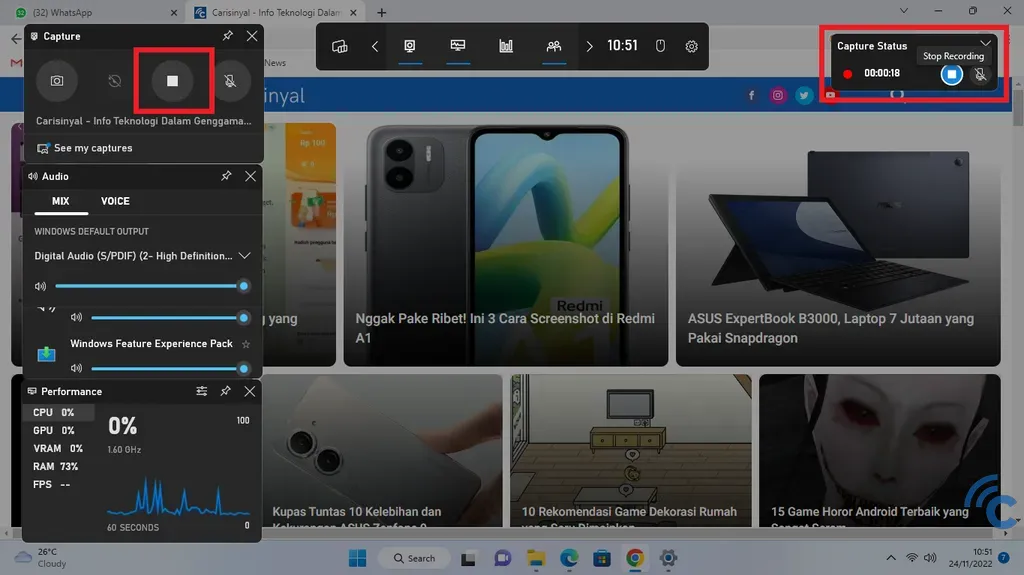
- To end the recording process, press the square button, which was previously circular, in the "Capture" section.
- Alternatively, you can disable it by clicking the blue square button in the "Capture Status" section.
- After that, the screen recording result will be automatically saved.
2. Screen Recording with Chrome Extensions

Apart from using the built-in features, screen recording on your PC or laptop can also be done using Chrome Extensions. These screen recorders, which come in the form of Chrome Extensions, are especially useful for users who frequently use Google Chrome or Chromium-based browsers that support Chrome extensions, such as Edge or Opera.
One extension that can be used is "Awesome Screenshot and Screen Recorder," which is very interesting because it combines two functions: taking screenshots and recording the screen. Using it is very easy, but first, you need to log in to Google Chrome and download this extension.
Moreover, you have the flexibility to choose where you want to save the recorded content, whether it is on your PC or laptop storage or in the Cloud. For more complete instructions, please refer to the steps below.
- Launch Google Chrome on your PC or laptop.
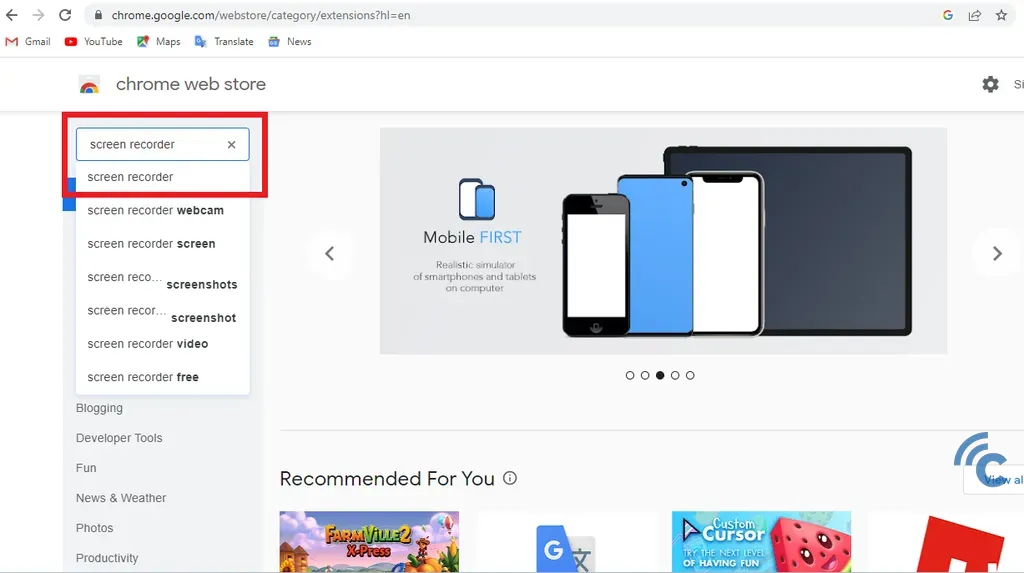
- Open the "Chrome web store" and enter "Screen recorder" in the search bar.
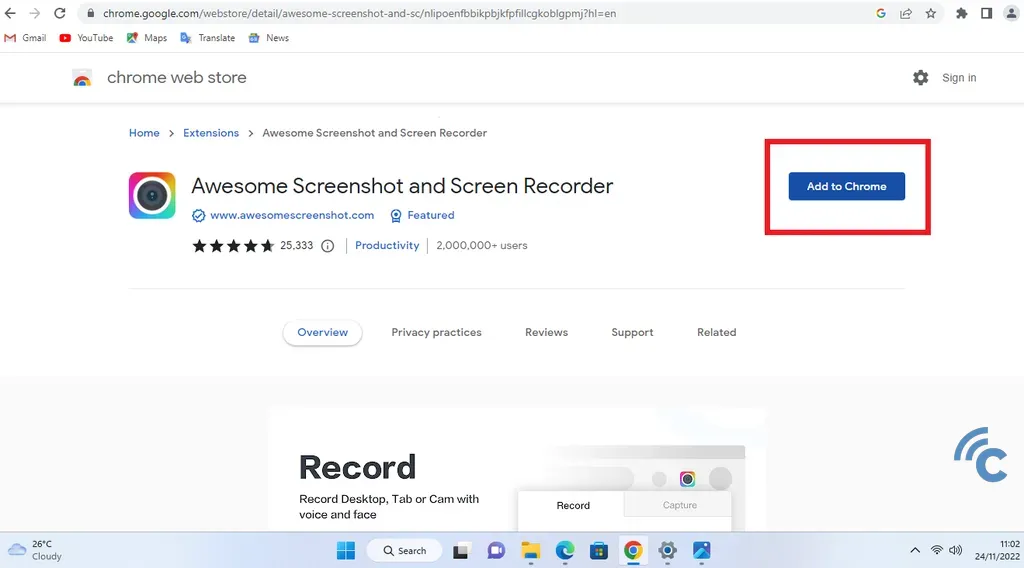
- Search for the "Awesome Screenshot and Screen Recorder" extension and click the "Add to Chrome" button.
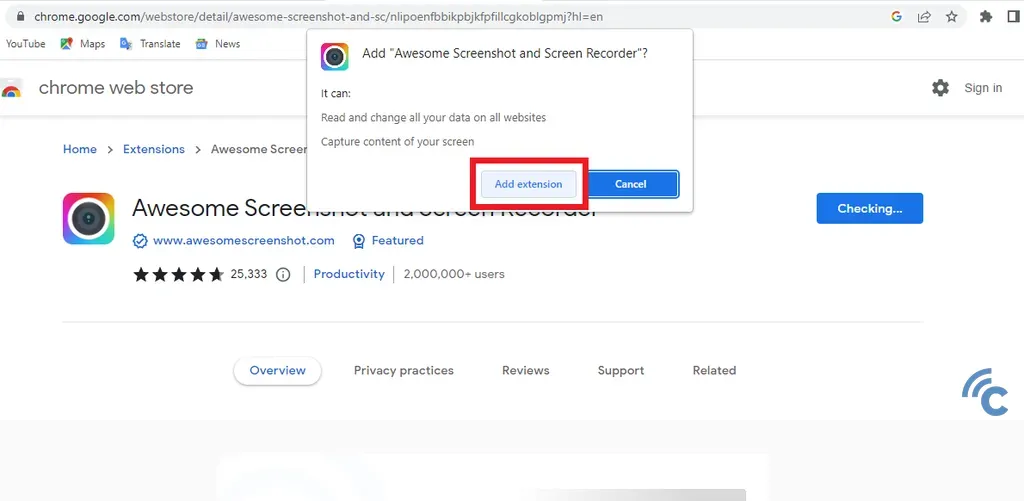
- If a warning appears, click "Add extension."
- Wait for the extension to download and install.
- Once installed and ready to use, click on the extension icon in Google Chrome, then select the "Awesome Screenshot and Screen Recorder" extension.
- A small window will open. To start screen recording, click "Start Recording."
- You can specify the area to be recorded, whether it is the desktop screen, a tab, or a specific part within a tab.
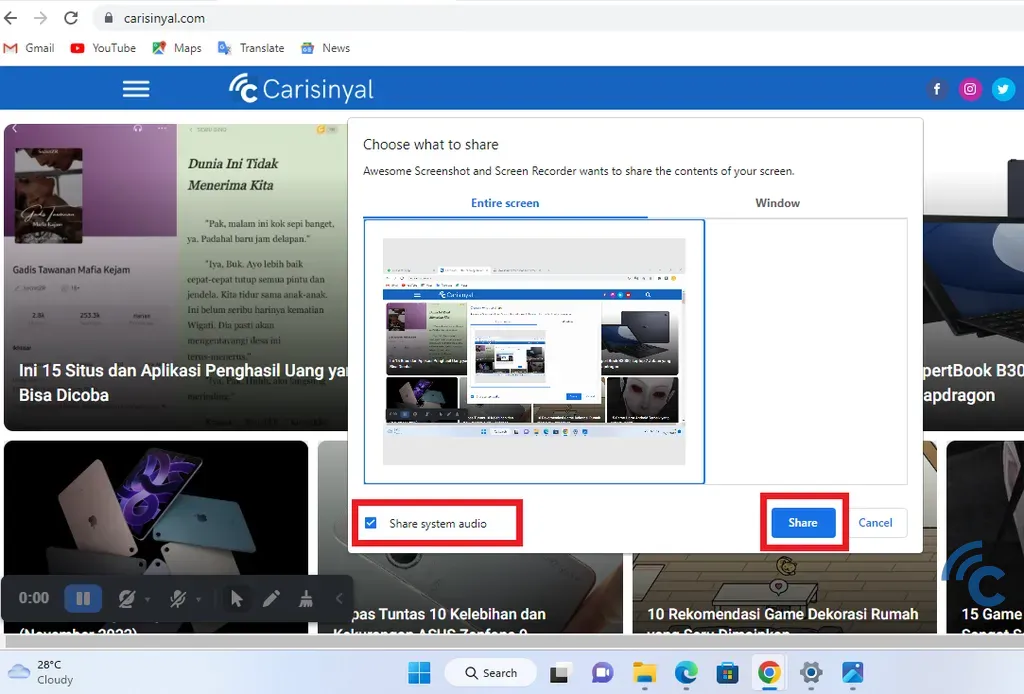
- Next, you will be prompted to select the part of the screen to record or share. You can also choose to record audio simultaneously or not.
- When ready, click the "Share" button.
- The recording process will take place automatically.
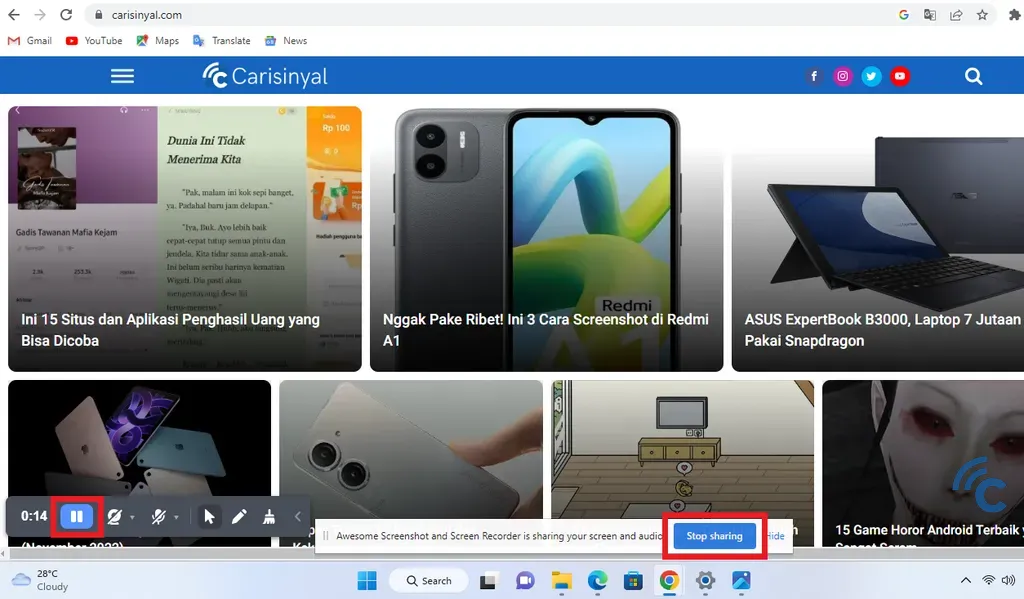
- To end the recording, simply click the blue "Stop Sharing" button.
- Alternatively, you can pause the recording first by clicking the "pause" icon, then press the red square button labeled "Stop".
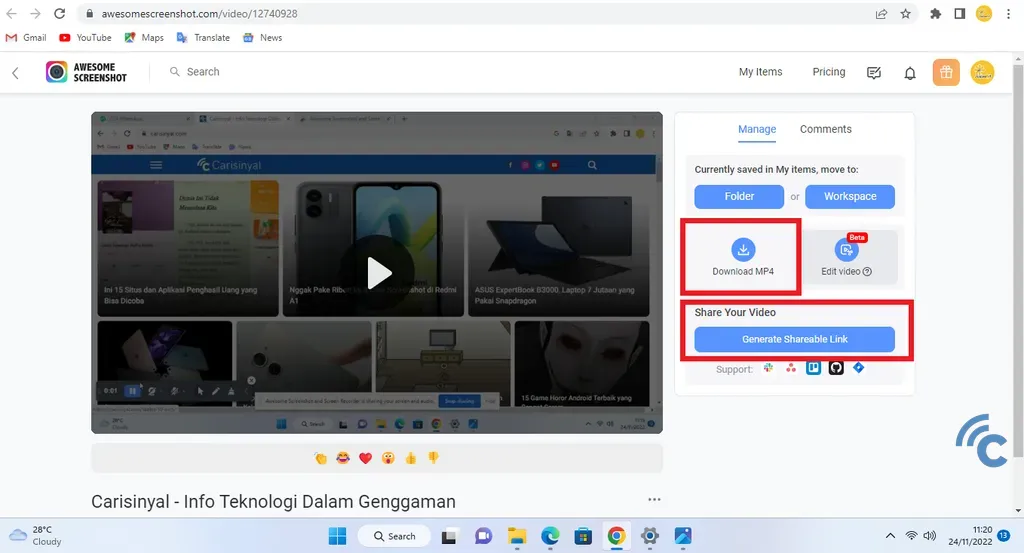
Once the recording is complete, it will be automatically saved in the Cloud of the linked account. You also have the option to download the MP4 file or copy the shareable link.
3. Screen Recording with PowerPoint
Many people are unaware that PowerPoint can serve as a useful tool for screen recording. However, PowerPoint is not a comprehensive screen recording tool for Windows 11, and its features are rather limited.
Nevertheless, the screen recording feature in PowerPoint is quite practical, especially for those with basic screen recording requirements. In this article, we will demonstrate the use of Microsoft PowerPoint 2019. Simply follow the steps below:
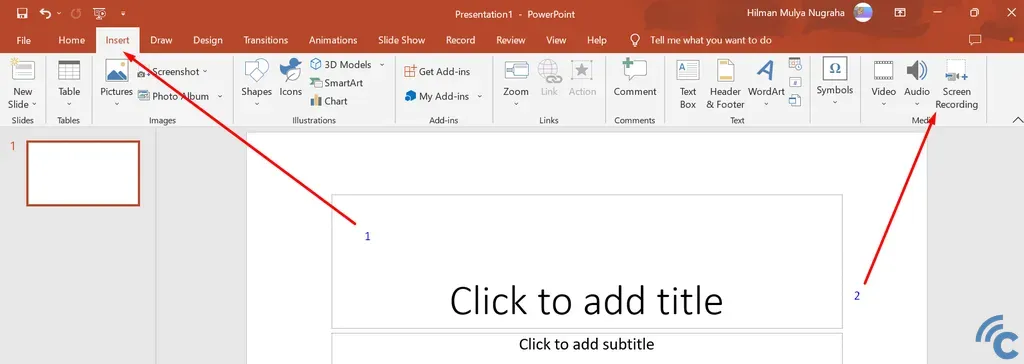
- Launch PowerPoint and navigate to the Insert tab. Select the Screen Recording option, as shown in the image below.
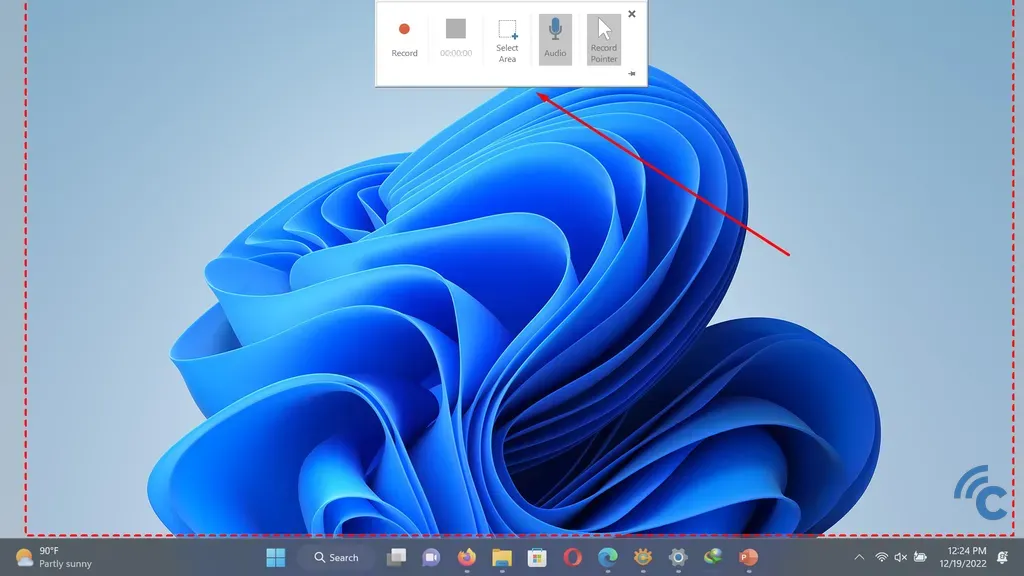
- You will find options to start the recording, select the area to record, and insert sound into the recording.
- This screen recording feature in Microsoft PowerPoint 2019 is very easy and reliable, making it suitable for beginners.
These are the three methods you can use to record your screen on Windows 11. While there are third-party apps available, both paid and free, for screen recording, the three methods mentioned above are sufficient for basic recording needs.