
4 Easy Ways to Screen Record on PC & Laptops
In today's world, capturing screen activity on laptops is becoming essential for various reasons, be it for work or personal use. If you're a teacher looking to produce instructional videos, a professional needing to create presentations, or a gamer eager to showcase your gameplay, mastering screen recording on your laptop is an invaluable skill.
Although it might appear challenging initially, the process of screen recording is straightforward and can be accomplished effortlessly. With just a few easy steps, you can utilize the tools provided by your operating system to capture your laptop screen. Here, we'll explore different techniques for recording your laptop screen that you can easily try out.
1. Using Windows Key + Alt + R

This method offers another way to capture your laptop screen using a combination of keyboard keys. Follow these steps:
- Begin by pressing the Windows key on your laptop's keyboard.
- Next, while continuing to hold down the Windows key, press both the Alt key and the letter R at the same time.
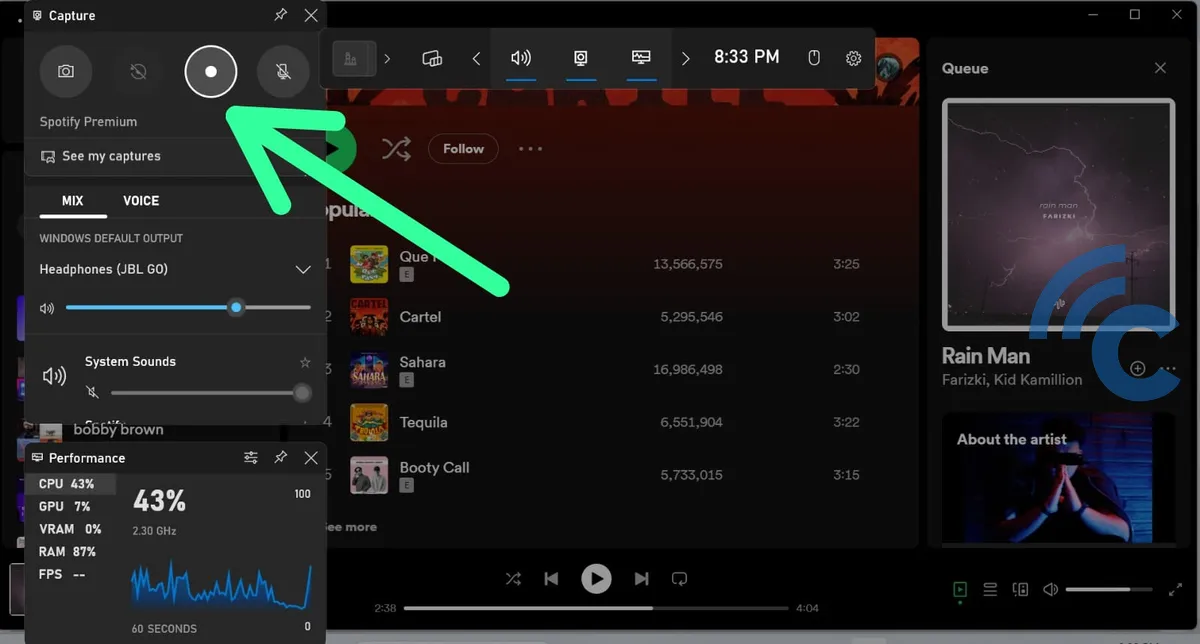
- Once you do this, the screen recording function will turn on and begin capturing everything on your laptop screen.
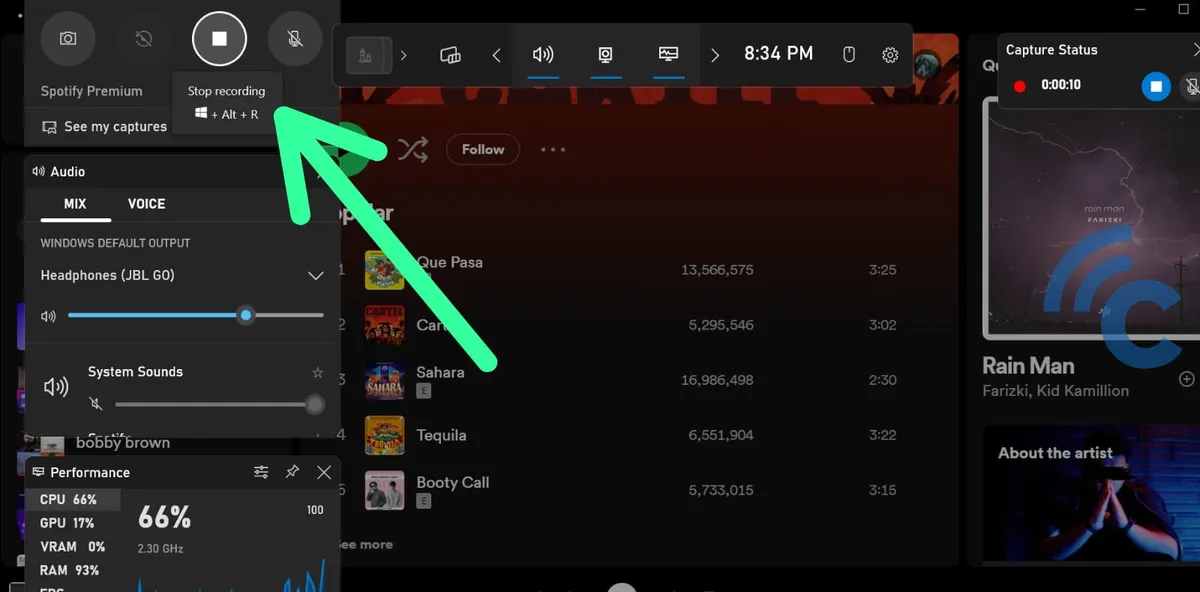
- When you're ready to stop recording, just click the 'Stop Record' button. Your screen recording will then be saved automatically.
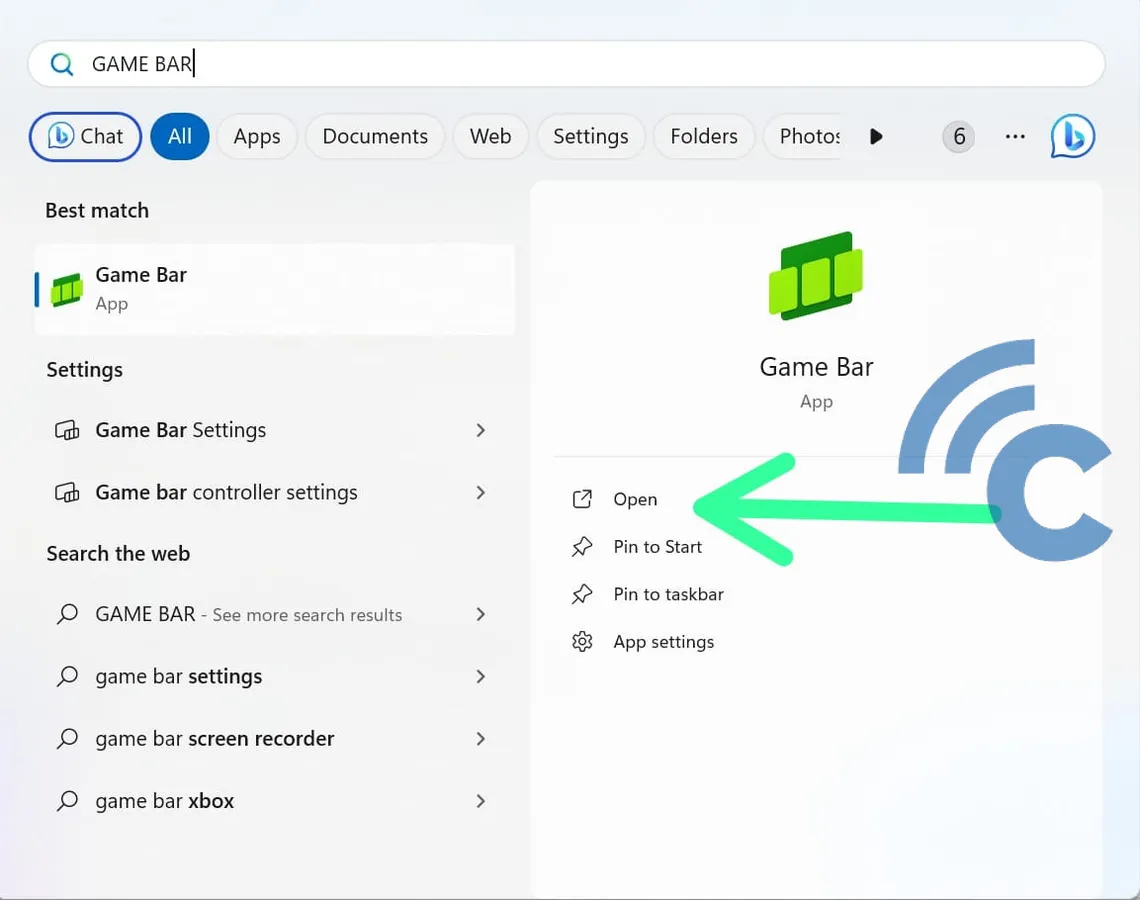
2. Using Windows Key + G
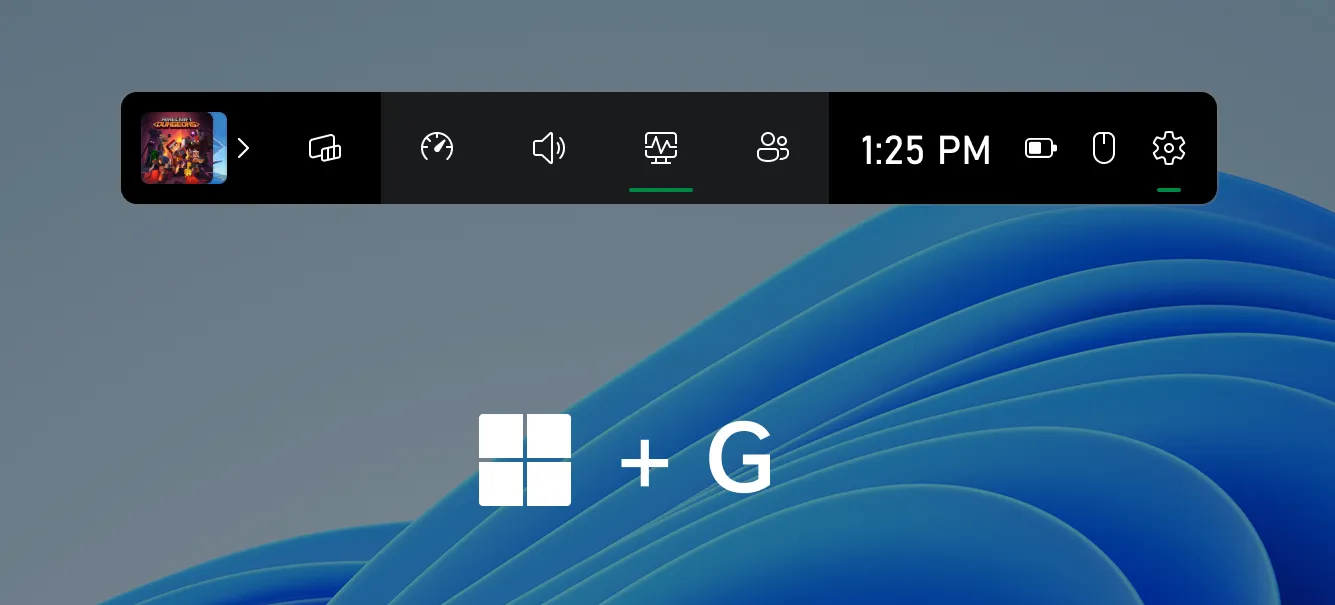
For those using Windows 10 or later, recording your screen has become simpler as there's no need to download extra software. This convenience is thanks to the Xbox Game Bar, a built-in feature in Windows.
The process of recording your screen with the Xbox Game Bar is straightforward and quick. Just a few easy steps, and you'll have your screen recording saved. To begin using the Xbox Game Bar for screen recording, here's what you need to do:
- First, access the "Windows" menu.
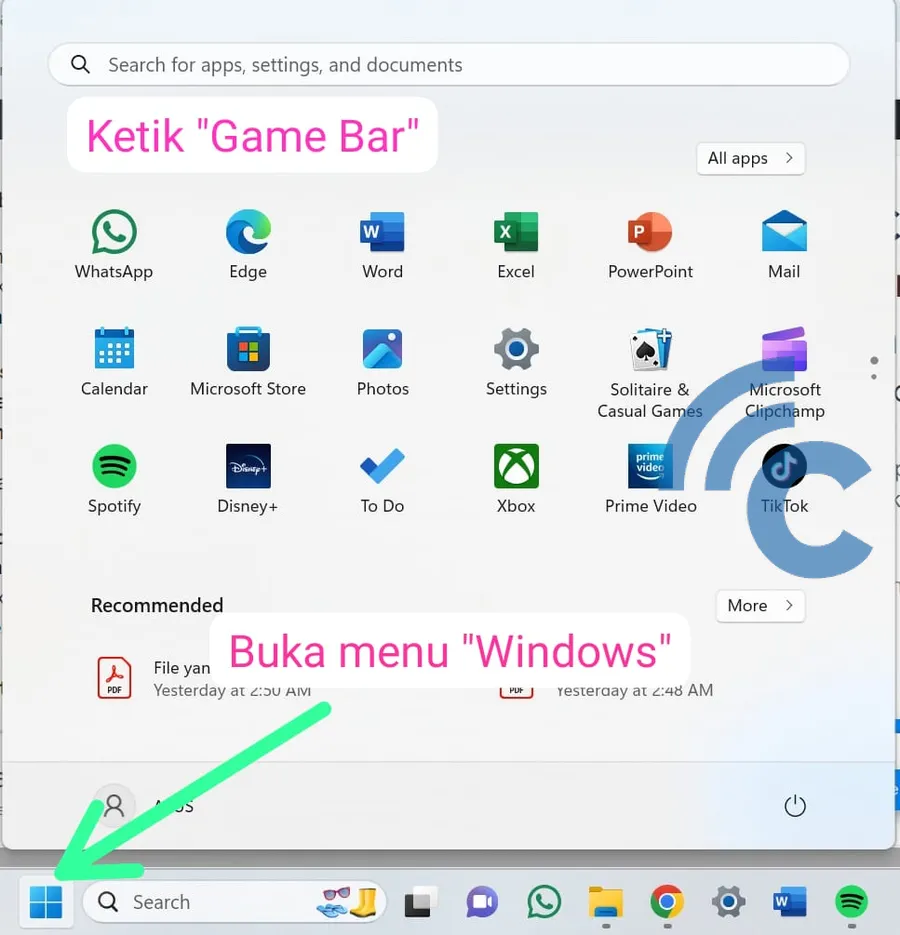
- Then, go to the "Game Bar" section and turn on this feature.
With the Game Bar active, you can begin recording your screen by following these steps:
- To start the recording, click on the "Record" button, which looks like a big colon icon.
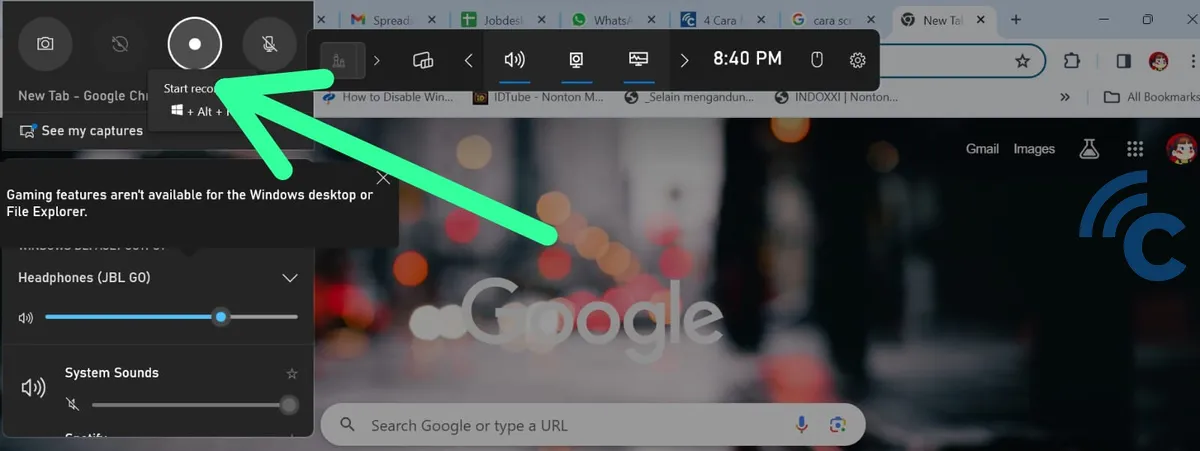
- Once you're finished recording, hit the "Stop" button, represented by a green square icon.
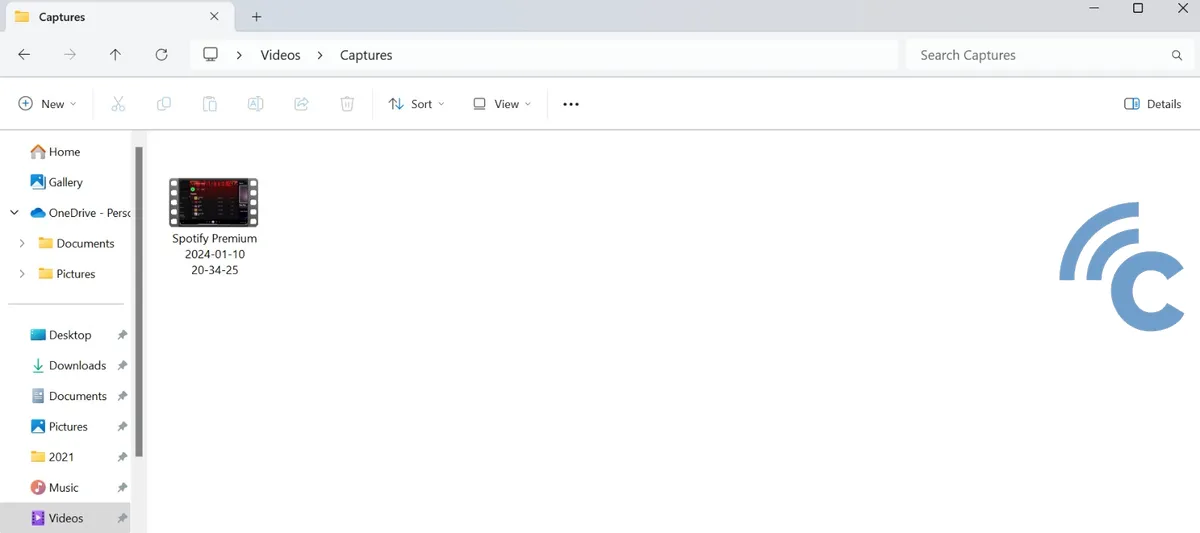
- Your screen recording will automatically be saved on your laptop. To view your recording, navigate to the "Video" folder and select "Captures".
3. Using Chrome Extensions
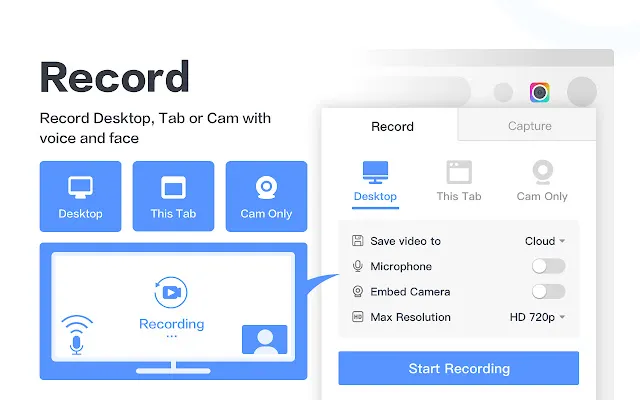
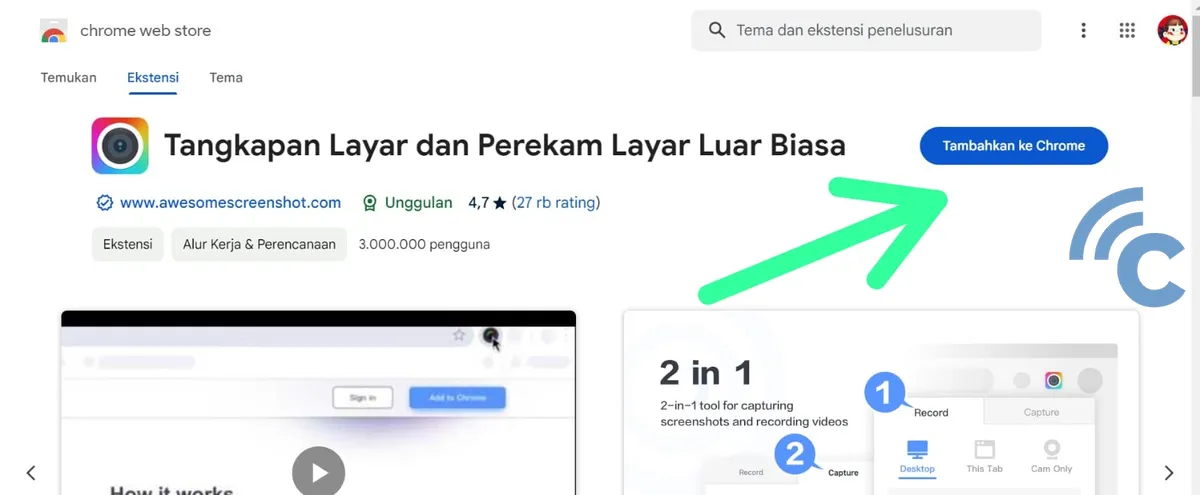
This method is particularly useful for those who use the Chrome browser and want to record their laptop screen. We will use the "Awesome Screenshot and Screen Recorder" extension. Here's how to do it:
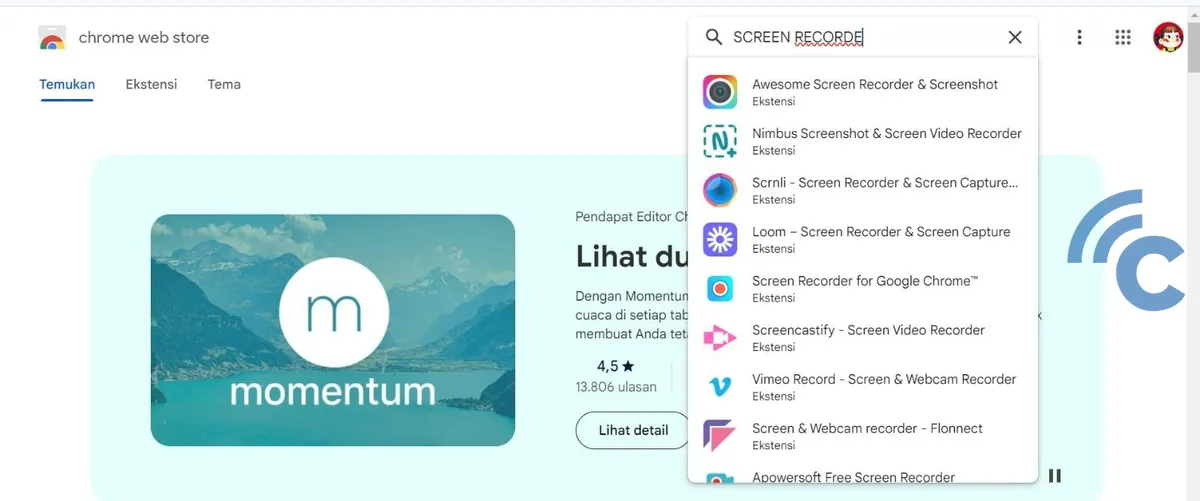
- Start by opening your Chrome browser and head over to the Chrome Web Store.
- In the search box, type "Screen recorder".
- Choose the "Add to Chrome" button to install the extension.
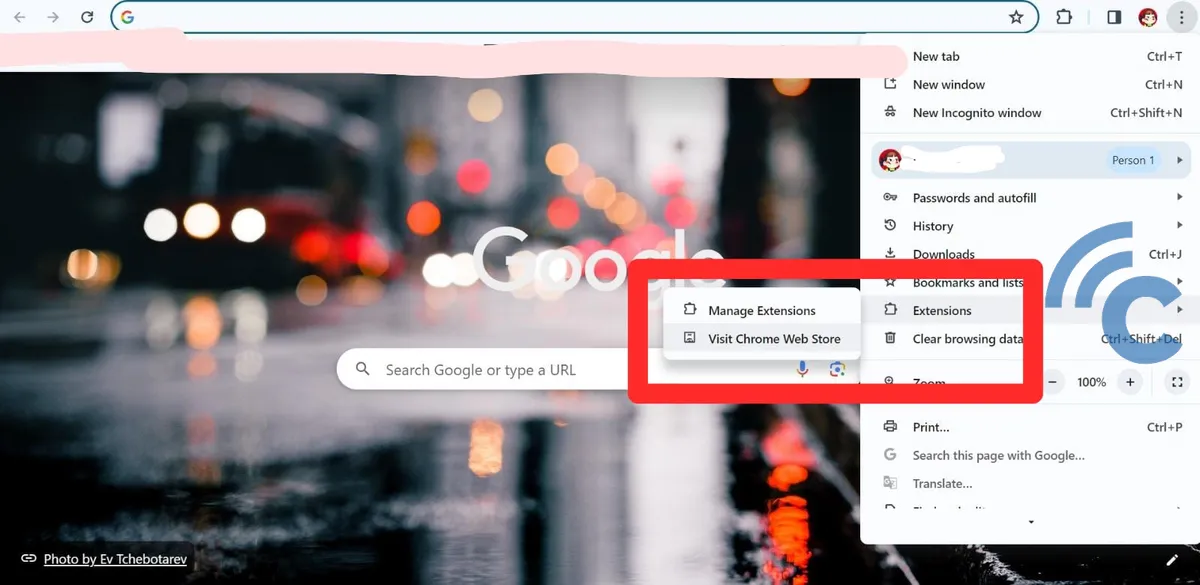
- Then, in the top right corner of your Chrome browser, click on "Extensions".
- Make sure to enable the Pin feature for the extension you just added.
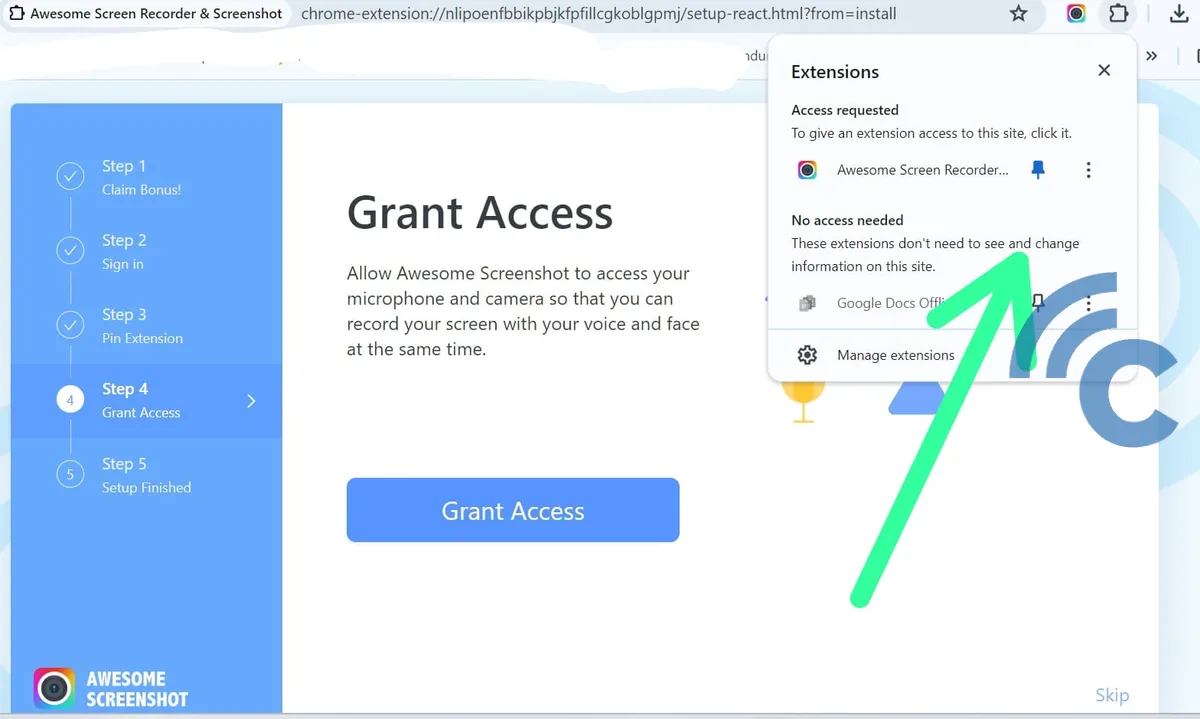
- Click on the extension icon to initiate the screen recording setup.
- Open the "Screen Recorder" extension you've installed.
- Select the "Recorder" option to get ready for recording.
- To begin recording, hit "Start Recording".
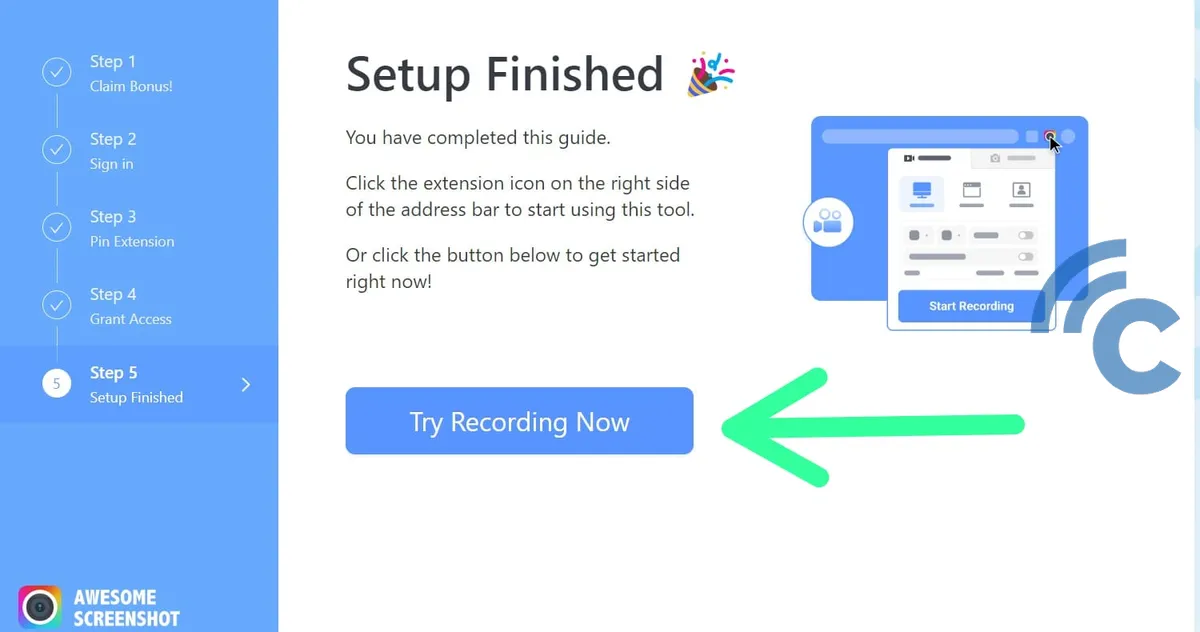
- Once you're done, click "Stop Recording" to finish.
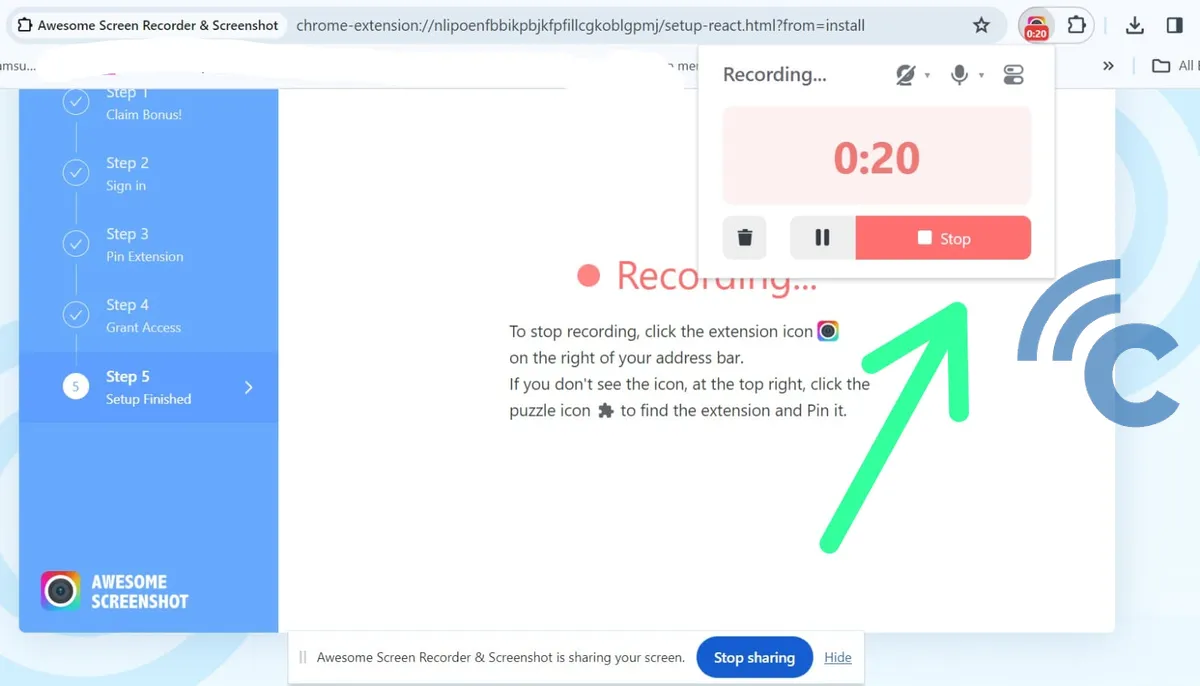
- Your recording will automatically be saved.
After you've completed the recording, remember to review your file thoroughly to ensure everything is correct and avoid the need for a re-recording.
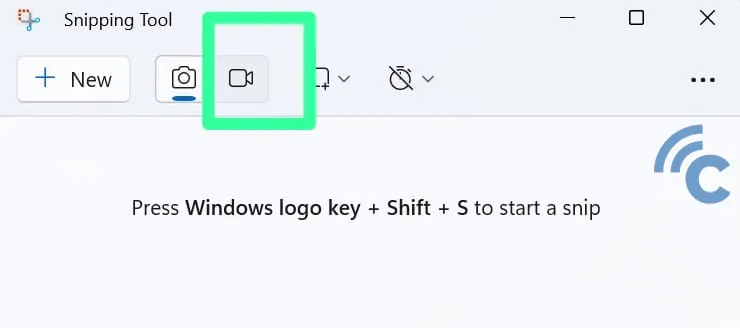
4. Using Snipping Tool
The Snipping Tool provides an easy way to record your screen. However, it's worth noting that this application has a few limitations, such as not supporting voice recording or the Spot Light feature.
But don't worry, you can still edit the recorded video with an external application like Microsoft's ClipChamp. Remember, the Snipping Tool can only create files in MP4 format. Here's how to use the Snipping Tool to record your screen:
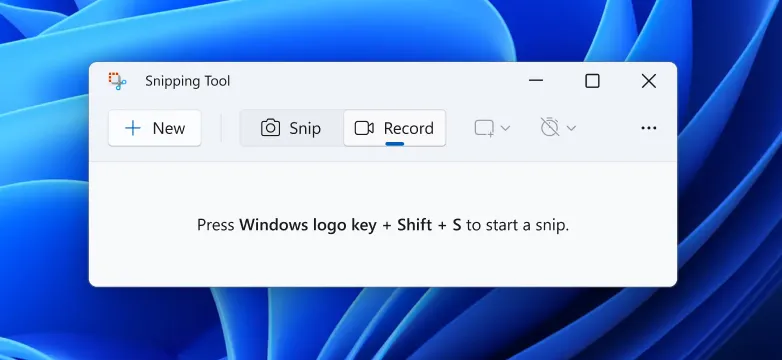
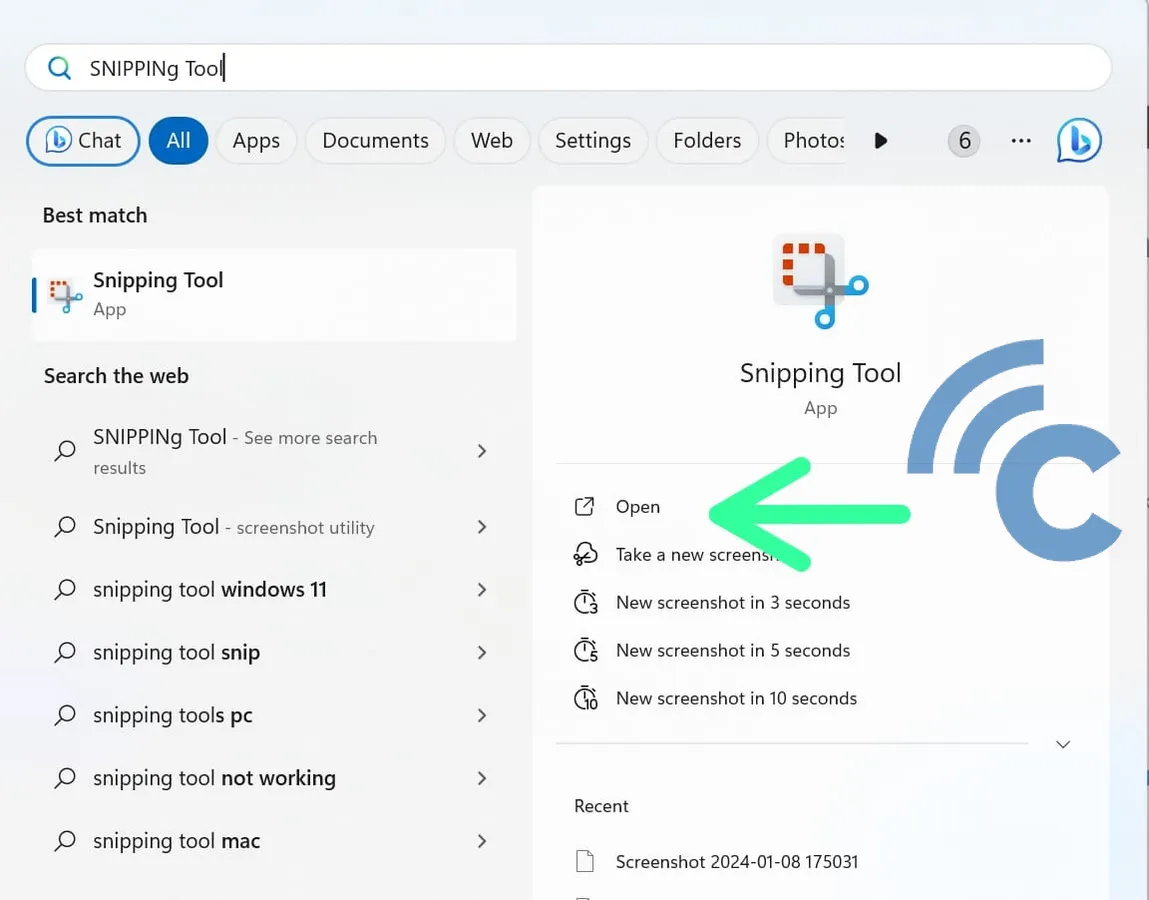
- Firstly, click the "Start" menu on your laptop or PC and type "Snipping Tool" in the search bar. Open the application.
- To begin, click on the video camera icon – ensure it's activated beforehand.
- Hit the "New" button or use the shortcut CTRL+N.
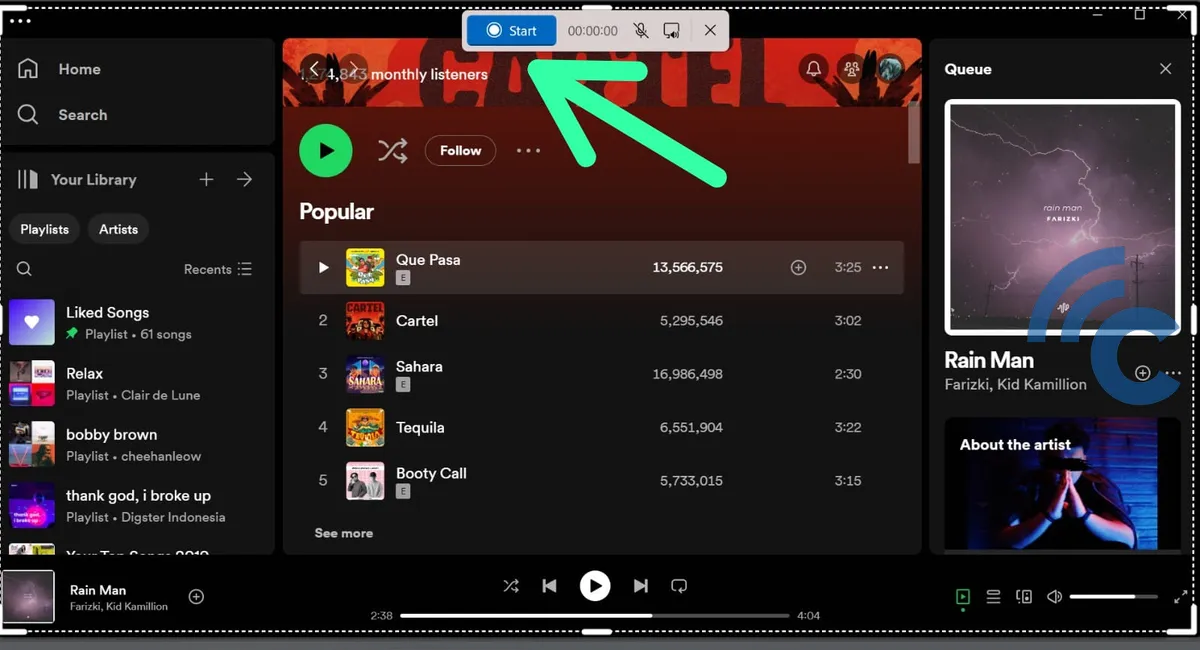
- Select the area you wish to record by drawing a box.
- Click the "Start Recording" button to initiate.
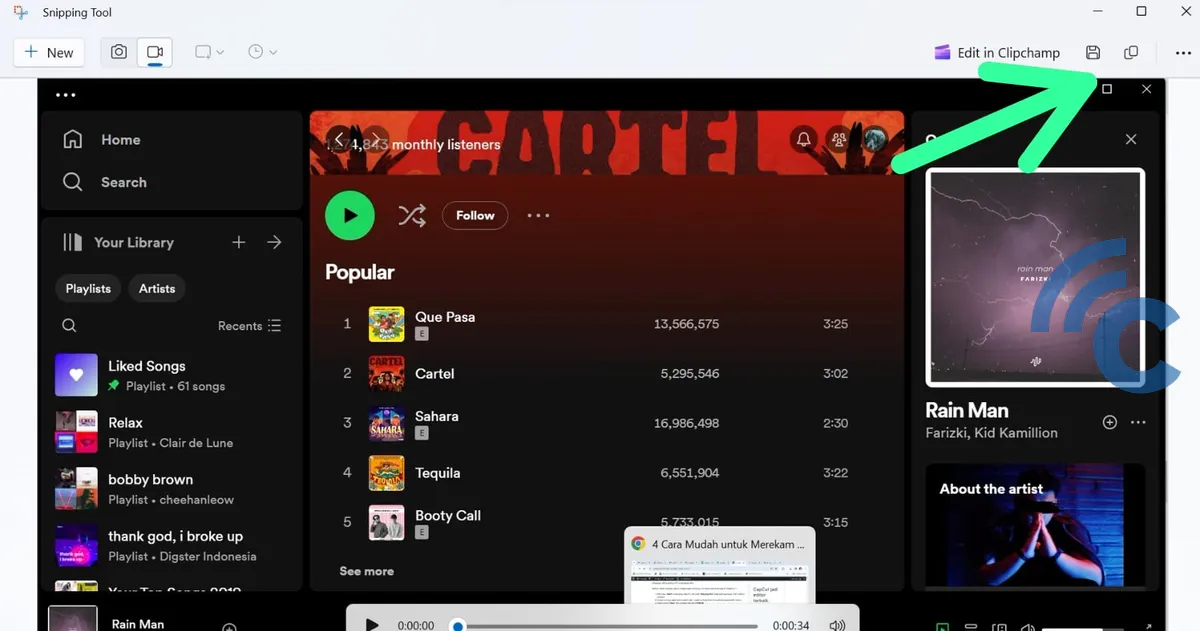
- When you're finished, use the "Stop" button to end or the "Pause" button if you need a break.
- To save your screen recording as an MP4 file, click "Save" or press CTRL+S.
Remember to check the recording on your laptop to avoid the need to record again.
Recording your laptop screen is easily achievable using your operating system's built-in features or a screen recording application.
The in-built features are sufficient for capturing on-screen activities, but an external screen recorder app provides more options and versatility. So, whether you prefer using built-in tools or an app, screen recording is effective and easy to follow.